In this guide, you'll learn how to configure Thunderbird to interact with your web-hosting email account. Follow along to set up your Thunderbird email client seamlessly.
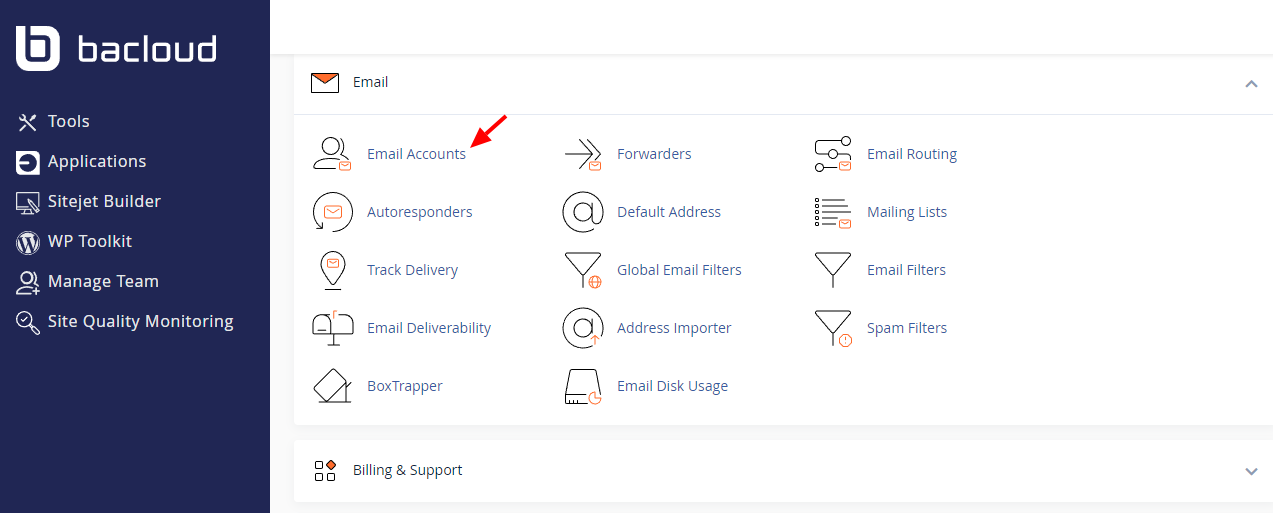
Before proceeding with the Thunderbird setup, ensure you have the right Email server information to set up your mailbox. You can easily find this info in your cPanel account.
Navigate to the "Email Accounts" link located within the Email section.
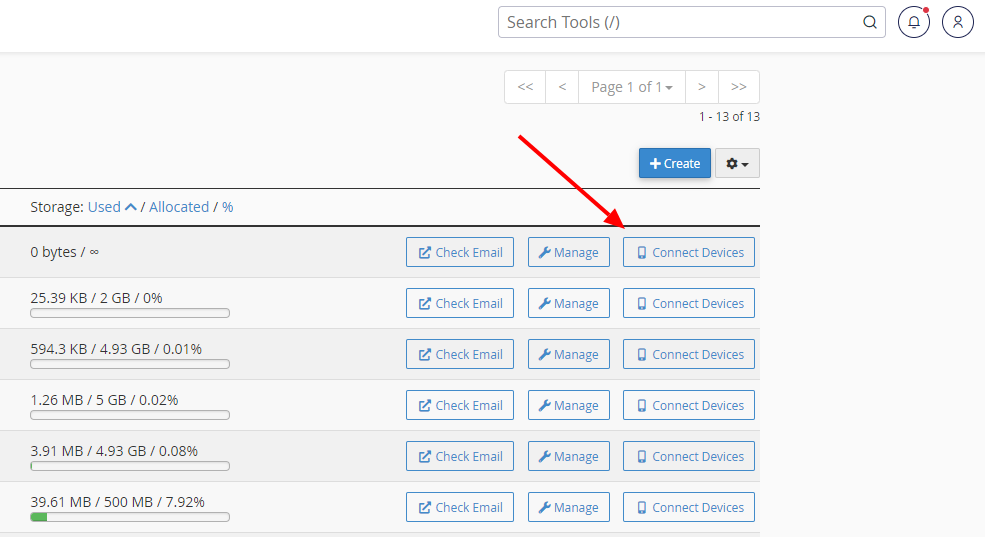
Head over to your email interface and choose the option labeled "Connect Devices.".
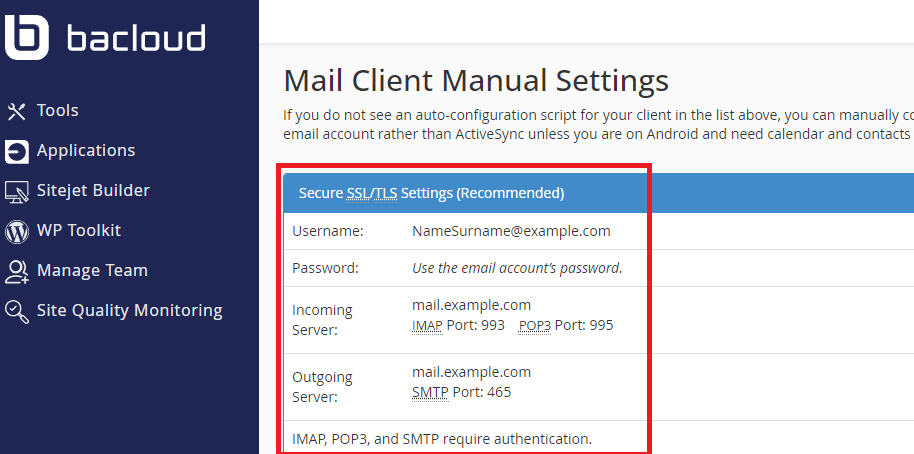
Locate the settings within the "Mail Client Manual Settings" section.
For an email account set up to Thunderbird, you need to do the following:
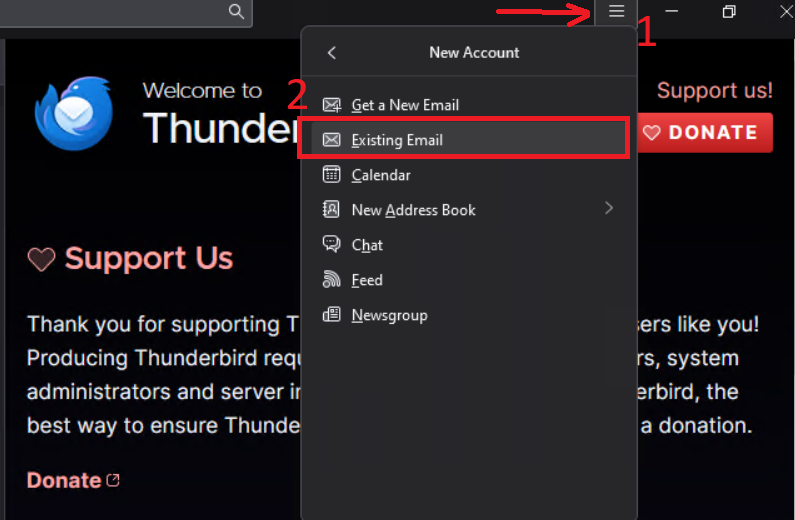
- Click on “Thunderbird Menu” on the top bar > New Account > Existing Email:
Step 2: Within the Mail Account Setup window, input the following information:
Your Full Name: Enter the name you wish recipients to see when they receive your emails.
E-Mail address: Provide your email address.
Password: Input the password associated with your email account.
Ensure there are no blank spaces within it.
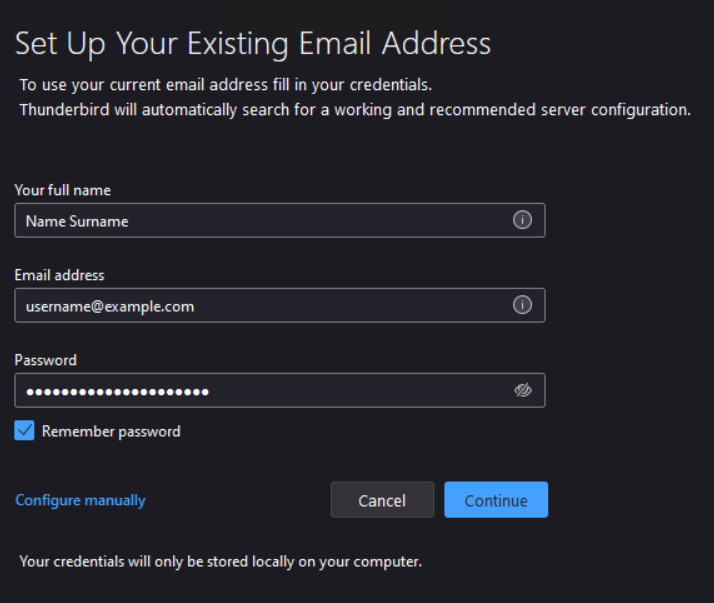
We recommend choose “Configure manually” function because in most cases the automatic settings are not selected correctly
- Once all the fields are filled, click “Configure manually”.
When selecting the protocol (IMAP or POP3), exercise caution as the port numbers and other necessary information differ. As previously discussed, find these settings within the "Mail Client Manual Settings" section.
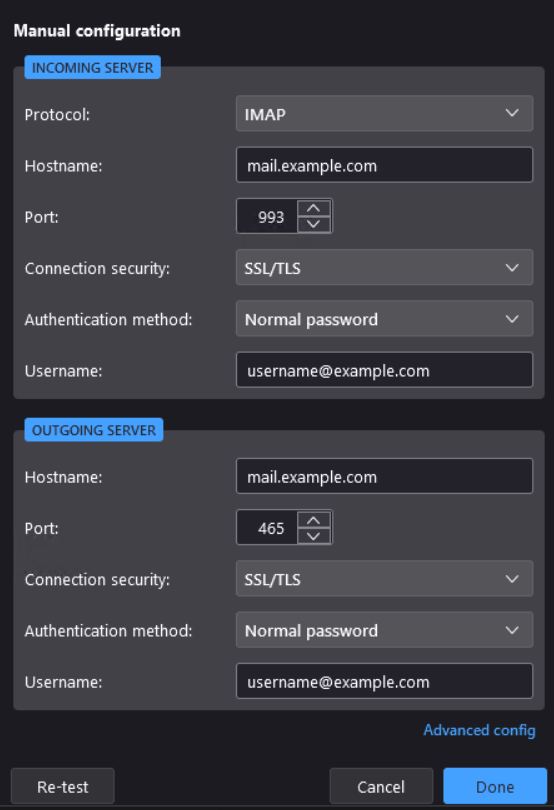
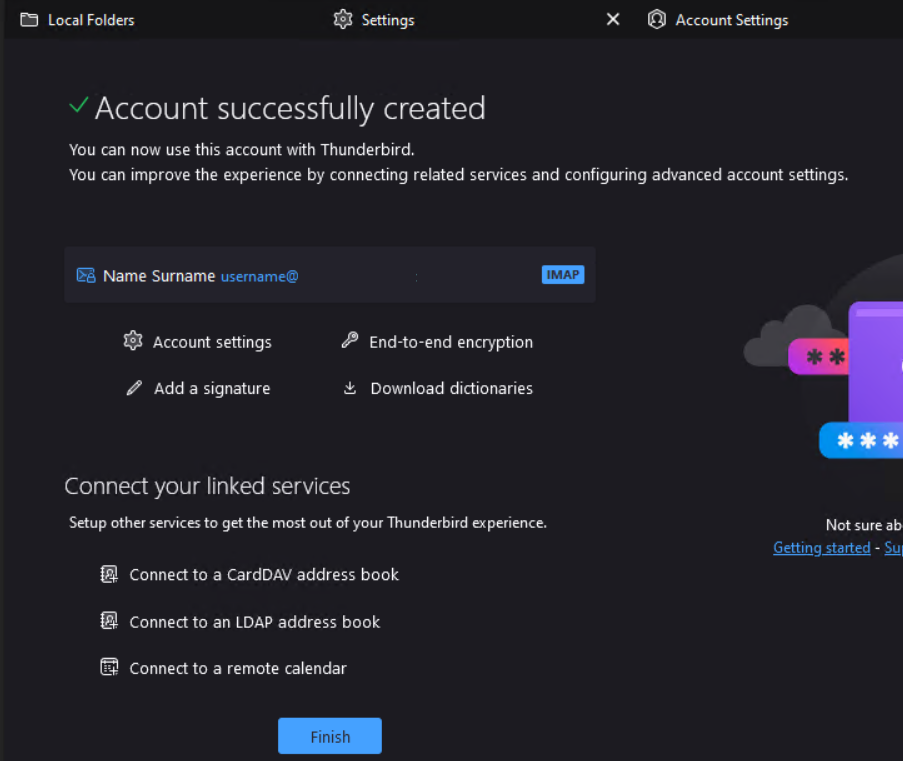
It's essential to use the "SSL/TLS" Connection security method on our hosting server. Once all details are entered, click the "Done" button. You should then receive a confirmation message indicating that your Email account has been successfully added to Thunderbird and is ready for use.