


Many organizations store valuable data in databases, but giving teams an easy way to explore, visualize, and share that data often requires a dedicated business intelligence (BI) platform.
Metabase is an open-source business intelligence (BI) platform that enables teams to analyze data, build interactive dashboards, and share insights without relying on proprietary software. It connects to a wide range of databases and data sources, making it suitable for everything from business reporting to application monitoring and analytics.
In this guide, you'll learn how to self-host Metabase on Ubuntu 26.04 LTS with Docker and PostgreSQL. You'll set up persistent storage, configure Nginx as a reverse proxy, and secure the deployment with HTTPS using Let's Encrypt.
Prerequisites
Before you begin, ensure you have the following:
-
An Ubuntu 26.04 LTS server
-
A root or sudo-enabled user account
-
Docker Engine and Docker Compose V2 (docker compose) installed. If Docker is not already installed, follow our How to Install and Set Up Docker on Ubuntu 26.04 guide before continuing.
-
A domain name pointing to the VPS
For a smoother production-style deployment, a VPS with at least 2 vCPUs and 4 GB RAM is recommended.
Step 1: Update the System
Before installing Metabase and its dependencies, update the package index:
sudo apt updateNext, upgrade the installed packages on the server:
sudo apt upgrade -yThese commands ensure that the system is up to date before you continue.
Step 2: Verify the Docker Installation
Before deploying Metabase, verify that Docker Engine and Docker Compose V2 are installed and that the Docker service is running.
Check the installed Docker version.
docker --versionIf Docker is installed, you should see output similar to:

Next, verify that Docker Compose V2 is available:
docker compose versionIf the Docker Compose plugin is installed, the command displays the installed version.
Step 3: Create the Metabase Project Directory
Create a dedicated directory for the Metabase deployment.
mkdir -p ~/metabaseChange into the directory.
cd ~/metabaseThis directory will contain the Docker Compose configuration and the environment file for the deployment.
Step 4: Create the Environment File
Create a .env file in the project directory to store the PostgreSQL connection settings for the Metabase deployment:
nano .envAdd the following values, replacing the example password with a strong password:
MB_DB_TYPE=postgresMB_DB_DBNAME=metabaseMB_DB_PORT=5432MB_DB_USER=metabaseMB_DB_PASS=your_strong_passwordMB_DB_HOST=postgresThe MB_DB_HOST value postgres corresponds to the PostgreSQL service name defined in the Docker Compose configuration.
After saving the file, restrict its permissions so that only the current user can read and modify it:
chmod 600 .envThe .env file contains database credentials and should not be committed to a public Git repository.
Step 5: Create the Docker Compose Configuration
Metabase recommends PostgreSQL as its application database. This database stores Metabase users, dashboards, questions, collections, settings, and other application metadata.
It is important to distinguish this PostgreSQL database from the databases you will later connect to Metabase for analytics. The PostgreSQL database configured here stores Metabase's own configuration and content, while your analytics databases contain the data you want to analyze.
From the Metabase project directory, create and open the Docker Compose file:
nano compose.yamlAdd the following configuration:
services: postgres: image: postgres:16 container_name: metabase-postgres restart: unless-stopped environment: POSTGRES_DB: ${MB_DB_DBNAME} POSTGRES_USER: ${MB_DB_USER} POSTGRES_PASSWORD: ${MB_DB_PASS} volumes: - pgdata:/var/lib/postgresql/data networks: - metabase-internal healthcheck: test: ["CMD-SHELL", "pg_isready -U ${MB_DB_USER} -d ${MB_DB_DBNAME}"] interval: 10s timeout: 5s retries: 5 metabase: image: metabase/metabase:v0.63.2 container_name: metabase restart: unless-stopped depends_on: postgres: condition: service_healthy environment: MB_DB_TYPE: postgres MB_DB_DBNAME: ${MB_DB_DBNAME} MB_DB_PORT: 5432 MB_DB_USER: ${MB_DB_USER} MB_DB_PASS: ${MB_DB_PASS} MB_DB_HOST: postgres ports: - "127.0.0.1:3000:3000" networks: - metabase-internal healthcheck: test: ["CMD-SHELL", "curl --fail -I http://localhost:3000/api/health || exit 1"] interval: 15s timeout: 5s retries: 5volumes: pgdata:networks: metabase-internal: driver: bridgeSave and close the file.
The PostgreSQL service uses the credentials defined in the .env file and stores its data in the persistent pgdata volume. No host port is assigned to PostgreSQL, so the database remains accessible only through the Docker network.
The metabase-internal network allows Metabase to communicate with PostgreSQL using the postgres service name. Metabase's port 3000 is bound only to the server's localhost interface, allowing the later-configured Nginx reverse proxy to access Metabase without exposing port 3000 directly to the Internet.
The health checks ensure that PostgreSQL is ready before Metabase starts and help verify that both services are responding correctly.
With the Docker Compose configuration complete, you can now start the Metabase services.
Step 6: Start Metabase
Start the Metabase and PostgreSQL services in the background:
docker compose up -dVerify that the containers are running:
docker compose psYou should see output similar to the following:

The output may vary, but PostgreSQL should show Up (healthy) and Metabase should show Up.
Once the services are running, you can proceed to the initial Metabase setup.
Step 7: Complete the Initial Metabase Setup
Open a second terminal on your local computer and create an SSH tunnel to the VPS:
ssh -L 3000:127.0.0.1:3000 USERNAME@SERVER_IPThis forwards traffic from your local machine to Metabase on the server, which is listening only on localhost.
Keep the SSH session open while completing the setup wizard. The SSH tunnel is only required for this initial setup; after HTTPS is configured, you will access Metabase through your domain instead.
Then open the following address in your local browser:
http://localhost:3000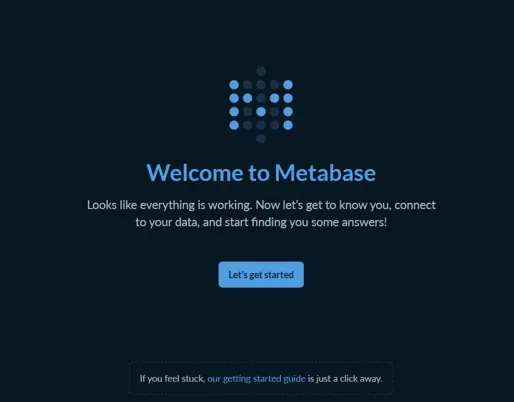
When the Metabase setup wizard appears, follow the on-screen prompts to:
-
Create the administrator account.
-
Choose your preferred language and organization settings.
-
Optionally connect a data source or continue using the included Sample Database. You can add additional data sources later from the Metabase administration settings.
-
Choose whether to share anonymous usage data with Metabase.
After completing the setup wizard, verify that the Metabase dashboard loads successfully.
Step 8: Configure Nginx as a Reverse Proxy
Nginx will receive requests for your Metabase domain and forward them to Metabase through the localhost port configured earlier.
First, install Nginx:
sudo apt install nginx -yNext, create a dedicated Nginx server block for Metabase:
sudo nano /etc/nginx/sites-available/metabaseAdd the following configuration, replacing metabase.example.com with the domain you configured for your Metabase installation:
server { listen 80; server_name metabase.example.com; location / { proxy_pass http://127.0.0.1:3000; proxy_set_header Host $host; proxy_set_header X-Real-IP $remote_addr; proxy_set_header X-Forwarded-For $proxy_add_x_forwarded_for; proxy_set_header X-Forwarded-Proto $scheme; }}The proxy_pass directive forwards requests to Metabase on port 3000. The proxy headers pass the original host, client IP address, and protocol information to Metabase.
Save and close the file.
Enable the Metabase server block:
sudo ln -s /etc/nginx/sites-available/metabase /etc/nginx/sites-enabled/metabaseIf UFW is enabled, allow HTTP traffic through port 80:
sudo ufw allow 80/tcpTest the Nginx configuration:
sudo nginx -tYou should see output similar to:

If the test is successful, reload Nginx:
sudo systemctl reload nginxYou can now access Metabase through your domain over HTTP:
http://metabase.example.comThe Metabase login page should open in your browser.
At this stage, Nginx is forwarding requests to Metabase while port 3000 remains accessible only through the server's localhost interface. The next step is to secure the connection with HTTPS.
Step 9: Enable HTTPS
Install Certbot and the Nginx plugin:
sudo apt install certbot python3-certbot-nginx -yAfter the installation is complete, obtain a Let's Encrypt certificate for your Metabase domain. Replace metabase.example.com with the domain configured for your Metabase installation:
sudo certbot --nginx -d metabase.example.comFollow the prompts to provide an email address, agree to the Let's Encrypt Terms of Service, and choose whether to share your email address with the Electronic Frontier Foundation (EFF).
When prompted, select the option to redirect all HTTP traffic to HTTPS. Certbot will automatically update the Nginx configuration and install the SSL certificate.
If UFW is enabled, allow HTTPS traffic through port 443:
sudo ufw allow 443/tcpThis allows external HTTPS connections to reach Nginx.
Finally, open your Metabase domain using HTTPS. Replace metabase.example.com with your actual domain:
https://metabase.example.comConfirm that:
-
The Metabase instance loads successfully over HTTPS.
-
The browser reports a secure connection.
-
Requests to http://metabase.example.com automatically redirect to https://metabase.example.com.
Step 10: Verify Data Persistence
Restart the Metabase and PostgreSQL containers to verify that Metabase retains its application data:
docker compose restartWait for the containers to restart, then open your Metabase domain and sign in.
Confirm that:
-
Your administrator account is still available.
-
Your Metabase settings have been preserved.
-
Any dashboards, collections, or questions you created remain available.
You can also verify that the containers are running:
docker compose psIf your Metabase data remains intact after the restart, the PostgreSQL application database and persistent Docker volume are working as expected.
Step 11: Back Up and Maintain Metabase
The PostgreSQL application database stores your Metabase users, dashboards, questions, collections, settings, and other application metadata. Back up this database regularly to protect your Metabase configuration and content.
Use PostgreSQL backup tools such as pg_dump rather than copying the live PostgreSQL data volume.
For example, create a database backup from the PostgreSQL container:
docker exec -t metabase-postgres pg_dump -U metabase -d metabase > metabase_backup.sqlReplace metabase with the PostgreSQL username and database name configured in your .env file if you used different values.
Store the backup securely and, when possible, keep a copy outside the VPS.
To automate recurring PostgreSQL backups, see our guide on How to Schedule and Automate Tasks on Ubuntu VPS Using Cron Jobs.
To view Metabase logs, run:
docker compose logs -f metabaseWhen upgrading Metabase, first update the Metabase image tag in compose.yaml to the version you want to deploy. Then pull the updated image and recreate the container:
docker compose pulldocker compose up -dBefore upgrading Metabase, create a backup of the PostgreSQL application database. This gives you a recovery point if the upgrade causes problems.
Conclusion
You have now self-hosted Metabase on Ubuntu 26.04 using Docker, PostgreSQL, and Nginx, with HTTPS enabled for secure access. The PostgreSQL application database and persistent storage help ensure your Metabase configuration and content survive container restarts.
With regular database backups and controlled updates, your Metabase deployment is ready for ongoing use and maintenance.
For more in-depth tutorials, visit the BaCloud blog, where you’ll find helpful guides.