

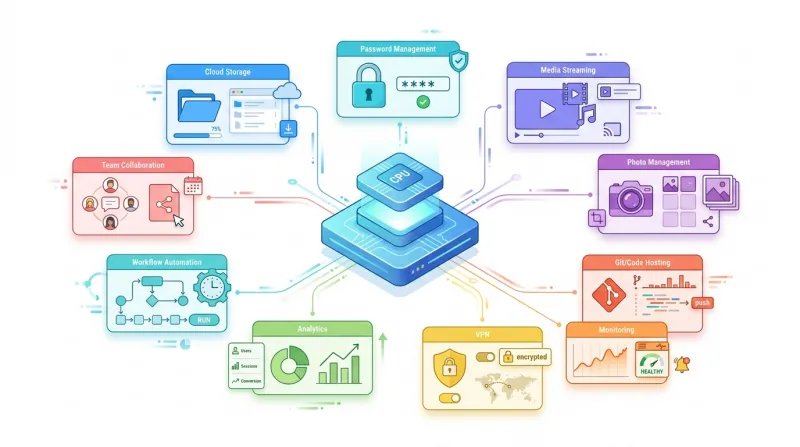
 A virtual private server is no longer just a place to host a website. With a modest Linux VPS, a domain name, Docker, and a basic understanding of server administration, you can build your own private cloud, photo library, media server, Git platform, password manager, monitoring system, workflow automation platform, DNS filtering service, document archive, or publishing platform.
The strongest self-hosted applications are not simply open-source replacements for SaaS products. They give you control over where your data lives, how it is backed up, which integrations are enabled, when software is upgraded, and who can access the service. That control comes with an important trade-off: when you self-host, you also become responsible for security patches, TLS certificates, backups, monitoring, capacity planning, and disaster recovery.
Nextcloud for private cloud storage and collaboration, Immich for photo and video management, Jellyfin for media streaming, Gitea for Git hosting and software development, Bitwarden for password management, Uptime Kuma for uptime monitoring, n8n for workflow automation, AdGuard Home for private DNS filtering, Paperless-ngx for document management, and Ghost for publishing, memberships, and newsletters. They cover very different workloads. Gitea and Uptime Kuma can run comfortably on relatively small servers, whereas Immich may require at least 6 GB of RAM and substantial CPU and storage resources. Jellyfin may be limited less by RAM than by video transcoding capability and bandwidth. Nextcloud's needs vary significantly with user count, installed apps, and activity. Official specifications therefore matter, but they should be treated as a floor rather than an automatic recommendation for purchasing a VPS.
The application itself usually does not need to expose its native HTTP port directly to the internet. Caddy, NGINX, Traefik, or another reverse proxy can terminate HTTPS and forward traffic internally. There are important exceptions: a DNS service such as AdGuard Home must expose the DNS protocols you actually intend clients to use, while services such as Gitea may need a separate SSH port for Git operations. Official documentation for Immich and n8n explicitly recommends or documents reverse-proxy-based TLS deployments, while Gitea supports HTTPS directly or behind a proxy.
The resource figures below distinguish between official requirements that projects publish and practical starting points that they do not. A VPS capable of starting an application is not necessarily large enough to deliver good production performance.
At-a-Glance Comparison and resource requirements
| Application | Primary use case | Minimum VPS requirements* | Storage profile | Recommended deployment | Important ports / network considerations |
|---|---|---|---|---|---|
| Nextcloud | File sync, sharing, collaboration | 2 vCPU, 4 GB RAM, 40 GB SSD + user data | Potentially large | Nextcloud AIO / Docker | HTTPS 443; AIO management ports depend on setup |
| Immich | Private photo/video cloud | 2 CPU cores minimum, 4 recommended; 6 GB RAM minimum, 8 GB recommended | Very large | Docker Compose | App commonly proxied internally; upload bandwidth matters |
| Jellyfin | Video/music streaming | 2–4+ vCPU, 4 GB RAM, 100 GB SSD + media | Extremely large | Docker on Linux | 8096/TCP commonly used internally; streaming can consume significant bandwidth |
| Gitea | Git hosting, code review, packages | 2 vCPU, 1–2 GB RAM, 20 GB+ SSD | Small to large | Docker Compose | 3000/TCP web; separate SSH mapping commonly used |
| Bitwarden | Password and secrets management | Standard: 2–4 GB RAM, 12–25 GB storage | Small | Official Docker-based installer | 80/443; HTTPS essential |
| Uptime Kuma | Uptime and endpoint monitoring | 1 vCPU, 512 MB–1 GB RAM, 5–10 GB SSD | Small | Docker Compose | 3001/TCP internally; public status pages typically via HTTPS proxy |
| n8n | Workflow automation | 2 vCPU, ~4 GB RAM, 20 GB+ SSD | Usually modest | Docker / Docker Compose | 5678/TCP internally; inbound webhooks require reliable HTTPS |
| AdGuard Home | DNS filtering and encrypted DNS | 1 vCPU, 512 MB–1 GB RAM, 5 GB SSD | Small | Docker or native binary | 53 TCP/UDP; 443, 853, or others for encrypted DNS |
| Paperless-ngx | OCR document archive | 2–4 vCPU, ~4 GB RAM, 20 GB+ documents | Medium to large | Docker Compose | 8000/TCP internally; HTTPS reverse proxy recommended |
| Ghost | Blog, publication, memberships | 1–2 vCPU, 1 GB RAM minimum, 20 GB SSD | Usually modest | Native Ghost-CLI | HTTPS via NGINX; MySQL required for supported production stack |
*These VPS requirements are the minimum needed to launch the system on a VPS. We recommend considering an order service with at least 50% - 100% more resources than the minimum requirements.
Top Self-Hosted applications
1. Nextcloud is one of the most comprehensive self-hosted applications available for a VPS. At its core, it provides private file storage, synchronization, browser access, sharing, and collaboration. Its wider ecosystem can extend the platform with calendars, contacts, collaborative editing, communication tools, and many other applications. Nextcloud supports MariaDB/MySQL and PostgreSQL for normal deployments, while Oracle support is limited to Enterprise; its documentation recommends PostgreSQL or MariaDB as database engines.
Primary use cases and key features: A Nextcloud VPS can replace or complement consumer cloud storage services for individuals, families, small companies, project teams, and organizations that want direct control over file storage. It is especially useful when users need synchronized desktop/mobile files, browser-based access, file sharing, WebDAV-compatible storage, and an extensible collaboration environment rather than a basic network drive. The trade-off is that Nextcloud is a full application platform rather than a lightweight file server, so resource requirements grow with the number of users, files, applications, previews, and background operations.
Typical system requirements: Nextcloud does not publish a simple “2 CPU / X GB VPS” requirement because memory consumption varies substantially with usage. It requires at least 128 MB of RAM per process and recommends at least 512 MB per process; a 64-bit CPU, operating system, and PHP environment are strongly recommended. For a small real-world VPS using the broader All-in-One stack, 2 vCPUs, approximately 4 GB of RAM, and 40 GB or more of SSD storage, plus space for user files, is a more realistic starting point than sizing based solely on the PHP process minimum.
Storage capacity can quickly become the dominant requirement. A ten-user instance, where each user stores 100 GB, already implies roughly 1 TB of primary user data before accounting for versions, trash, previews, database data, and backups. Because of this, Nextcloud often makes sense on VPS plans with expandable block storage or large local SSD/NVMe volumes.
Recommended deployment: For VPS users who prefer a containerized, integrated deployment, Nextcloud All-in-One (AIO) is an attractive choice because it manages multiple parts of the Nextcloud environment together and includes integrated backup functionality. Traditional installation on a Linux/PHP/web server/database stack remains possible and is well documented. Nextcloud's administration documentation also supports manual deployments such as Ubuntu with Apache and MariaDB.
Need a tutorial on how to install Nextcloud on a VPS? Check the Bacloud blog topic "How to Install Nextcloud with Docker on Ubuntu 24.04"
Pros: extremely broad functionality, a mature client ecosystem, an excellent fit for private cloud storage, an extensive application ecosystem, and multiple deployment options.
Cons: considerably more complex than a simple file server; background jobs, previews, database tuning, and additional apps can increase CPU/RAM consumption; storage and backup requirements can become substantial.
Ideal user: families, teams, businesses, agencies, and privacy-conscious users who want a genuinely capable private cloud rather than simply a directory exposed over the internet.
Official documentation: Nextcloud Administration Manual and Nextcloud All-in-One

2 Immich is designed for self-hosted management, backup, browsing, and sharing of personal photo and video libraries. It is one of the most compelling modern VPS applications, but also one of the most resource-intensive on this list. Unlike lightweight web galleries, Immich performs tasks such as thumbnail generation, metadata processing, video handling, and machine-learning-related operations, so sizing the VPS correctly matters.
Primary use cases and key features: Immich is a strong fit for automatic mobile photo backup, family libraries, searchable photo collections, album sharing, and users looking to bring their personal media under their own administrative control. It supports multiple users, local sharing between users, and public album sharing. OAuth can also be integrated with an external identity provider.
Typical system requirements: Unlike many self-hosted projects, Immich publishes hardware numbers directly. Current documentation specifies at least 2 CPU cores and 6 GB RAM, while 4 cores and 8 GB RAM are recommended. Systems with only 4 GB can operate with machine-learning features disabled, but that is below the project's normal requirement.
The PostgreSQL database itself is typically around 1–3 GB, according to Immich's documentation, and should ideally reside on local SSD storage rather than a network share. If Docker memory limits are enforced, PostgreSQL should be allocated at least 2 GB. Immich also warns that generated thumbnails and transcoded videos can increase the total photo library size by roughly 10–20%.
A sensible small VPS therefore starts with around 4 vCPUs, 8 GB of RAM, and 50 GB of SSD/NVMe system storage, with a much larger separate capacity allocation for the actual photo/video library. Network requirements depend on how aggressively phones upload and users stream video, but 100 Mbps or faster connectivity is a sensible target for a multi-user instance.
Recommended deployment: Immich requires Docker and the modern Docker Compose plugin and specifically uses the docker compose command rather than the deprecated standalone docker-compose tool.
Backups need special attention: An Immich database backup does not contain the photos and videos themselves. A complete recovery strategy needs both the database and uploaded asset directories. Immich explicitly recommends a 3-2-1 backup strategy and notes that database backups must be combined with a copy of files under UPLOAD_LOCATION.
For a private family installation, placing Immich behind a VPN rather than exposing it globally can reduce internet-facing attack surface. When public access is required, use HTTPS, keep updates current, restrict server administration, and monitor the instance.
Integration and compatibility: PostgreSQL is fundamental to the application, while a reverse proxy such as Caddy, NGINX, or Traefik can terminate TLS. Immich should be mounted at the root of its domain or subdomain rather than casually nested behind arbitrary URL paths, and large-file upload behavior should be tested after configuring the proxy.
Pros: excellent modern photo experience, mobile-focused workflow, multi-user support, sharing, self-hosted data control, and sophisticated media processing.
Cons: comparatively high RAM requirement, CPU-intensive background operations, rapidly growing storage needs, and a backup process that must preserve both database and media files.
Ideal user: photographers, families, privacy-focused mobile users, and anyone with a significant personal photo/video collection who is comfortable maintaining a relatively substantial VPS.
Official documentation: Immich Documentation
3. Jellyfin is a self-hosted media server designed to organize and stream media to web browsers, televisions, mobile devices, and compatible clients. It is particularly appealing because the server can be completely under your control, but running Jellyfin on a public VPS introduces two factors that matter far less for a typical web app: transcoding performance and bandwidth consumption.
Primary use cases and key features: Jellyfin is suitable for personal movie and television libraries, music collections, remote media access, and multi-device playback. If client devices can play the stored codecs directly, server CPU requirements can remain moderate. If files must be converted in real time, however, transcoding can become one of the most computationally demanding workloads on the VPS. Jellyfin supports hardware acceleration technologies, including Intel Quick Sync/VA-API, when compatible hardware is available.
Typical system requirements: There is no single universal CPU requirement because workload depends heavily on direct play versus transcoding. For a VPS, 2–4 vCPUs and around 4 GB of RAM are a sensible starting point for a small deployment where most media direct-plays. CPU-only transcoding can demand substantially more resources; a VPS with exposed compatible GPU acceleration can be dramatically better for that use case.
Jellyfin's hardware selection guidance recommends a 100 GB SSD for the OS, Jellyfin data, and transcoding cache in its general server recommendations. Media itself normally requires much more. Its guidance also recommends gigabit-class local networking and at least 20 Mbps upload for remote-access scenarios on a home server; on a datacenter VPS, the equivalent concern is sufficient sustained outbound throughput and an appropriate monthly transfer allowance.
For example, a single stream averaging 15 Mbps transfers roughly: 15 Mbps × 3,600 seconds ÷ 8 ≈ 6.75 GB per hour
One hundred hours of viewing at that bitrate is therefore about 675 GB of outbound transfer, before overhead. This is why a VPS with an inexpensive CPU but a restrictive bandwidth quota can be a poor Jellyfin server.
Need a tutorial on how to install Nextcloud on a VPS? Check the Bacloud blog topic "Setting Up Jellyfin Media Server on Ubuntu 26.04 LTS"
Pros: excellent media-server capabilities, broad client ecosystem, no need to hand media to a third-party streaming cloud, supports hardware-accelerated transcoding.
Cons: potentially very high bandwidth consumption, CPU-heavy transcoding, very large storage requirements, and many commodity VPS products do not expose a suitable GPU.
Ideal user: technically comfortable media enthusiasts with legitimate personal media libraries, good VPS bandwidth allowances, and preferably direct-play clients or access to hardware acceleration.
Official documentation: Jellyfin Documentation
4. Gitea is a self-hosted software development service that provides Git repository hosting, code review, collaboration, package registries, and CI/CD capabilities. It is one of the best examples of an application that can provide substantial value on a relatively small VPS. Gitea itself states that 2 CPU cores and 1 GB RAM are typically sufficient for small teams and projects.
Primary use cases and key features: Gitea can host private or public Git repositories, issues, pull requests, releases, organizations, code review, and packages. Its package ecosystem supports more than twenty package types, including container images and Helm charts. That makes it useful not only as a Git server but as a compact internal development platform.
Typical system requirements: For a small team, start with 2 vCPU, 1–2 GB RAM, and 20 GB of SSD/NVMe storage. Repository size, Git LFS data, packages, container images, Actions logs, and build artifacts can drive storage requirements well beyond Gitea's application footprint. The official project requirement of 2 cores and 1 GB RAM makes Gitea particularly suitable for cost-conscious VPS deployments.
Network usage for normal Git operations is usually modest. However, CI/CD, container registries, large binaries, and Git LFS can radically change that profile.
Gitea's official Docker documentation uses Compose and documents both standard and rootless container approaches.
Security, backups, and updates: Run Gitea as a dedicated non-root account in native deployments; the project explicitly recommends this on Unix-like systems. Put its web interface behind HTTPS and make sure the configured root URL matches the public reverse-proxy URL so clone links and redirects are generated correctly.
Backups must include persistent Gitea data and the database. Protect configuration files because application secrets are part of the security boundary.
If you enable CI runners, treat them as an additional security domain. Executing arbitrary build scripts is fundamentally more dangerous than simply serving Git repositories. Containerized runners provide better workload separation, and highly sensitive installations should consider running build agents away from the main Gitea server.
Integration and compatibility: Gitea has drivers for MySQL, PostgreSQL, SQLite, and Microsoft SQL Server. SQLite can be attractive for a tiny single-node instance; PostgreSQL is a stronger choice when the installation becomes more operationally important.
A typical public configuration is:
git.example.com:443 → NGINX/Caddy → Gitea:3000
while Git-over-SSH can be mapped separately:
git.example.com:222 → Gitea SSH
Pros: lightweight, mature Git functionality, surprisingly small resource footprint, package registry capabilities, straightforward Docker deployment.
Cons: storage can grow rapidly when packages/CI artifacts are added; self-hosted CI requires careful isolation; you are responsible for repository backups and availability.
Ideal user: developers, software agencies, small engineering teams, home labs, internal development environments, and organizations that want control over source code without deploying a much larger DevOps platform.
Official documentation: Gitea Documentation
5. Bitwarden. Password management is one of the highest-value services you can host, but also one of the least forgiving of poor administration. Bitwarden supports official self-hosted deployments using Docker containers and now offers both its standard server deployment and the lighter Bitwarden Lite option. Bitwarden describes Lite as intended for personal use and home labs rather than business deployments.
Primary use cases and key features: A self-hosted Bitwarden server provides a central vault for credentials, accessible via Bitwarden's applications and browser integrations. Two-step login options include authenticator applications and FIDO2/WebAuthn-compatible credentials. Organizations can use additional centrally managed features depending on their plan and licensing.
Typical system requirements: For the standard Linux deployment, Bitwarden lists a minimum of a 1.4 GHz x64 processor, 2 GB of RAM, 12 GB of storage, and Docker Engine 26+ with Compose. Its recommended specifications are a dual-core x64 2 GHz CPU, 4 GB of RAM, and 25 GB of storage.
Bitwarden Lite is dramatically smaller: its official minimum requirements are 200 MB of RAM, 1 GB of storage, and Docker Engine 26+. That makes Lite one of the few password-management platforms suitable for an extremely small personal VPS, though Bitwarden explicitly positions it for personal/home-lab rather than business contexts.
Looking for a Bitwarden alternative? Check the Bacloud blog post "How to Deploy a Private Bitwarden-Compatible Password Manager with Vaultwarden"
Recommended deployment: Businesses should generally favor the standard supported Linux deployment, while individuals with modest requirements can consider the Lite deployment. The standard Linux installer starts with Bitwarden's official setup script:
curl -Lso bitwarden.sh \
  "https://func.bitwarden.com/api/dl/?app=self-host&platform=linux"

chmod 700 bitwarden.sh

./bitwarden.sh install
The installer then guides the administrator through server/domain and deployment configuration. Bitwarden's standard deployment uses its provided Bash tooling to manage the Docker-based application stack.
Lite can be deployed as a single Docker container using the official image:
docker run -d \
  --name bitwarden \
  --restart unless-stopped \
  -v "$(pwd)/bwdata:/etc/bitwarden" \
  -p 127.0.0.1:8080:8080 \
  --env-file settings.env \
  ghcr.io/bitwarden/lite
The exact database and port configuration should follow the current Lite documentation. Lite also supports a Docker Compose architecture.
Security, backups, and updates: This is one application where shortcuts are especially difficult to justify. Use HTTPS, enable two-step login, protect recovery credentials, keep the host operating system and Bitwarden deployment up to date, restrict SSH access, and make off-server backups. Bitwarden recommends regular backups and system updates for self-hosted deployments. Standard deployments can be updated through the installation script using updateself followed by update.
Two-step login significantly reduces the risk of a stolen master password, and FIDO2/WebAuthn is one of the methods Bitwarden supports.
Integration and compatibility: Standard self-hosting is a multi-container deployment. Lite condenses the service into a more lightweight architecture and can be paired with supported external database options as documented by Bitwarden. Use ports 80/443 at the public edge and place the service behind a valid TLS configuration.
Pros: official self-hosting support, an excellent client ecosystem, relatively modest storage needs, a Lite option for personal servers, and strong multi-factor authentication capabilities.
Cons: a password manager is a high-value target; losing the VPS without valid backups can create a serious recovery problem; secure administration matters more than with a disposable hobby application; some paid functionality requires licensing even on self-hosted instances.
Ideal user: security-conscious individuals, IT teams, and organizations with the operational discipline to maintain a critical authentication service reliably.
Official documentation: Self-host Bitwarden
6. Uptime Kuma is a lightweight self-hosted monitoring platform designed to answer one deceptively important question: Is your service actually up? It can monitor HTTP/HTTPS endpoints, TCP services, ping responses, DNS, WebSockets, push monitors, Docker containers, and other targets, and send notifications via a broad selection of services.
Primary use cases and key features: It works well for websites, APIs, VPSs, home servers, game servers, private services, SSL-certificate visibility, and customer-facing status pages. Uptime Kuma supports multiple status pages, two-factor authentication, proxy support, certificate information, and a wide range of notification integrations.
Typical system requirements: Uptime Kuma does not publish a simple production VPS minimum comparable with Immich or Bitwarden. For a small installation, 1 vCPU, 512 MB–1 GB RAM, and roughly 5–10 GB of SSD storage is a sensible starting point. Monitor count, check frequency, retention, and database growth influence resource use.
Bandwidth consumption is normally low because most checks transfer little data. Hundreds or thousands of aggressive monitors can change that, but for normal small-business or personal infrastructure, the application is one of the lightest services in this guide.
Recommended deployment. Docker Compose is extremely straightforward:
mkdir uptime-kuma
cd uptime-kuma

curl -o compose.yaml \
  https://raw.githubusercontent.com/louislam/uptime-kuma/master/compose.yaml

docker compose up -d
The official project runs on port 3001 by default and documents binding the container only to 127.0.0.1 when direct public exposure is not desired. Persistent application storage should be local; Uptime Kuma explicitly states that NFS is not supported for its application data.
A useful public architecture is therefore:
status.example.com → HTTPS reverse proxy → 127.0.0.1:3001
Security, backups, and updates: Enable Uptime Kuma's built-in two-factor authentication, keep the application up to date, and put the dashboard behind HTTPS. Persistent data should be included in VPS backups. If a status page is intended for the public while administration is not, design proxy/firewall rules accordingly.
There is also an important infrastructure design consideration: monitoring every service from the same VPS that hosts them creates a blind spot. If that VPS or its data center network disappears, the monitor disappears exactly when you need it. For meaningful external availability monitoring, run Uptime Kuma from a separate VPS, provider, region, or failure domain.
Integration and compatibility: Uptime Kuma integrates with many notification services and can test a wide variety of endpoint types. This makes it particularly valuable when paired with several other services mentioned in this article: for example, a small, independent Kuma VPS can monitor Nextcloud, Gitea, Ghost, n8n, and Jellyfin.
Pros: low resource requirements, fast deployment, intuitive interface, broad monitoring support, useful public status pages.
Cons: it is not a substitute for deep metrics/log observability; running it beside the systems it monitors weakens outage detection; monitoring history still needs persistent backups.
Ideal user: virtually anyone running multiple VPSs, websites, APIs, home-lab services, or customer-facing infrastructure.
Official documentation/project: Uptime Kuma
7. n8n is a workflow automation platform that lets you connect applications, databases, APIs, webhooks, and custom logic into automated workflows. On a VPS, it can serve as a private automation hub for everything from lead handling to infrastructure alerts and AI/API workflows. n8n recommends Docker for most self-hosting needs.
Primary use cases and key features: Typical workflows include synchronizing data between applications, receiving webhooks, calling REST APIs, transforming data, automating CRM or email tasks, scheduling recurring jobs, triggering infrastructure actions, and creating multi-step business processes.
Unlike a fixed-purpose application, n8n's resource requirements can change dramatically depending on what workflows actually do. A server executing occasional API calls is very different from one processing large binary files or hundreds of concurrent workflow executions.
Typical system requirements: A useful general VPS starting point is 2 vCPUs, approximately 4 GB of RAM, and 20 GB or more of SSD storage. n8n's current VPS deployment documentation includes cloud-server examples built around production-style Docker deployments, and its self-hosted database can be either SQLite by default or PostgreSQL.
Storage generally remains modest unless workflows retain large execution histories, binary data, or files. Network usage depends almost entirely on integrations: a workflow that makes small API requests barely registers, while moving media or backups between systems can generate substantial traffic.
Recommended deployment: Docker or Docker Compose is the natural choice:
docker volume create n8n_data

docker run -d \
  --name n8n \
  --restart unless-stopped \
  -p 127.0.0.1:5678:5678 \
  -v n8n_data:/home/node/.n8n \
  docker.n8n.io/n8nio/n8n
For production use, prefer a Compose file with persistent configuration, a domain, a reverse proxy, environment variables, and—where the workload justifies it—PostgreSQL. n8n's official VPS guides use this broader architecture and document DNS plus reverse-proxy setup.
Security, backups, and updates. n8n frequently stores credentials needed to call external systems, making the application and its database high-value assets. n8n creates an encryption key used to encrypt credentials; administrators can explicitly set a custom N8N_ENCRYPTION_KEY. That key must be protected and included in disaster-recovery planning.
Use HTTPS. n8n's security documentation recommends a reverse proxy for TLS/SSL termination. Public webhook endpoints must remain reachable where workflows depend on them, but that does not mean every administrative interface should be exposed without protection.
Back up the database and n8n persistent data, and test recovery. PostgreSQL is preferable to SQLite for more serious or horizontally scaled workloads; the Docker installation documentation confirms that SQLite is the default while PostgreSQL is supported.
Integration and compatibility: The native application commonly listens on 5678 internally. Behind a proxy, configure public hostname/protocol and webhook-related URLs correctly so external services call the actual HTTPS endpoint rather than an internal container address. n8n's deployment configuration provides environment variables for these externally visible URLs.
Pros: extremely flexible, huge automation potential, excellent fit for APIs and webhooks, keeps sensitive workflows under your administrative control.
Cons: workflows can become operationally critical; stored API credentials increase security sensitivity; badly designed automations can consume unexpected CPU, memory, API quotas, or traffic.
Ideal user: developers, IT teams, marketers, SaaS operators, agencies, and businesses that repeatedly move information between applications and APIs.
Official documentation: n8n Self-Hosting Documentation

8. AdGuard Home provides network-level DNS filtering under your own control. Instead of installing an ad blocker on every device individually, clients can use the AdGuard Home server for DNS resolution, allowing the server to apply filtering and policy centrally. The application can also provide encrypted DNS services using DNS-over-HTTPS, DNS-over-TLS, and DNS-over-QUIC.
Primary use cases and key features: The most obvious uses are blocking known advertising/tracking domains, applying DNS policies across multiple devices, viewing DNS queries, creating custom filtering rules, and operating encrypted DNS for remote devices.
DNS blocking does have fundamental limitations. AdGuard's own documentation notes that DNS-level filtering cannot reliably remove advertising from the same domain as the content; examples include certain advertisements on major video and social platforms.
Typical system requirements: AdGuard Home is lightweight. For a personal or family DNS VPS, 1 vCPU, 512 MB–1 GB of RAM, and around 5 GB of SSD storage is a comfortable, practical baseline. CPU and storage are rarely the limiting factors; network reliability and DNS latency are much more important.
Because every hostname lookup may depend on this VPS, choose a location with stable routing and low latency to the users. For mission-critical DNS, consider using redundant resolvers rather than making a single small VPS the sole dependency.
Recommended deployment: AdGuard Home supports a native service and an official Docker image. Docker is convenient:
docker pull adguard/adguardhome

mkdir -p ~/adguard/work
mkdir -p ~/adguard/conf

docker run -d \
  --name adguardhome \
  --restart unless-stopped \
  -v ~/adguard/work:/opt/adguardhome/work \
  -v ~/adguard/conf:/opt/adguardhome/conf \
  -p 53:53/tcp \
  -p 53:53/udp \
  -p 3000:3000/tcp \
  adguard/adguardhome
Port 3000/TCP is used for initial configuration, while 53/UDP is required for normal DNS. The official Docker documentation lists additional mappings for HTTPS/DoH, DoT, DoQ, DNSCrypt, DHCP, and debugging; expose only the services you actually require rather than copying every possible port into a public firewall.
Security, backups, and updates: The most important security rule is simple: do not accidentally create an unrestricted, publicly accessible DNS resolver on the public internet. Restrict allowed clients where appropriate and use encrypted DNS protocols for remote users. AdGuard Home provides DNS-over-HTTPS, DNS-over-TLS, and DNS-over-QUIC specifically for encrypted client/server DNS traffic.
The administration panel should be protected, preferably behind TLS, a firewall, a VPN, or a reverse proxy, rather than casually exposed to the internet. Preserve the configuration and work directories in backups.
Integration and compatibility: Plain DNS requires port 53. DoT is commonly used on port 853, while DoH integrates naturally with HTTPS. When the web interface is behind a proxy, AdGuard Home documents configurations for NGINX, Caddy, and Apache, as well as trusted-proxy handling to ensure accurate client IP information.
Be aware that Ubuntu may already have something systemd-resolved listening on port 53 locally. AdGuard documents the resulting “address already in use” problem and methods for resolving it.
Pros: tiny resource footprint, network-wide filtering, encrypted DNS support, useful query visibility, excellent VPS project.
Cons: DNS becomes critical infrastructure; poor configuration can expose an unwanted public resolver; a distant VPS can introduce unnecessary DNS latency; DNS filtering cannot block every form of advertising.
Ideal user: families, technical users, remote workers, privacy enthusiasts, home labs, and administrators wanting centralized DNS policy.
Official documentation: AdGuard Home Knowledge Base
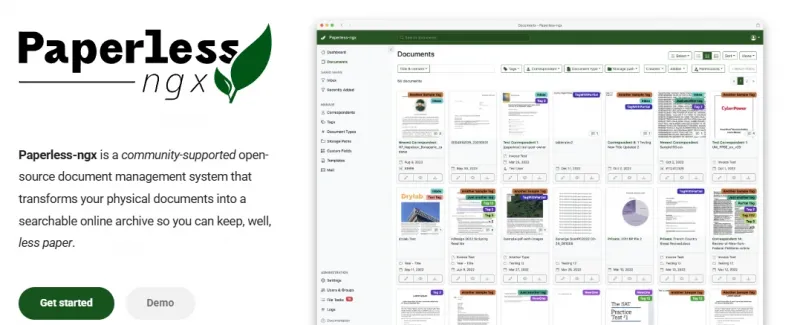
9. Paperless-ngx is a document management system designed to convert a collection of receipts, letters, invoices, contracts, scanned records, and other files into an organized digital archive. Its real value is not simply in storing PDFs; it can process documents so their contents become searchable and can be classified with metadata such as tags, correspondents, and document types.
Primary use cases and key features: Paperless-ngx is particularly useful for household documents, company records, accounting paperwork, supplier invoices, manuals, statements, and historical scanned documents. OCR workloads make it more CPU-intensive than its everyday web interface might suggest.
Its administration interface lets users organize metadata including tags, correspondents, document types, and related information. Optional integrations with Apache Tika and GoTenGen can extend document processing to formats beyond ordinary PDFs and images.
Typical system requirements. Paperless-ngx does not define a universal minimum for VPS hardware because OCR workloads and document volumes vary. A sensible starting point is 2–4 vCPUs, around 4 GB of RAM, and at least 20 GB of SSD/NVMe storage, plus the capacity required for the document library.
CPU affects how quickly newly uploaded documents can be processed and OCR'd. RAM becomes more important when several workers or supporting services operate simultaneously. Storage must accommodate original documents, processed content, previews/thumbnails, indexes, the database, and backups.
Network usage is generally lower than with Immich or Jellyfin, which makes Paperless-ngx particularly well-suited to a conventional VPS.
Recommended deployment: The project provides an interactive Docker Compose setup workflow and recommends PostgreSQL for new installations. It also requires a Redis-compatible message broker, with Valkey or Redis supported. The default web port is 8000.
Security, backups, and updates: Paperless-ngx may contain some of the most sensitive information on your server: tax documents, addresses, financial statements, signed contracts, identification records, medical paperwork, or invoices. HTTPS, strong authentication, restrictive firewall rules, secure SSH, encrypted off-site backups, and timely updates are therefore particularly important.
Paperless-ngx includes a document exporter that is particularly useful for backups and migrations. A deployment backed up using the exporter can be restored using the document importer.
If authentication is delegated to a reverse proxy, configure trusted-proxy/header authentication carefully. A forged authentication header reaching the application directly could otherwise undermine the intended access-control boundary.
Integration and compatibility: New deployments should generally use PostgreSQL, as specified in the project's setup guide. The surrounding stack also uses a Redis-compatible broker such as Valkey or Redis. Optional document-processing tools such as Tika and Gotenberg can broaden file-format handling.
A normal network design is:
docs.example.com:443 → Caddy/NGINX → Paperless-ngx:8000
with the PostgreSQL and broker ports kept strictly internal.
Pros: turns years of paperwork into useful, searchable data; relatively moderate bandwidth needs; Docker-friendly architecture; strong backup/migration tooling.
Cons: OCR can cause CPU spikes; document libraries can contain extremely sensitive data; several supporting services complicate deployment compared to a single-container application.
Ideal user: households going paperless, freelancers, accountants, small offices, and businesses that need a searchable private document archive.
Official documentation: Paperless-ngx Documentation

10. Ghost is a professional, open-source publishing platform for blogs, publications, creators, and membership-based sites. Rather than trying to be a general-purpose website builder, it is centered on publishing, content management, audiences, members, and newsletters.
Ghost is also notable in this article because, unlike most of the container-first applications above, its traditional Ghost-CLI deployment remains the officially supported production installation model. Ghost's CLI configures much of the supporting stack, including MySQL, NGINX, systemd, and SSL.
Primary use cases and key features: Ghost is suitable for company blogs, technical publications, personal newsletters, editorial sites, creator businesses, and membership content. Its platform includes publishing tools, memberships, themes, APIs, and newsletter-related functionality.
This makes Ghost particularly attractive for a VPS owner who wants to do more than publish static pages but does not need the breadth and plugin ecosystem of a general-purpose CMS.
Typical system requirements: Ghost's currently supported production stack includes Ubuntu 22.04, 24.04, or 26.04, a supported Node.js version, NGINX, MySQL 8.0 or 8.4, systemd, and at least 1 GB of memory. A non-root user should run Ghost commands.
For a small production publication, 1–2 vCPUs, 2 GB of RAM, and around 20 GB of SSD/NVMe storage give more breathing room than the official 1 GB minimum. Storage remains fairly modest for a text-heavy publication but grows with images and other media. Bandwidth depends on audience size and media usage.
Recommended deployment. Use the supported Ubuntu + Ghost-CLI path:
sudo npm install -g ghost-cli@latest

sudo mkdir -p /var/www/ghost
sudo chown "$USER":"$USER" /var/www/ghost

cd /var/www/ghost

ghost install
During installation, Ghost-CLI checks the environment and can configure MySQL, NGINX, SSL, and systemd. The CLI is the supported method for installing and managing the standard production stack.
Ghost 6.x also has Docker-oriented hosting work under active development, but Ghost's update documentation currently describes the Docker-based hosting method as being in preview, while Ghost-CLI remains the safer default for a conventional production VPS deployment.
Security, backups, and updates. Ghost-CLI can configure NGINX and SSL during installation, making a properly encrypted domain deployment relatively straightforward. Update using:
ghost check-update
ghost backup
ghost update
Ghost recommends backing up before updates. ghost backup can create a ZIP containing site data, while more detailed disaster-recovery procedures can separately preserve the MySQL database and content directory.
For production, MySQL is the supported database; Ghost's current official hosting guide specifies MySQL 8.0 or 8.4.
Integration and compatibility: Ghost normally sits behind the NGINX configuration generated by Ghost-CLI and is publicly accessible via HTTPS. APIs and webhooks can connect the publication to other systems.
For example, combining Ghost and n8n opens useful automation patterns:
New Ghost member → webhook → n8n → CRM / Slack / database / internal workflow
This is a good example of why a VPS can be more than just a server for a single isolated application: individually hosted services can form a private application stack.
Pros: focused publishing experience, good performance profile for a standard VPS, built-in audience-oriented functionality, clean administration, and support for automated installation via Ghost-CLI.
Cons: narrower scope than a general-purpose CMS; production deployment depends on a specific supported stack; email/newsletter operations introduce external email-delivery considerations; Docker deployment is not yet the default, stable path documented for traditional production hosting.
Ideal user: bloggers, companies, publishers, creators, newsletter businesses, and organizations wanting an elegant content platform on infrastructure they control.
Official documentation: Ghost Documentation
Three-Step Quickstart Checklist
1. Choose one application and size the VPS for the actual workload.
Pick a supported Linux distribution, enough CPU/RAM for the application's official or practical requirements, SSD/NVMe for active databases, sufficient storage for future data growth, and a datacenter location close to your users. Immich, for example, needs at least 2 cores and 6 GB of RAM and recommends 4 cores and 8 GB of RAM; Gitea can serve a small team with around 2 cores and 1 GB of RAM.
2. Deploy it securely before importing important data.
Patch the operating system, use SSH keys, configure the firewall, install Docker/Compose where appropriate, create persistent volumes, and put normal web applications behind a domain and HTTPS reverse proxy. Do not directly expose database ports. For applications that handle particularly valuable data—such as Bitwarden, Paperless-ngx, Nextcloud, and Immich—enable the strongest available authentication options and restrict administrative access. Bitwarden supports multiple two-step login methods, while Nextcloud provides dedicated server-hardening guidance.
3. Create and test backups, then add monitoring.
Back up both files and application state, copy backups away from the production VPS, define an update procedure, and perform at least one test restore before trusting the server with irreplaceable data. Immich explicitly requires both its database and uploaded media for comprehensive recovery; Paperless-ngx supports exporter/importer-based restoration; Ghost provides ghost backup; Jellyfin documents server backup and restore. Finally, monitor the public endpoint from an independent system to ensure that an outage actually triggers an alert.
Final Takeaway
The most interesting thing about self-hosting in 2026 is not that a VPS can replace a web-hosting account. It is that one relatively inexpensive server can become an application platform you completely control.
The central principle is the same for all ten applications:
- Self-hosting gives you control over the service, but it also comes with responsibility.
- Choose the VPS based on the workload rather than the lowest advertised price. Keep databases on fast storage. Minimize publicly exposed ports. Use TLS. Protect administrative interfaces. Keep applications updated. Monitor them externally. And above all, maintain backups that persist even when the production VPS does not.
- Done properly, a VPS stops being simply “a server on the internet.” It becomes your own private cloud, development platform, automation system, monitoring stack, document archive, media library, or publishing infrastructure—built around applications and data that remain under your control.