

Managing credentials across systems can get messy fast. Access needs change, passwords get shared in chats or stored in files, and it quickly becomes hard to manage securely.
Password managers like Bitwarden provide a structured way to handle this. If you want to host it yourself, Vaultwarden lets you run a lightweight server that works with standard Bitwarden clients.
In this guide, we’ll deploy a private Vaultwarden instance and configure it as a secure, self-hosted password manager for a reliable and production-ready setup.
What is Vaultwarden and When Should You Use It?
Vaultwarden is a lightweight, self-hosted implementation of the Bitwarden API. It allows you to run your own password manager while remaining fully compatible with official Bitwarden clients. It’s optimized for low resource usage, making it a practical choice for VPS deployments and homelab environments where the full Bitwarden stack would be unnecessary.
When to Use Vaultwarden
-
You want full control over your password data
-
You’re deploying on a low-resource server
-
You’re comfortable managing a Docker-based setup
When Not to Use It
-
You need enterprise features like SSO or directory sync
-
You prefer official support or a managed solution
In short, Vaultwarden is best for individuals and small teams who want a secure, self-hosted alternative without running a heavy infrastructure.
Prerequisites
Before deploying Vaultwarden, ensure you have the following:
-
Ubuntu 22.04 / 24.04
-
Non-root user with sudo privileges
-
Domain name (required for HTTPS)
-
Open ports: 80 (HTTP) and 443 (HTTPS)
-
Docker and Docker Compose (plugin: docker compose)
-
Basic firewall configured (e.g., UFW)
DNS Requirement
Your domain must point to your server’s public IP address via an A record.
System Preparation
Start by updating your system to ensure all packages are current:
sudo apt update && sudo apt upgrade -yNext, configure a basic firewall using UFW. Run the following commands one by one to allow SSH and HTTP/HTTPS traffic:
sudo ufw allow 22/tcp
sudo ufw allow 80sudo ufw allow 443sudo ufw enable
For a more secure setup, consider additional server hardening measures such as:
-
Installing Fail2ban to protect against brute-force attacks
-
Disabling root SSH login
-
Using SSH keys instead of password authentication
These steps are not required for this setup but are recommended for production environments.
Install Docker and Docker Compose
Vaultwarden runs in a container, so Docker must be installed on your server. If you haven’t installed it yet, follow our Docker installation guide for Ubuntu 24.04 before continuing.
Once Docker is installed, install the Docker Compose plugin:
sudo apt updatesudo apt install docker-compose-plugin -yThis installs the modern Docker Compose v2 plugin (docker compose).
Verify Installation
After installation, confirm both Docker and Docker Compose are working.
Run:
docker --versionIf Docker is installed correctly, you should see output similar to:
![]()
Next verify that Docker Compose is available by running:
docker compose versionYou should see output similar to:
![]()
If both commands return version information, you’re ready to proceed.
Project Structure Setup
Create a dedicated working directory for your Vaultwarden deployment:
mkdir -p ~/vaultwarden && cd ~/vaultwardenThis creates a vaultwarden directory in your home folder (if it doesn’t already exist) and moves into it. All configuration and data for this setup will live here.
Inside this directory, you’ll define two key files:
-
docker-compose.yml – describes the Vaultwarden service, including the container, volumes, and networking
-
.env – stores environment variables such as your domain, admin token, and other configuration values
Keeping everything in a single directory makes the deployment easier to manage, update, and back up later.
Configure Vaultwarden Environment
Vaultwarden is configured using environment variables stored in a .env file. This keeps sensitive values separate from your main configuration.
Generate the Admin Token
Before defining your environment variables, generate a secure admin token:
openssl rand -base64 48Copy the generated value, you’ll use it in the next step.
Define Environment Variables
Create and open a .env file in your project directory:
nano .envAdd the following:
DOMAIN=https://yourdomain.comWEBSOCKET_ENABLED=trueSIGNUPS_ALLOWED=falseADMIN_TOKEN=your_generated_value_hereReplace https://yourdomain.com with your actual domain.
Explanation:
-
DOMAIN sets the public URL your users will access (must include https://)
-
WEBSOCKET_ENABLED enables real-time updates (required for notifications and sync)
-
SIGNUPS_ALLOWED=false disables public registration (recommended for private deployments)
-
ADMIN_TOKEN secures access to the admin panel
You can also configure email support using SMTP_* variables, which is recommended for password resets and user invites.
Docker Compose Configuration
Vaultwarden is deployed using a docker-compose.yml file that defines the container, storage, and runtime behavior.
Create and open the file in your project directory:
nano docker-compose.ymlAdd the following configuration:
services: vaultwarden: image: vaultwarden/server:latest container_name: vaultwarden restart: unless-stopped environment: - DOMAIN=${DOMAIN} - WEBSOCKET_ENABLED=${WEBSOCKET_ENABLED} - SIGNUPS_ALLOWED=${SIGNUPS_ALLOWED} - ADMIN_TOKEN=${ADMIN_TOKEN} volumes: - ./data:/data ports: - 127.0.0.1:8080:80Explanation:
-
image → Official Vaultwarden server container
-
restart: unless-stopped → Ensures the service automatically restarts after crashes or system reboots
-
environment → Passes configuration values from your .env file into the container
-
DOMAIN → Recommended for production correctness; ensures proper URL generation, authentication flows, and session handling
-
volumes → Persists all Vaultwarden data in ./data so it survives container restarts
-
ports (127.0.0.1:8080:80) → Exposes the service only locally for secure access via a reverse proxy
Reverse Proxy and HTTPS Setup
To securely expose Vaultwarden, you’ll place it behind a reverse proxy. In this guide, we’ll use Caddy for its simplicity and built-in HTTPS support.
Caddy automatically provisions TLS certificates using Let's Encrypt, so no manual SSL configuration is required.
This step configures Caddy at the system level and is separate from the Vaultwarden project directory.
Install Caddy
Install required packages for adding external repositories:
sudo apt install -y debian-keyring debian-archive-keyring apt-transport-httpsAdd the official Caddy GPG key for package verification:
curl -1sLf https://dl.cloudsmith.io/public/caddy/stable/gpg.key | sudo gpg --dearmor -o /usr/share/keyrings/caddy-stable-archive-keyring.gpgAdd the Caddy repository to your system:
curl -1sLf https://dl.cloudsmith.io/public/caddy/stable/debian.deb.txt | sudo tee /etc/apt/sources.list.d/caddy-stable.listUpdate package lists and install Caddy:
sudo apt update && sudo apt install caddy -yConfigure Caddy
Open the Caddy configuration file:
sudo nano /etc/caddy/CaddyfileThis file defines how incoming requests are routed to your services.
Add the following configuration:
yourdomain.com { reverse_proxy 127.0.0.1:8080}-
Replace yourdomain.com with your actual domain
-
This tells Caddy to route HTTPS traffic to Vaultwarden running locally on port 8080
Apply Configuration
Restart Caddy to apply the new configuration:
sudo systemctl restart caddyThis reloads the configuration and starts handling HTTPS traffic.
Caddy automatically handles HTTPS, WebSockets, and header forwarding, so no additional configuration is required for this setup.
Launching the Stack
Before starting, navigate to the Vaultwarden directory containing the docker-compose.yml file, then start the service using Docker Compose:
docker compose up -dThis command builds (if needed), pulls the latest image, and starts the container in detached mode, allowing it to run in the background.
Verify the Deployment
Check the status of your containers to ensure Vaultwarden is running:
docker compose psYou should see the vaultwarden service listed with a running status, similar to the image below:
![]()
Next, review the container logs to confirm there are no startup errors:
docker logs vaultwardenThis will display the container's runtime logs. You should see normal startup messages indicating the server is running and listening for requests. If there are obvious errors, it usually points to a configuration issue such as incorrect environment variables or port conflicts.
Initial Access and Setup
Once the container is running and your reverse proxy is configured, you can access Vaultwarden through your domain:
https://yourdomain.comOpen this in your browser and create your first user account.
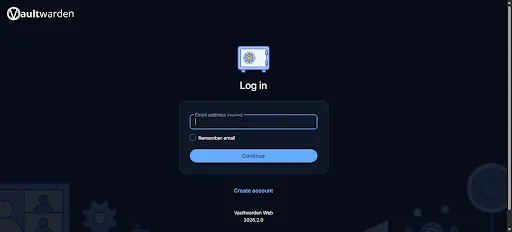
This will be your primary account for accessing the password manager.
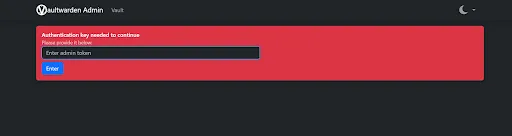
Access the Admin Panel
Vaultwarden provides an admin interface for managing instance-level settings. You can access it at:
https://yourdomain.com/adminYou’ll be prompted to enter the ADMIN_TOKEN you configured earlier.
Basic Configuration
After logging into the admin panel, review the following:
-
Ensure public signups are disabled (if not already set via environment variables)
-
Configure SMTP settings to enable email features such as password resets and user invitations
Backup and Restore Strategy
Backing up Vaultwarden is critical, as all user data is stored locally in your deployment. A proper backup strategy ensures you can recover from data loss, server failure, or misconfiguration.
Vaultwarden stores everything in the /data directory, including:
-
the main database (db.sqlite3)
-
file attachments
-
configuration-related data
In practice, backing up the entire data directory is sufficient.
Create a Backup
From your project directory, first stop the running container to ensure data consistency:
docker compose downThen create a compressed backup of the data directory:
tar -czvf vaultwarden-backup.tar.gz ./dataThis generates a .tar.gz archive containing all Vaultwarden data.
Backup Best Practices
Store backups outside the server (e.g., cloud storage or another machine). For production setups, automate backups using cron jobs and periodically verify that backups can be restored successfully.
Restore Overview
From your project directory, stop the container before restoring:
docker compose downNext, remove the existing data directory. This deletes the current Vaultwarden data, so ensure you have a valid backup before proceeding:
rm -rf ./datThen extract your backup archive to restore the data:
tar -xzvf vaultwarden-backup.tar.gzFinally, restart the service:
docker compose up -dThis ensures Vaultwarden resumes using the restored data.
Updating Vaultwarden
Keeping Vaultwarden up to date ensures you receive the latest security patches and improvements.
Before updating, take a backup of your data to avoid any risk of data loss. It’s also good practice to review release notes for any changes that might affect your setup.
To update the container, first pull the latest image:
docker compose pullThis downloads the newest version of the Vaultwarden image from the registry.
Next, restart the service using the updated image:
docker compose up -dThis recreates the container with the latest version while preserving your existing data.
Conclusion
You now have a fully functional, self-hosted password manager running with Vaultwarden. By combining Docker, a reverse proxy, and automatic HTTPS, you’ve set up a secure and lightweight alternative to the official Bitwarden server.
As with any self-hosted service, ongoing maintenance is key. Keep your instance updated, monitor logs when needed, and most importantly, maintain reliable backups of your data.
With these practices in place, your Vaultwarden deployment should remain secure, stable, and ready for everyday use.
For more in-depth tutorials, visit the BaCloud blog, where you’ll find helpful guides.