
Many projects start by storing information in spreadsheets, but as data grows, managing and collaborating on it becomes harder.
NocoDB is an open-source database platform that provides a spreadsheet-style interface for working with databases. In this guide, we will deploy NocoDB on a BaCloud VPS running Ubuntu 26.04 LTS using Docker and NocoDB's official Single-Server Installer.
This deployment includes NocoDB, PostgreSQL, Redis, Traefik, and automatic HTTPS with Let's Encrypt. By the end of this guide, NocoDB will be running with persistent storage, secure HTTPS access, and a basic update and backup workflow.
Prerequisites
Before continuing, make sure you have:
-
Ubuntu 26.04 LTS VPS
-
SSH access
-
A sudo-capable user
-
A domain or subdomain pointing to your server
For a production deployment, we recommend a VPS with 4 vCPU, 8 GB RAM, and 50 GB+ storage. Smaller servers may also work for lighter workloads.
Step 1: Update Ubuntu
Start by updating the package index and upgrading installed packages to keep your system up to date.
Run the following command:
sudo apt update && sudo apt upgrade -yOnce the update is complete, you can install Docker.
Step 2: Install Docker Engine and Docker Compose
Before deploying NocoDB, Docker Engine and Docker Compose must be installed on your Ubuntu server.
If Docker is not already installed, follow our How to Install and Set Up Docker on Ubuntu 26.04 guide before continuing.
After the installation is complete, verify that Docker Engine is available:
docker --version
Then verify that Docker Compose is installed:
docker compose versionIf both commands return version information, Docker is installed correctly and you can continue with the NocoDB deployment.
Step 3: Configure the Firewall
If UFW is enabled on your server, allow SSH traffic so you can continue managing the VPS remotely.
Run:
sudo ufw allow 22/tcpNext, allow HTTP traffic so Let's Encrypt can validate your domain during the installation.
Run:
sudo ufw allow 80/tcpFinally, allow HTTPS traffic for secure access to NocoDB after the deployment is complete.
Run:
sudo ufw allow 443/tcpIf UFW is already enabled, reload the firewall to apply the changes.
Run:
sudo ufw reloadKeep PostgreSQL, Redis, and other internal service ports inaccessible from the public internet. The NocoDB Single-Server Installer configures these services behind Traefik, so only ports 80 and 443 need to be publicly accessible.
Step 4: Configure DNS for NocoDB
Before running the NocoDB installer, point your domain or subdomain to your VPS.
Create an A record:
yourdomain.com → VPS_PUBLIC_IPReplace yourdomain.com with the domain or subdomain you plan to use for your NocoDB installation.
After creating the record, verify that the domain points to your VPS IP address:
nslookup yourdomain.comThe returned IP address should match your VPS public IP.
Once DNS resolution is confirmed, you can continue with the NocoDB installation.
Step 5: Install NocoDB Using the Official Single-Server Installer
NocoDB provides an official Single-Server Installer that automatically creates the Docker Compose deployment and configures the required services.
Download the installer script:
curl -fsSL https://install.nocodb.com/noco.sh -o noco.shRun the installer:
bash noco.shThe installer will guide you through setup.
When prompted for the domain, enter the domain or subdomain you configured earlier:
yourdomain.comDo not use the VPS IP address if you plan to enable HTTPS with Let's Encrypt.
When prompted for PostgreSQL, select the bundled option:
1) BundledThis allows the installer to deploy and configure PostgreSQL automatically.
When prompted for Redis, select the bundled option:
1) BundledThis allows the installer to deploy and configure Redis automatically.
Finally, provide an email address when prompted to register a Let's Encrypt certificate.
After completing the prompts, the installer will create the Docker Compose deployment, start the required services, and configure HTTPS through Traefik.
Step 6: Verify the Installation
After the installer completes, move into the NocoDB deployment directory:
cd ~/nocodbCheck that the containers are running:
docker compose psThe NocoDB stack should show the required services running.
Next, open your NocoDB domain in a browser:
https://yourdomain.comConfirm that the NocoDB setup page loads successfully before continuing with the initial configuration.
Step 7: Complete the NocoDB Initial Setup
Open your NocoDB URL in a browser:
https://yourdomain.com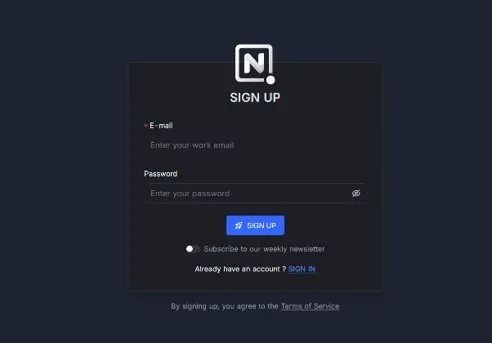
Create the initial administrator account when prompted.
The first user created during setup will become the NocoDB super administrator.
After setup, you can access the NocoDB dashboard and continue configuring your database.
Step 8: Manage the NocoDB Deployment
After installation, you can use Docker Compose commands from the NocoDB deployment directory to manage the application.
To check the running services:
docker compose psTo view the NocoDB logs:
docker compose logs -f nocodbTo restart the NocoDB application and worker services:
docker compose restart nocodb workerTo stop the deployment:
docker compose downThese commands cover the most common day-to-day administration tasks for a single-server NocoDB deployment.
Step 9: Update NocoDB
The NocoDB Single-Server installation includes an update script that simplifies the upgrade process.
From the NocoDB deployment directory, run:
./update.shBefore updating, back up your deployment so you can recover your data if the upgrade doesn't go as planned.
After the update completes, sign in to NocoDB and verify that the application is running normally.
Conclusion
NocoDB is now running on your Ubuntu 26.04 VPS using Docker and the official Single-Server Installer.
The deployment includes NocoDB, PostgreSQL, Redis, Traefik, and HTTPS access through Let's Encrypt. You can now manage the installation using Docker Compose commands and keep the deployment updated using the provided update script.
For more in-depth tutorials, visit the BaCloud blog, where you’ll find helpful guides.