

Wireshark is a network protocol analyzer used to capture and inspect network traffic in real time. It is widely used for network troubleshooting, protocol analysis, security investigations, and performance monitoring.
In this guide, we’ll walk you through installing Wireshark on Ubuntu 26.04, configuring packet capture permissions, verifying the installation, and beginning to capture network traffic.
Prerequisites
Before installing Wireshark, ensure you have:
-
An Ubuntu 26.04 system.
-
A user account with sudo privileges.
-
An active internet connection to download packages from the Ubuntu repositories.
-
A graphical desktop environment if you plan to use the Wireshark GUI.
Note: If you're working on a headless server without a graphical desktop, consider using TShark, Wireshark's command-line counterpart, for packet capture and analysis.
Step 1: Update Package Index
Start by updating your system’s package list so Ubuntu can retrieve the latest available versions from its repositories.
sudo apt updateIf you also want to upgrade installed packages on your system, you can optionally run:
sudo apt upgrade -yThis updates existing packages to their latest versions. Once this is complete, you can proceed with installing Wireshark.
Step 2: Install Wireshark
Install Wireshark from the official Ubuntu repositories using the apt package manager by running:
sudo apt install wireshark -yThis command installs Wireshark along with its graphical interface and the core packet capture engine (dumpcap), which handles low-level packet collection.
Step 3: Configure Packet Capture Permissions
Wireshark requires additional permissions to allow non-root users to capture network traffic safely. This avoids running the application as sudo while still granting access to packet capture tools.
First, enable non-root packet capture support:
sudo dpkg-reconfigure wireshark-commonWhen prompted, select:
-
Yes — allow non-superusers to capture packets
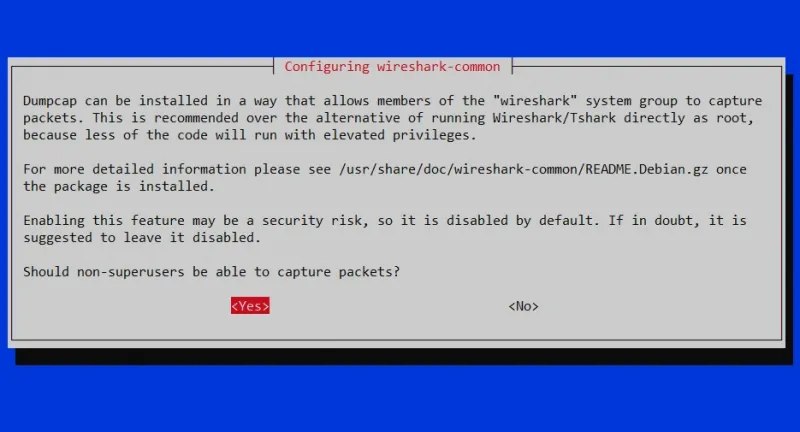
This configures Wireshark’s capture engine (dumpcap) to run with the appropriate permissions.
Next, add your user to the Wireshark group:
sudo usermod -aG wireshark $USERThis grants your user account permission to access capture interfaces without requiring root privileges.
Finally, apply the group changes in your current session:
newgrp wiresharkThis refreshes your group membership immediately without needing a system reboot or logout.
Step 4: Identify Network Interfaces
Before starting a packet capture, you need to know which network interfaces are available on your system. Wireshark uses these interfaces as capture sources.
To list available interfaces at the system level, run:
ip addrThis shows all active and inactive network interfaces on the system.
Alternatively, you can use TShark to list capture-ready interfaces:
tshark -D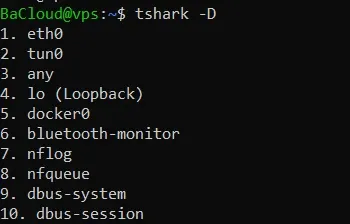
This is useful when interface names are not obvious or differ from system defaults.
On modern Linux systems, interface names may appear as eth0, ens33, enp0s3, or wlp2s0, depending on the environment.
Step 5: Verify Installation and Capture Permissions
Start by confirming that Wireshark is correctly installed on the system.
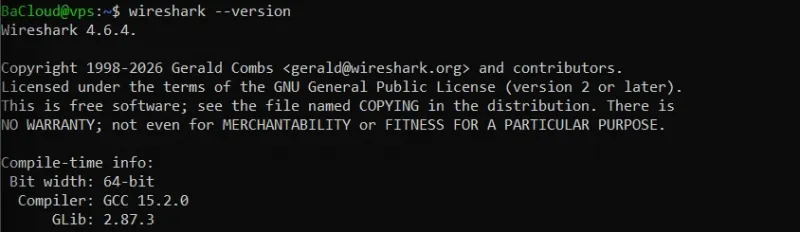
To check the Wireshark version, run:
wireshark --versionYou should see an output similar to the one below.
Next, verify that the TShark command-line tool is also installed:
tshark --version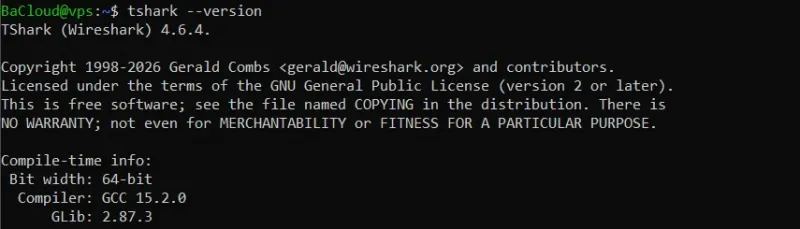
This ensures the CLI packet analysis tool is available for use in terminal-based environments.
After confirming installation, check that packet capture permissions are correctly configured. Wireshark uses the dumpcap binary to capture packets, and it must have the proper Linux capabilities set.
To verify this, run:
getcap /usr/bin/dumpcapThis command checks whether dumpcap has the required privileges to capture network traffic without root access.
The expected output should be:
cap_net_admin,cap_net_raw=eipThis confirms that non-root packet capture is correctly enabled and the system is properly configured for network monitoring.
Step 6: Launch Wireshark
After completing installation, you can launch Wireshark if your system has a graphical desktop environment.
To start Wireshark from the terminal, run:
wiresharkYou can also open Wireshark from the application menu by searching for Wireshark.
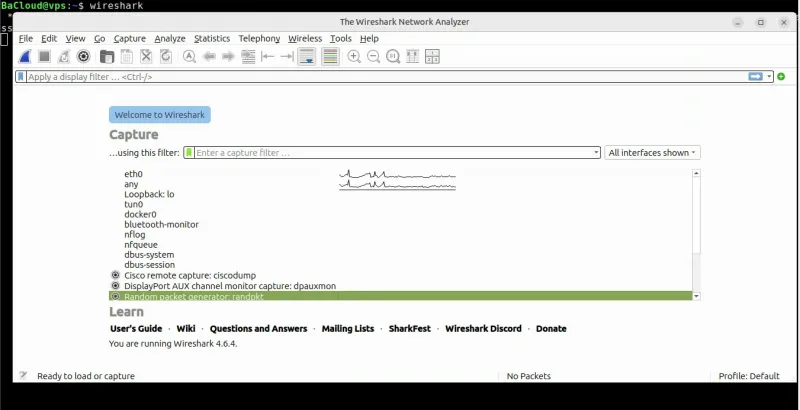
When Wireshark opens successfully, it immediately displays a list of available network interfaces, as seen in the image above.
Each interface may display a small live activity graph showing current traffic levels for that interface. These graphs represent real-time interface statistics, not captured packet data.
Note
On systems without a graphical desktop environment (such as most VPS setups), Wireshark will not start.
In this case, you have two options:
-
Use TShark for command-line packet capture.
Simply run:
tshark-
Install a graphical desktop environment.
If you want to install a GUI on your VPS, follow this guide: How to Install and Set Up a Graphical Interface Desktop (GUI) on an Ubuntu VPS
Step 7: Capture Network Traffic
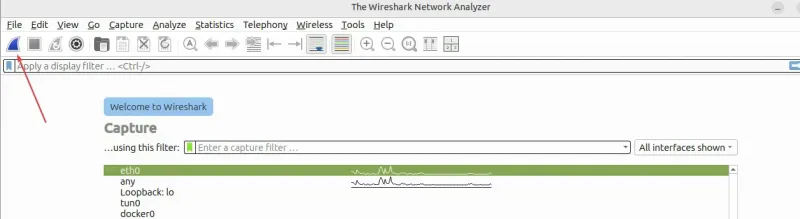
To begin packet capture, select an interface from the list shown in Step 6.
Choose the interface that corresponds to your active network connection (for example eth0, enp0s3, or wlp2s0 depending on your system).
Start capturing packets by double-clicking the interface or clicking the Start Capturing Packets button (shark fin icon).
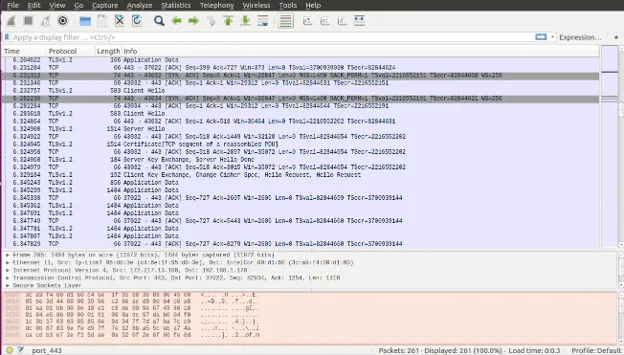
Wireshark will begin recording packets from the selected interface. The captured packets will appear in real time in a structured list like the one below:
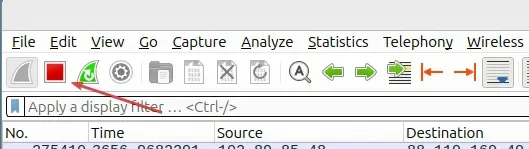
When you have collected enough data, stop the capture by clicking the Stop Capturing Packets button (red square icon).
At this point:
-
Packet capture stops
-
All captured packets remain available for analysis within the Wireshark interface.
Uninstalling Wireshark
If you no longer need Wireshark, you can remove the installed packages using APT.
To remove Wireshark and its configuration files, run:
sudo apt purge wireshark wireshark-common -yThis removes the Wireshark graphical interface and the core packet capture components from the system.
After removing the packages, clean up any unused dependencies:
sudo apt autoremove -yThis removes packages that were installed automatically as dependencies but are no longer required by the system.
Conclusion
In this guide, we installed and configured Wireshark on Ubuntu 26.04 using the official APT repositories. We also configured permissions for non-root packet capture, verified the installation, and captured network traffic for analysis.
With the installation complete, you can now use Wireshark to capture and analyze network traffic on your Ubuntu system.
For more in-depth tutorials, visit the BaCloud blog, where you’ll find helpful guides.