

If your website feels slow, you might be losing money. According to Google's research on mobile speed, around half of visitors leave if a page takes more than three seconds to load.
On the internet today, speed isn’t just nice to have — it’s a ranking factor, a user experience boost, and often the difference between a sale and a bounce.
That’s where LiteSpeed and its powerful caching engine LSCache come in. LiteSpeed is a high-performance web server designed for faster load times, improved scalability, and full Apache compatibility. LSCache, on the other hand, provides deep, CMS-level caching that significantly reduces page load times and server resource usage.
This guide walks you through setting up and configuring LiteSpeed + LSCache and MariaDB in VPS, using best practices for 2025 to optimize your VPS setup.
Prerequisites
Before getting started, make sure you have the following in place:
-
A system running Ubuntu 22.04 or 24.04 LTS (VPS or local server)
-
Root or a user account with sudo privileges
-
Basic familiarity with the Linux terminal
Optional:
-
A domain name pointing to your server’s IP, recommended if you plan to enable HTTPS later.
-
Install a few helpful tools if missing, these make downloads, archiving, and firewall setup easier:
|
sudo apt install wget curl ufw unzip -y |
Step 1 — Install OpenLiteSpeed
We’ll begin by installing OpenLiteSpeed, the web server that will power your CMS.
-
Update your server packages
Before installing, it’s best practice to refresh your package index so Ubuntu knows about the latest versions available:
|
sudo apt update |
-
Add the LiteSpeed repository
OpenLiteSpeed isn’t included in Ubuntu’s default repositories, so you need to add LiteSpeed’s official repo and key:
|
wget -O - https://repo.litespeed.sh | sudo bash |
This script automatically detects your Ubuntu version (22.04 / 24.04) and configures the correct source list.ssh
-
Install OpenLiteSpeed
Now install the free, open-source version of LiteSpeed. This includes the core web server and the admin interface:
|
sudo apt install openlitespeed -y |
Once installed, enable the service and start it automatically at boot:
|
sudo systemctl enable --now lshttpd |
You can confirm it’s running with:
|
sudo systemctl status lshttpd |
You should see output similar to:
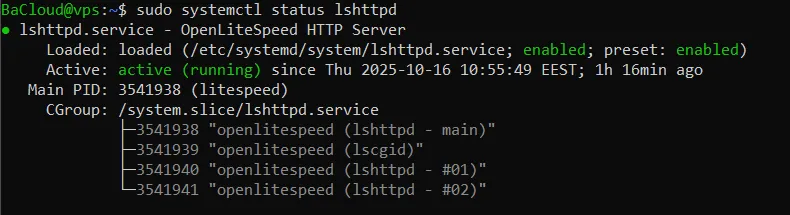
(Press Q to exit the status view.)
-
Access the WebAdmin Console
LiteSpeed comes with a built-in web admin interface for managing virtual hosts, PHP settings, and more.
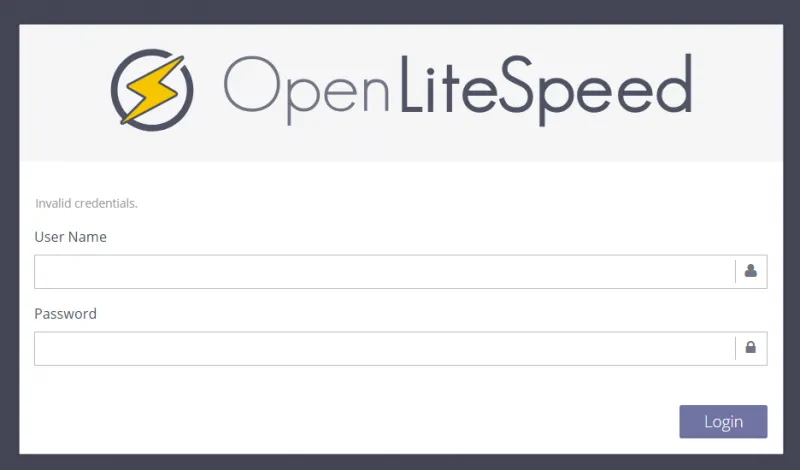
Open your browser and visit:
|
http://<server-ip>:7080 |
(Replace <server-ip> with the public IP address of your server.)
You should see a login screen like the one below:
-
Create Admin Credentials
Before logging in, you must create your admin username and password.
Run this setup script and follow the prompts:
|
sudo /usr/local/lsws/admin/misc/admpass.sh |
After that, you can log in to the WebAdmin console using the credentials you just set.
-
Allow Access Through the Firewall (if needed)
If you can’t reach the WebAdmin panel, it might be blocked by your firewall.
Run the following to open the necessary ports for LiteSpeed (7080 for admin, 8088 for default web pages):
|
sudo ufw allow 7080,8088/tcp |
Then reload your firewall rules:
|
sudo ufw reload |
At this point, LiteSpeed should be fully installed and accessible from your browser.
Step 2 — Install PHP and Database Support
We’ll now set up PHP and a database server, which are required to run WordPress.
-
Install PHP 8.3 and required extensions
LiteSpeed uses its own optimized version of PHP, known as lsphp.
Run the following command to install PHP 8.3 along with the most common extensions needed for CMS platforms:
|
sudo apt install lsphp83 lsphp83-common lsphp83-mysql lsphp83-curl -y |
Note: On newer Ubuntu systems (24.04 and later), some PHP extensions such as json, mbstring, and zip are already built into the PHP core or included in lsphp83-common, so they don’t need to be installed separately.
Once installed, LiteSpeed will automatically detect lsphp83 when serving dynamic content.
-
Install and secure MariaDB
Next, install MariaDB, a drop-in replacement for MySQL that powers most open-source CMS databases:
|
sudo apt install mariadb-server -y |
After installation, it’s best practice to secure the database by removing test users and setting a root password:
|
sudo mysql_secure_installation |
Note for first-time installations:
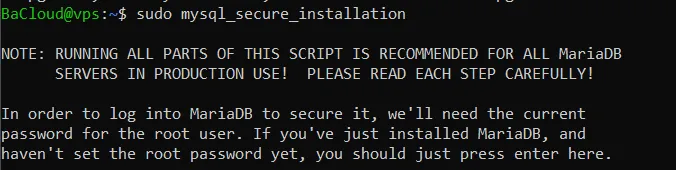
When you see the MariaDB root password prompt (as shown in the screenshot), just press Enter to continue, since a fresh installation doesn’t have a root password yet.
Follow the prompts with these recommended responses:
-
Switch to unix_socket authentication: n
-
Change the root password: n (skip if already set)
-
Remove anonymous users: y
-
Disallow remote root login: y
-
Remove test database: y
-
Reload privilege tables: y
At this stage, both PHP and MariaDB are installed and ready, and your server is prepared to host WordPress.
Step 3 — Configure Virtual Host for WordPress
A virtual host tells LiteSpeed where to find your website files and how to serve them. We’ll now create a virtual host named main that points to /var/www/html — the directory that will later contain your WordPress files.
-
Create the Web Root Directory
First, create a directory to hold your website files.
Run this command:
|
sudo mkdir -p /var/www/html |
Now confirm the directory exists:
|
ls -ld /var/www/html |
You should see an output similar to this:
![]()
Next, set ownership and permissions so the LiteSpeed process can access it.
Run each command separately:
|
sudo chown -R nobody:nogroup /var/www/html |
-
Add a New Virtual Host
Log in to WebAdmin at http://<server-ip>:7080.
-
On the left sidebar navigate to Virtual Hosts → Add.
-
Enter the following values:
-
Virtual Host Name: main
-
Virtual Host Root (vhRoot): /usr/local/lsws/conf/vhosts/main
-
Config File: /usr/local/lsws/conf/vhosts/main/vhconf.conf
-
-
Leave other options default. Set:
-
Follow Symbolic Link = Yes
-
Enable Scripts/ExtApps = Yes
-
Restrained = No
-
-
If WebAdmin reports that vhconf.conf does not exist, click Create, then Save.
-
Edit the Virtual Host Configuration File
Now we’ll set the document root and enable .htaccess rewriting.
Open the config file with Nano:
|
sudo nano /usr/local/lsws/conf/vhosts/main/vhconf.conf |
Paste the following lines into the file:
|
docRoot /var/www/html |
Save your changes and exit.
This tells LiteSpeed:
-
The website’s root directory is /var/www/html.
-
It should serve index.php or index.html by default.
-
It should read WordPress rewrite rules from .htaccess.
-
Map the Listener to the Virtual Host
By default, OpenLiteSpeed’s default listener points to the Example vhost. We’ll now connect the new host main instead.
-
In WebAdmin, navigate to: Listeners → Default → Virtual Host Mappings
-
Delete the existing mapping to Example (click the trash icon).
-
Click Add, and enter:
-
Virtual Host: main
-
Domains: *
-
-
Click Save.
-
Perform a Graceful Restart using the WebAdmin top-right icon, or run:
|
sudo systemctl restart lshttpd |
-
Verify the Configuration
Now you can test that LiteSpeed is serving pages correctly.
Create a simple HTML file inside your web root:
|
echo "LiteSpeed is serving correctly" | sudo tee /var/www/html/index.html |
Restart the LiteSpeed service to apply all configuration changes:
|
sudo systemctl restart lshttpd |
Then open your browser and visit:
|
http://<server-ip>:8088 |
You should see the message:
Once confirmed, remove the test file to keep your directory clean:
|
sudo rm /var/www/html/index.html |
You now have a working virtual host configuration. Your server is ready to set up WordPress on this VPS server.
How to set up WordPress on the VPS? Check our blog post!
Conclusion
Your LiteSpeed server is now fully set up with LiteSpeed and LSCache, giving you a fast and stable foundation for your site. At this point, most of the heavy lifting is complete. From here on, ongoing improvements will primarily focus on fine-tuning cache rules, monitoring performance, and maintaining WordPress's security and up-to-date status.
For more in-depth tutorials, visit the BaCloud blog, where you’ll find helpful guides.