

With over 21 million active servers, Discord has become the backbone of online communities — from gaming groups and developer servers to web3 projects and student hubs. But as communities grow, so does the need for automation and customization. That’s where Discord bots come in.
A custom bot can welcome new users, moderate chats, deliver content, and automate tasks. In this guide, you’ll learn how to install and configure your Discord bot on a VPS environment, ensuring it runs smoothly.
Prerequisites
Before you get started, make sure you have the following ready:
-
A VPS — We’ll use a Bacloud VPS running Ubuntu 24.04 for this guide.
-
A Discord account with admin rights on a server — You’ll need to be an admin of a Discord server where you’ll add and test the bot.
-
A Discord bot token — You’ll generate this in the Discord Developer Portal to connect your bot to Discord.
-
Python 3 and pip — Required to run the bot and install its dependencies. (We’ll install these in the setup steps.)
-
Git — Used to clone a bot from GitHub.
Step 1. Preparing the VPS Environment
Before running your Discord bot, you need to prepare your VPS by updating system packages and installing Python. Since the bot we’ll use is written in Python, this is essential.
Update System Packages
Start by updating your system’s package list and upgrading installed packages to ensure your VPS is secure and stable:
|
sudo apt update && sudo apt upgrade -y |
This updates your system, minimizing the risk of compatibility issues later on.
Install Python and pip
Because the bot we’re going to use is built in Python, you’ll need Python 3 and pip (Python’s package manager) installed:
|
sudo apt install python3 python3-pip -y |
Ubuntu 24.04 often comes with Python 3 pre-installed, but running this command ensures you have the latest version and pip ready.
Set Up a Virtual Environment (Recommended)
To keep your bot’s dependencies isolated and prevent conflicts with other Python projects or system-wide packages, it’s best practice to use a Python virtual environment. A virtual environment is like a separate container where your project’s Python packages live independently.
Here’s how to set it up:
-
Install the venv module (if not already installed):
This provides the tools to create virtual environments.
|
sudo apt install python3-venv -y |
-
Create a virtual environment named botenv:
This will create a local directory where project-specific packages are kept.
|
python3 -m venv botenv |
-
Activate the virtual environment:
Once active, your terminal prompt will change (showing something like (botenv)) to indicate you’re now working inside the virtual environment.
|
source botenv/bin/activate |
![]()
While active, any Python packages you install will stay contained within botenv.
To exit the virtual environment later, just run:
|
deactivate |
Using a virtual environment keeps your VPS clean and makes it easier to manage your bot’s dependencies.
Step 2. Creating and Configuring the Discord Bot
Before running the bot on your VPS, you need to set it up inside Discord itself. This involves registering the bot, securing its token, and inviting it to your server.
Register the Bot
-
Go to the Discord Developer Portal and log in with your Discord account.
-
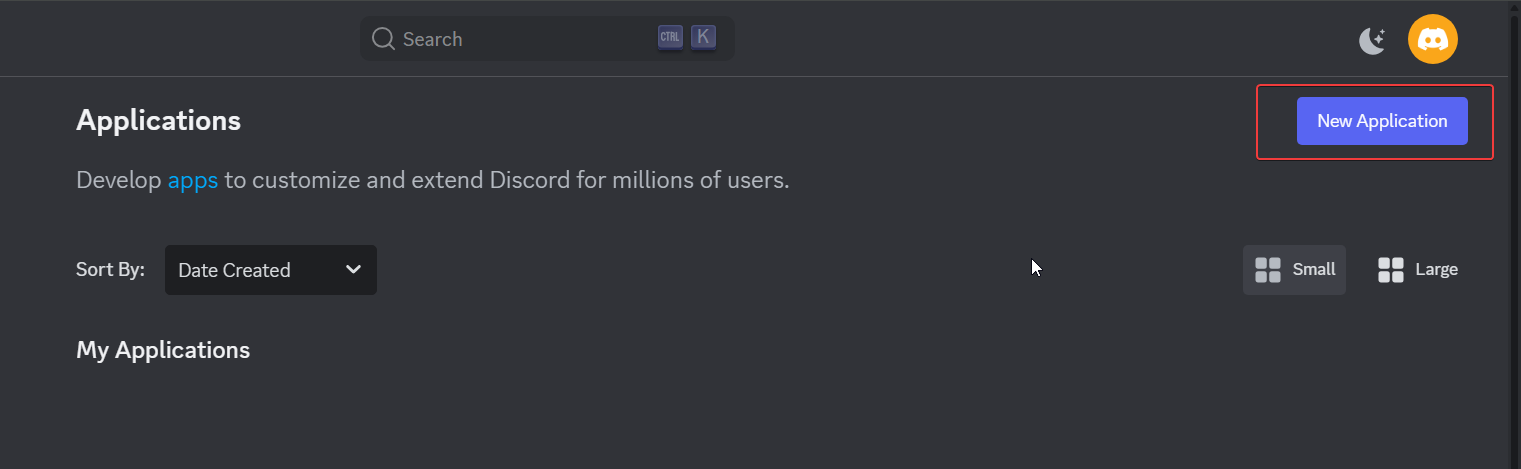
Create a new application by clicking the “New Application” button. Give your application a name — this can be anything you like (for example, “MyServerBot”).
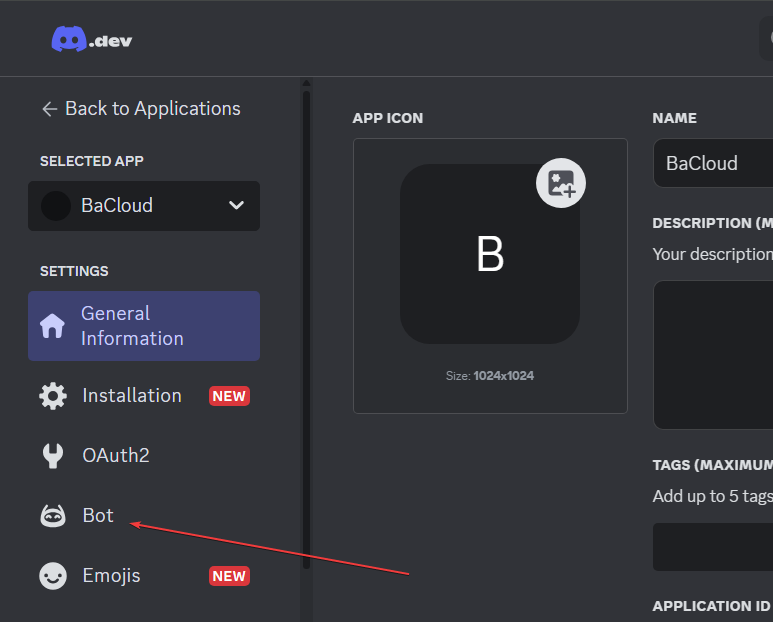
-
In the left-hand menu, click the Bot tab. The bot user will be automatically set up, and you will see its settings, including username, token, and permissions.
Secure and Copy the Token
The bot token is the key that allows your code to log in as the bot.
-
In the Bot tab, locate the Token section. This is the secret key your bot uses to authenticate with Discord’s servers.
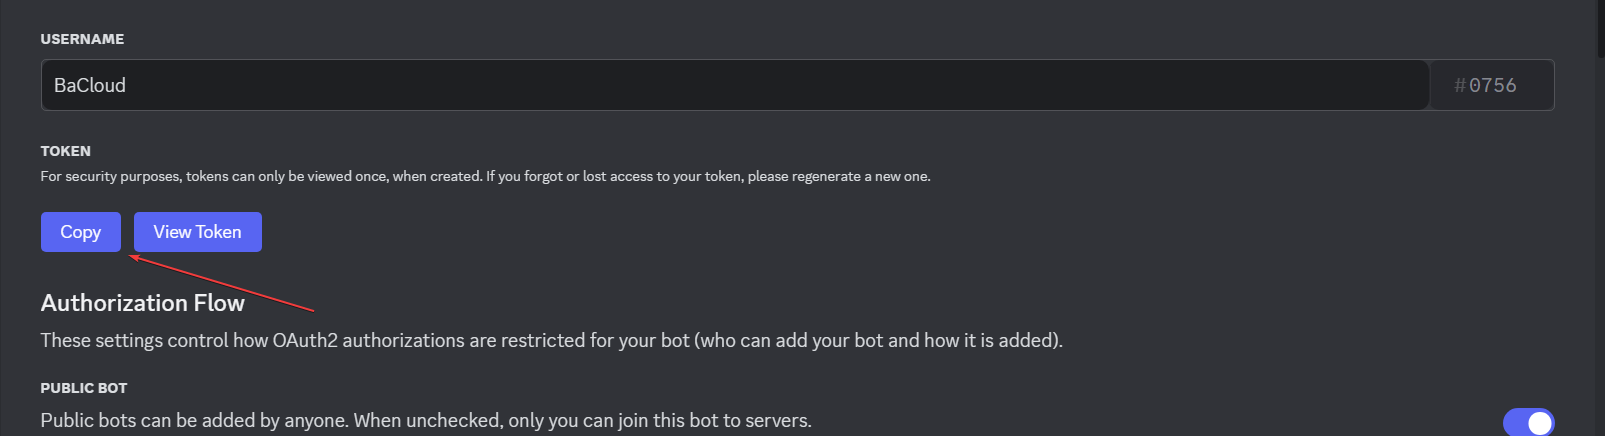
-
Click Copy to save the token somewhere safe. You will only be able to view the token once. If you lose it, you’ll need to regenerate a new one. Never share your bot token publicly. Treat it like a password — anyone with access can control your bot.
We’ll use this token later in your bot’s configuration.
Invite the Bot to a Server
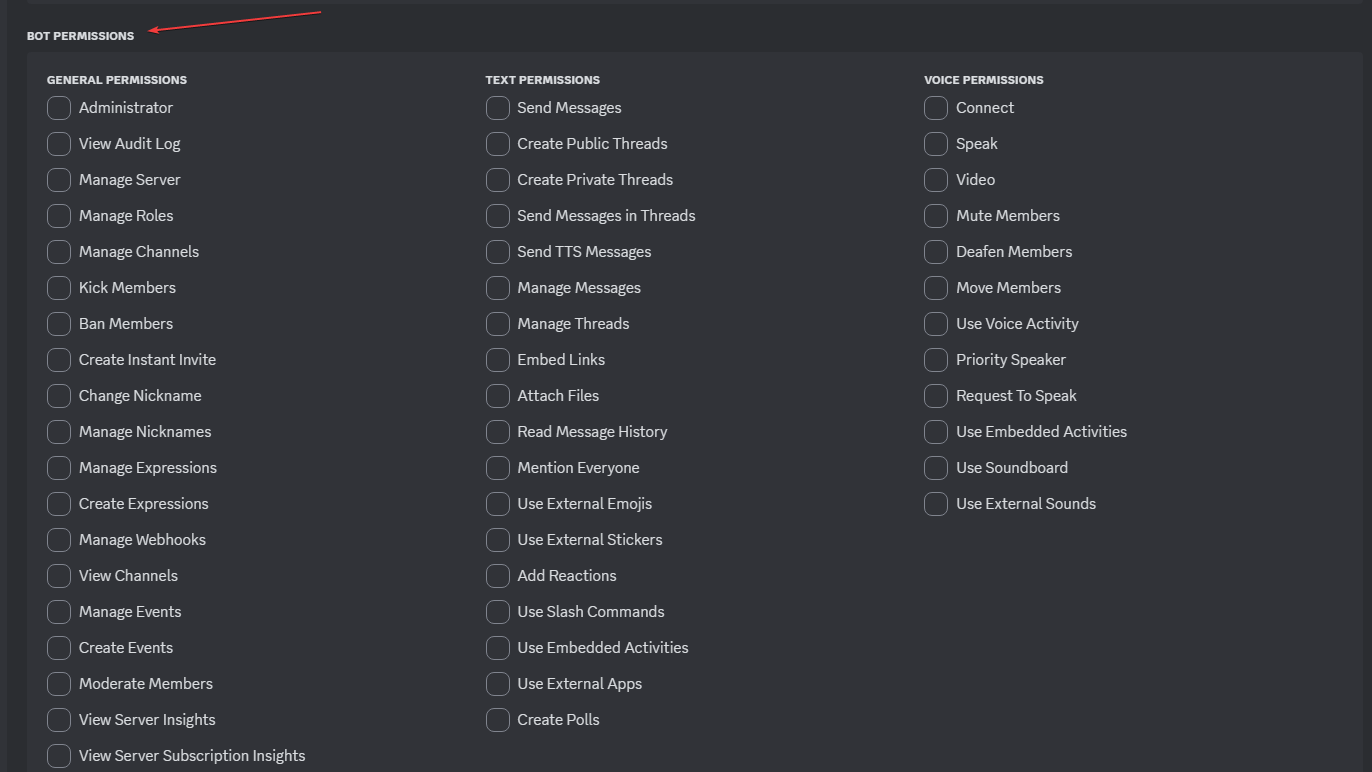
To let the bot join your server, you need to generate an invite link:
-
In the left-hand menu, go to OAuth2 → URL Generator.
-
Under Scopes, check the box for bot.
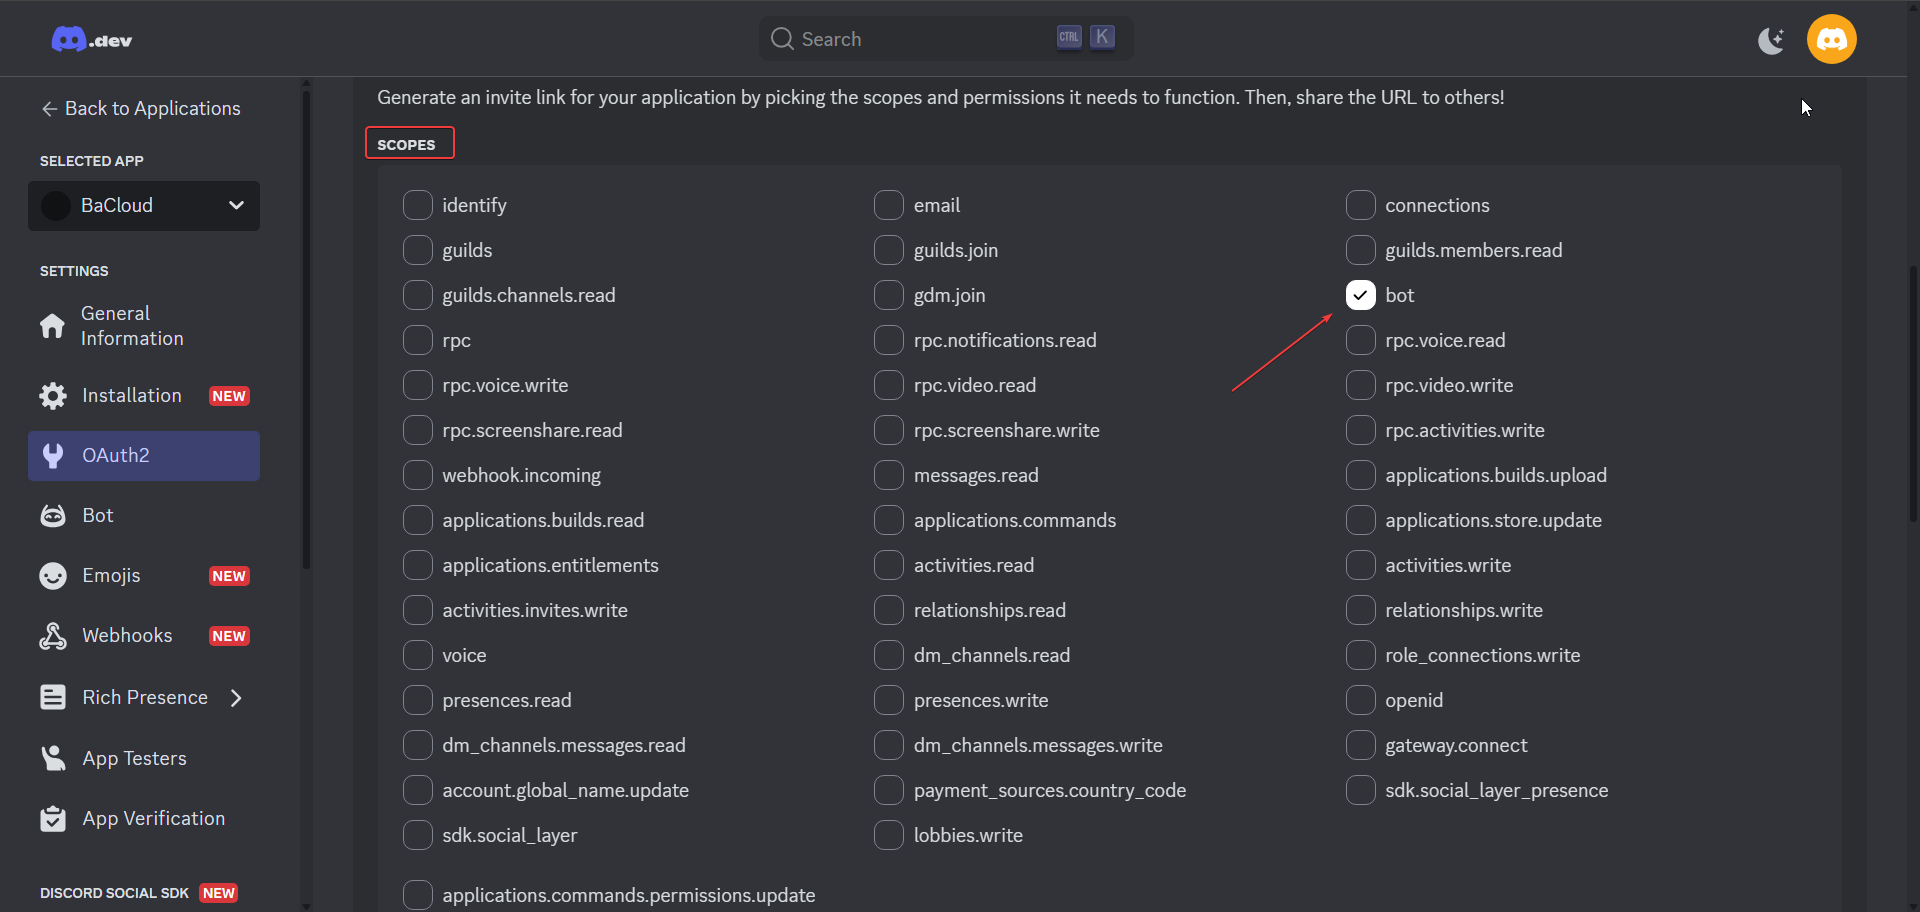
-
Under Bot Permissions, select the permissions your bot needs (for example: Send Messages, Read Message History, Manage Messages).
-
Copy the generated invite link.

-
Paste the invite link into your browser, select your server, and authorize the bot to join.
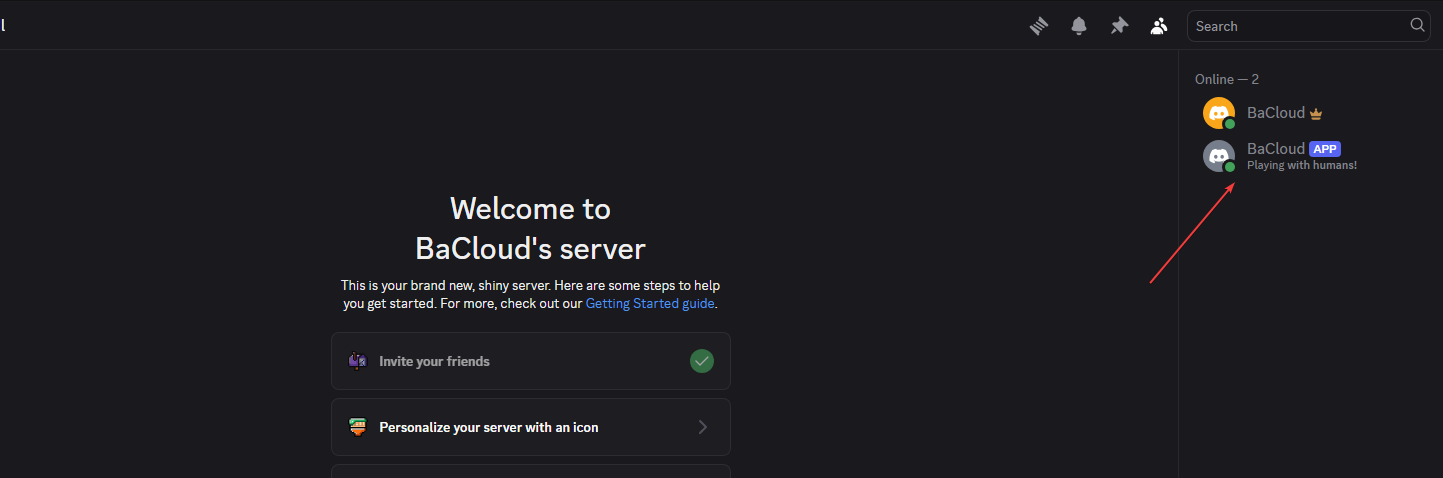
Once invited, the bot will appear offline on your server. Don’t worry, it will come online when you run the bot code on your VPS
Step 3. Downloading the Bot Template
To get your bot up and running quickly, we’ll use a simple, community-maintained Python Discord bot template. It provides a basic structure with common features like command and slash command handling, making it easy to customize. This open-source template is available on GitHub.
Clone the Template Repository
Run the following command in your VPS terminal to download the bot’s code:
|
git clone https://github.com/kkrypt0nn/Python-Discord-Bot-Template.git |

Then navigate into the project folder:
|
cd Python-Discord-Bot-Template |
Install Python Dependencies
With your virtual environment activated, install the necessary Python packages by running:
|
pip install -r requirements.txt |
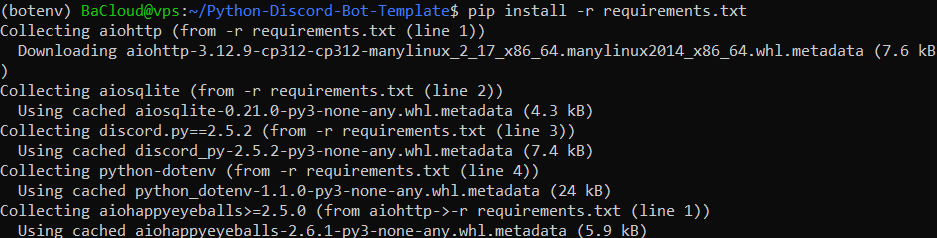
This installs all the libraries the bot needs to run.
Step 4. Configuring the Bot Settings
If you followed the previous steps, you should already be inside the project folder (Python-Discord-Bot-Template). From here, we’ll update the bot’s configuration and secure your sensitive files.
Edit the .env File
Instead of hardcoding sensitive info into your code, we use a .env file to keep your bot token and server ID secure.
Create or open the .env file in your project folder:
|
nano .env |
Add the following lines (replace the placeholder values with your actual token and server ID):
|
DISCORD_TOKEN=YOUR_DISCORD_BOT_TOKEN_HERE |
To get your Server ID. In Discord, first make sure Developer Mode is enabled. To do this, go to User Settings > Advanced, then toggle on Developer Mode. After that, right-click your server name in the left sidebar and select “Copy Server ID.”
After pasting, save and exit the editor (Ctrl + X, then Y, then Enter).
Load Your Settings in the Bot Script
Open the main bot file, usually bot.py:
|
nano bot.py |
At the very top of the file, add or confirm these imports:
|
import os |
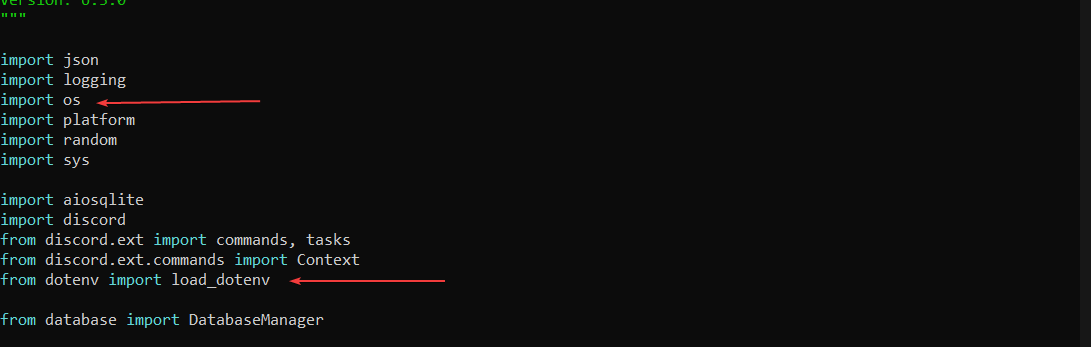
These lines let your Python script load the variables stored in .env.
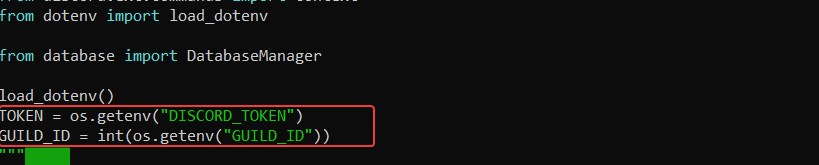
Just below the imports, add this code to load your .env file and retrieve your Discord bot token and server ID by referencing their environment variable names — not the actual values:
|
load_dotenv() # Load variables from .env file |
Set Your Bot’s Command Prefix
Your bot needs to know which character(s) to listen for when users enter commands, that’s what a command prefix is.
In the same file where your bot is defined (typically bot.py), scroll to the class constructor; usually named something like MyBot or DiscordBot.
Look for a block of code like this:
|
super().__init__( |
This means the bot expects a prefix to be provided via a PREFIX environment variable in your .env file.
Since we’re using a fixed prefix (!) for simplicity, update the code block to:
|
super().__init__( |

This tells your bot to listen for commands starting with ! or when directly mentioned.
Use the Token to Run Your Bot
At the very bottom of bot.py, locate the line that starts your bot. It might look like this:
|
bot.run("your_token_here") |
Replace it with:
|
bot.run(TOKEN) |

This ensures your bot uses the token securely loaded from the .env file when connecting to Discord.
Enable Message Content Intent
Discord bots require explicit permission to read message content (like chat commands). This is a “Privileged Intent” that you have to enable both on Discord’s Developer Portal and in your bot’s code. Without this step, your bot won’t respond to commands like !ping or !help.
Enable Message Content Intent on Discord Developer Portal
-
Go to the Discord Developer Portal.
-
Select your bot application.
-
Click Bot on the sidebar.
-
Scroll down to Privileged Gateway Intents.
-
Enable the toggle for Message Content Intent.
-
Click Save Changes.
Update Your Bot’s Code to Use Message Content Intent
-
Open your bot’s main Python file. If your bot’s main file is called bot.py, run this command in your terminal while inside your bot folder:
|
nano bot.py |
-
Locate the part where the bot’s intents are set up. It should look like this:
|
intents = discord.Intents.default() |

-
Now, do one of the following:
-
If you see the line below but it starts with a # (meaning it’s commented out), remove the # at the start of the line to uncomment it:
|
# intents.message_content = True |
Change it to:
|
intents.message_content = True |

-
If the line does not exist anywhere in your code, add this line immediately after the intents declaration:
|
intents = discord.Intents.default() |
After that’s done, Save the file and exit.
Use .gitignore to Protect Your Token
If you’re using Git for version control, make sure sensitive files like your bot token are not accidentally committed.
-
Open or Create the .gitignore File
Inside your project directory, run:
|
nano .gitignore |
This command will open the .gitignore file if it exists, or create a new one if it doesn’t.
-
Add Config Files to .gitignore
Add the following line (anywhere in the file, or under a “# Configuration” section if you want to stay organized):
|
.env |
This tells Git to ignore these sensitive files. Once you’ve added the lines, save and exit the editor.
Step 5. Running the Bot
Now that everything is configured, it’s time to bring your bot to life.
Ensure you’re still in the project folder, specifically the one you cloned earlier (Python-Discord-Bot-Template). From inside that folder, run:
|
python bot.py |
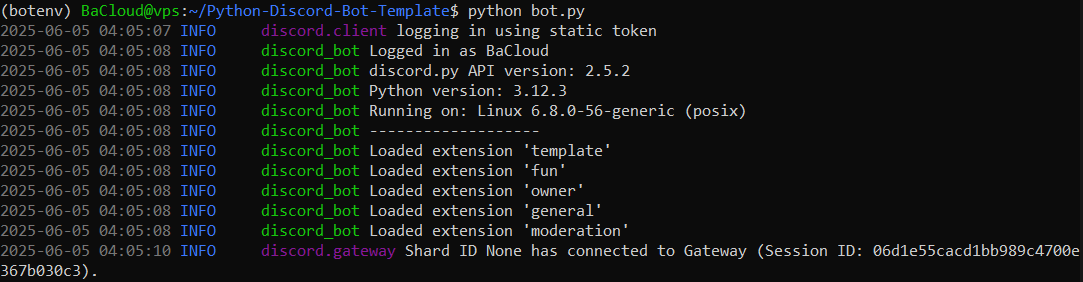
If everything is set up correctly, you’ll see an output like the one above, indicating the bot has started successfully. Open your Discord server, the bot should now appear online in the member list. It’s ready to respond to commands.
Step 6. Testing the Bot
Once your bot is running, you can verify that it was installed and configured correctly.
Open your Discord server and try a test command in a channel the bot has access to:
|
!ping |
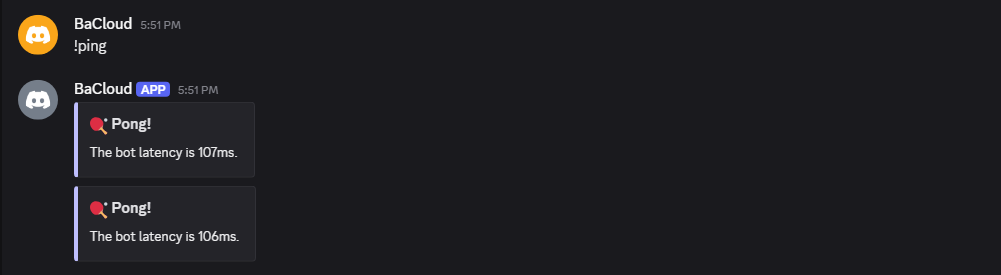
If the bot responds with a message like the one above, your setup is working correctly. The bot is now connected and ready to respond to commands.
By default, the bot will remain online only as long as this terminal session is active.
Conclusion
At this point, you’ve successfully installed and configured your Discord bot on a VPS. It’s connected to your server, responding to commands, and running in your terminal. However, your bot remains live only as long as your terminal session is open. To make it truly production-ready and keep it online 24/7, you’ll need to run it as a background service.