
Ubuntu 24.04 LTS "Noble Numbat" is the latest long-term support (LTS) release in the Ubuntu family, and it’s packed with meaningful improvements. At its core, Ubuntu 24.04 ships with the Linux 6.8 kernel, offering better hardware compatibility and performance, along with updated packages, enhanced security, and a refreshed interface. It’s a solid upgrade from Ubuntu 22.04 LTS ("Jammy Jellyfish"), especially for users who want the latest features without compromising stability.
With the release of Ubuntu 24.04.1 in August 2024, Canonical officially opened the door for direct upgrades from 22.04, eliminating the need to pass through interim versions like 23.10.
In this guide, we’ll walk you through the process of safely performing an in-place upgrade, keeping your apps, files, and configurations intact.
Key Considerations Before You Upgrade
Before starting the upgrade, it’s important to consider whether moving from Ubuntu 22.04 LTS to 24.04 LTS is the right choice for your setup.
Looking for a reliable Ubuntu VPS? Get a 100% NVMe-based Ubuntu VPS in minutes! Multiple locations worldwide!
Get Ubuntu VPS
Why Upgrade?
- Newer Kernel: Ubuntu 24.04 uses Linux kernel 6.8, which offers improved hardware support and performance enhancements.
- Updated Software: Key packages and system libraries are updated, providing better features and security.
- Security Improvements: As a new Long-Term Support (LTS) release, 24.04 will receive security patches and support for the next five years.
What to Consider
- Stability Needs: For systems running important or production workloads, it's best to wait for at least the first point release before upgrading from a previous LTS. Now that Ubuntu 24.04.1 LTS is out, it's a stable and recommended upgrade target for both production and development systems.
- Software Compatibility: Ensure the applications and services you rely on are compatible with the new release to avoid disruptions.
Prerequisites
Before upgrading, make sure your system is ready. Skipping these basics can lead to a failed upgrade or downtime.
- Ubuntu 22.04 LTS Installed: This guide is for systems currently running Ubuntu 22.04 (Jammy Jellyfish). Check with lsb_release -a.
- Backup Recommended: If the system is in production or holds important data, back it up first.
- Sudo or Root Access: You’ll need admin privileges. If you're unsure, run sudo whoami to confirm.
- Stable Internet Connection: The upgrade downloads a significant amount of data, so avoid using unreliable connections, especially on remote systems.
- At Least 25 GB Free Disk Space: Check with df -h /. Low disk space is a common cause of failed upgrades.
Step 1: Backup Your Files
Before you begin the upgrade, make sure your important data is backed up. Although in-place upgrades are generally safe, unexpected issues can still occur, especially on systems with custom configurations or third-party software.
How to Back Up
You can use any of the following methods, depending on your setup:
- External Storage: Copy files to a USB drive or external hard disk.
- Network Backup: Use a NAS (Network Attached Storage) if available.
- Cloud Storage: Services like Dropbox, Google Drive, or rsync to a remote server can work well.
If you're backing up a VPS:
- Create snapshots if your VPS provider supports them. They let you roll back quickly if something goes wrong.
Note for BaCloud VPS users: BaCloud offers optional server backup services with features such as scheduled backups, point-in-time restore, and encryption. Learn more at BaCloud Online Backup.
Step 2. Prepare for Remote Upgrades (Optional)
Upgrading over SSH risks losing connection if the SSH service restarts. To avoid being locked out, Ubuntu’s upgrade tool supports a fallback SSH port: 1022.
To allow this port through your firewall, run the appropriate command below based on your firewall setup:
- For UFW users, allow incoming TCP connections on port 1022 and reload the firewall:
|
sudo ufw allow 1022/tcp |
- For iptables users, insert a rule to accept traffic on port 1022:
|
sudo /sbin/iptables -I INPUT -p tcp --dport 1022 -j ACCEPT |
Next, make sure your SSH server listens on port 1022 in addition to port 22 by editing its configuration file. Open /etc/ssh/sshd_config and ensure the following lines are present and not commented out (i.e., no # at the beginning). If they don’t exist, add them:
|
Port 22 |
After saving the file, restart SSH to apply the changes:
|
sudo systemctl restart ssh |
Before starting the upgrade, test your fallback connection by opening a new terminal and connecting on port 1022:
|
ssh -p 1022 your-user@your-server-ip |
If you can connect, your backup SSH access is ready in case port 22 drops during the upgrade.
Once the upgrade completes and SSH on port 22 is confirmed working, don’t forget to remove or restrict access to port 1022 to keep your server secure.
Step 3: Prepare Your Current Ubuntu 22.04 System
Before upgrading, make sure your system is fully updated. This reduces the chance of errors during the upgrade process.
-
Update all system packages
Run this command to update your package lists, upgrade installed packages, perform a full upgrade, and remove unnecessary packages:
|
sudo apt update && sudo apt upgrade -y && sudo apt dist-upgrade -y && sudo apt autoremove |

-
Check your current Ubuntu version
Make sure you are running Ubuntu 22.04.5 LTS:
|
cat /etc/os-release |
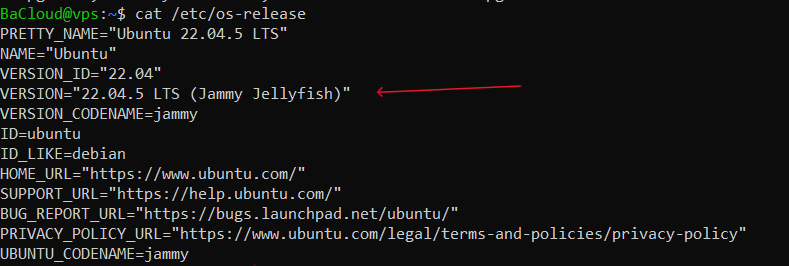
You should see a line like this: VERSION="22.04.5 LTS (Jammy Jellyfish)" This confirms that your system is ready for the upgrade to Ubuntu 24.04.
Step 4: Run and Complete the Upgrade
Now that your system is prepared, updated, and you’ve enabled the fallback SSH port 1022, it’s time to begin the upgrade to Ubuntu 24.04 LTS (Noble Numbat).
Begin the Upgrade
To start the upgrade, use the following command:
|
do-release-upgrade |
If you're connected via SSH (e.g., upgrading a remote VPS), it’s safer to run:
|
do-release-upgrade -f DistUpgradeView=Text |
This ensures the upgrade runs entirely in your terminal session and avoids issues with graphical prompts. After running the command, you will see the welcome message for Ubuntu 24.04:
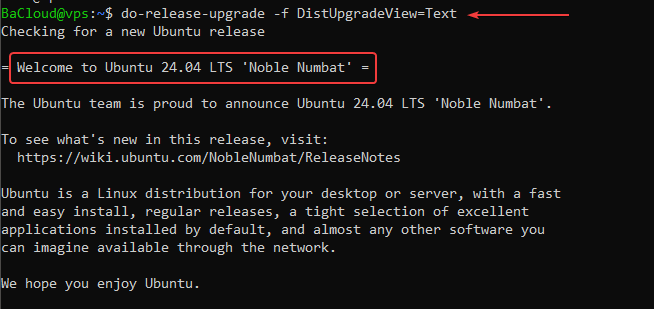
This confirms that a new long-term support (LTS) version is available and the system is ready to upgrade.
Next, you'll see some helpful information about Ubuntu, bug reporting, and ways to get involved in the community:
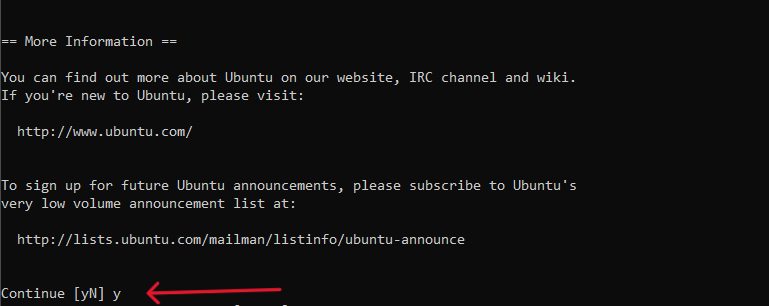
This section is informational. You can safely continue the upgrade by typing: y
SSH Session Warning
Because you're running the upgrade over an SSH session, you'll be warned about the risks:
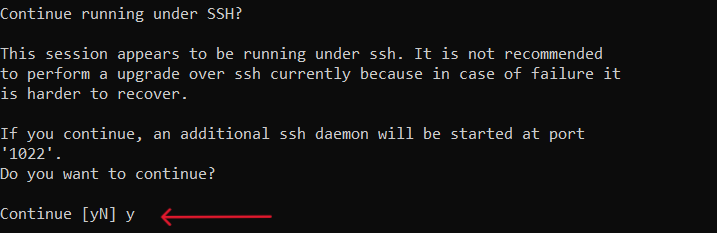
Ubuntu will offer to start a fallback SSH daemon on port 1022 to help you recover if your connection drops. Since we already opened port 1022 on the firewall and configured SSH to allow it, type y to continue and press ENTER.
You'll then see a message confirming that the additional SSH service is being launched:
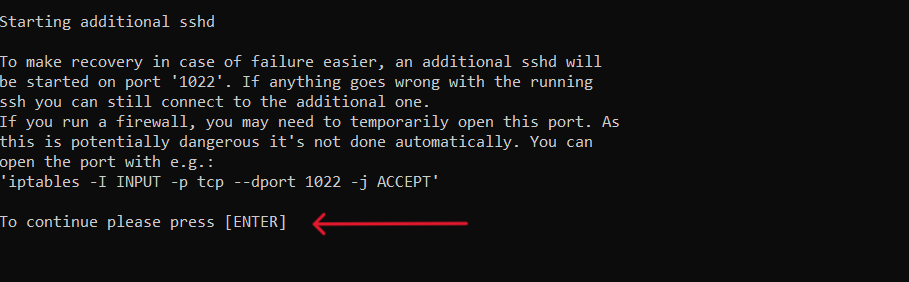
You may be reminded to open port 1022 manually if you haven't. In our case, this step is already complete, so you can just press ENTER to proceed.
Upgrade Confirmation
Next, the system will summarize the upgrade details:
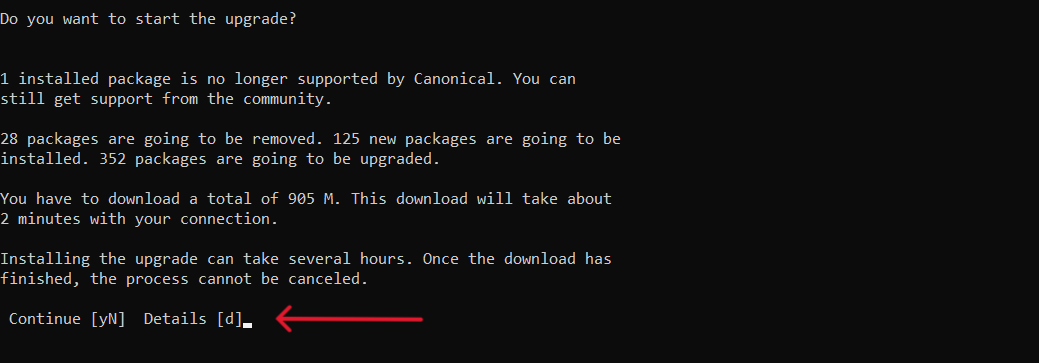
It also informs you of the estimated download size and duration. Once you're ready, type: y to proceed with downloading and installing packages.
Configuration File Prompts
During the upgrade, you may encounter prompts like this:
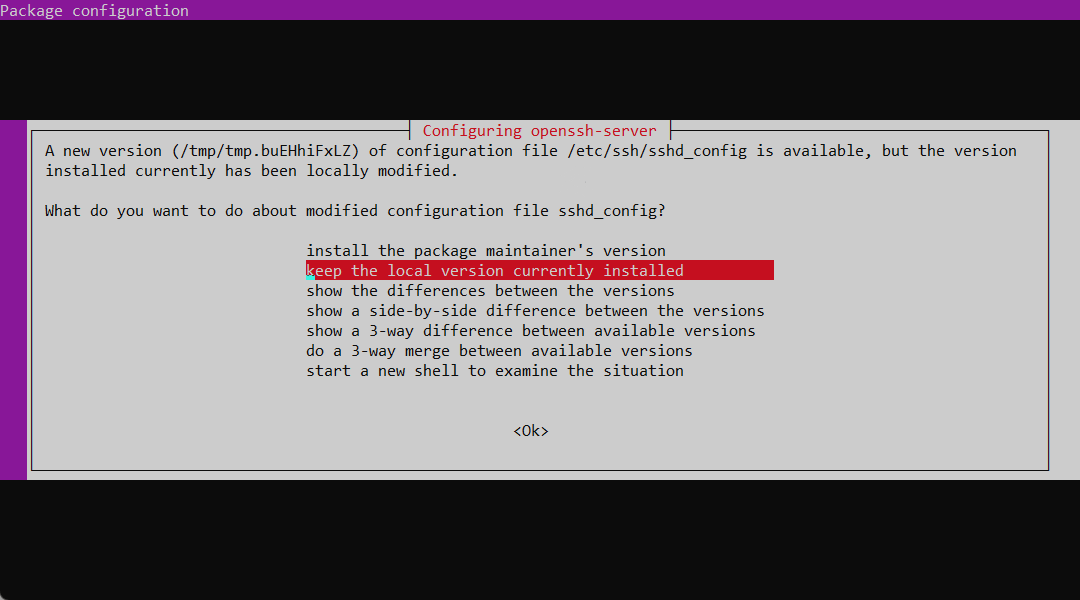
Ubuntu is asking whether to keep your current configuration or overwrite it with a default version. You can choose to keep the local version currently installed to preserve your custom settings, especially if you've made changes like enabling port 1022.
Final Confirmation & Reboot
When the upgrade is complete, you’ll see an output similar to the one below:

Type y and press ENTER to reboot into your newly upgraded Ubuntu 24.04 system.
Step 5: Verify the Upgrade
After the reboot, you should see a message like the one in the image below:

This indicates that the upgrade was successful. To further verify your system is now running Ubuntu 24.04, run the following command:
|
cat /etc/os-release |
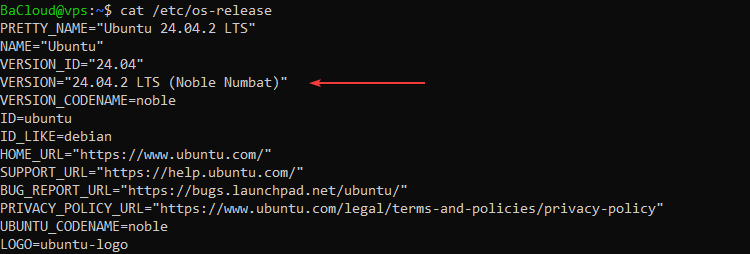
Look for this line in the output: VERSION="24.04 LTS (Noble Numbat)" This confirms that your system is now on Ubuntu 24.04 LTS. To ensure your system is fully up to date, run the following command:
|
sudo apt update && sudo apt upgrade -y |
This checks for any remaining updates and applies them to complete the transition to Ubuntu 24.04 LTS.
Conclusion
Upgrading from Ubuntu 22.04 LTS to 24.04 LTS is a straightforward process if you follow the right steps. With better hardware support, updated software, and long-term security updates, 24.04 is a solid choice for both production and development systems. Just make sure you prepare your system, back up your data, and check compatibility before starting. Once the upgrade is complete, you’ll be ready to take advantage of the latest Ubuntu improvements without compromising stability.
For more in-depth tutorials, visit the BaCloud blog, where you’ll find helpful guides.