


Coolify is an open-source, self-hosted Platform-as-a-Service (PaaS) that simplifies the deployment and management of applications, databases, and services on your own infrastructure. Combining an intuitive web interface with Docker makes application deployment and server management more straightforward.
In this guide, we'll walk you through installing Coolify on an Ubuntu 26.04 LTS VPS using the official installer, including verifying the installation and accessing the web dashboard so you can start deploying your applications.
Prerequisites
Before getting started, ensure your BaCloud VPS meets the following requirements:
-
Ubuntu 26.04 LTS installed
-
Root SSH access (recommended), or a sudo-enabled user with SSH access
-
Minimum server specifications: 2 CPU cores, 2 GB RAM (4 GB or more recommended for production), and 30 GB of available storage
-
A registered domain name (optional, but recommended for HTTPS and production deployments)
-
Ports 22, 80, 443, and 8000 must be available and not already in use.
Step 1 – Update Your Ubuntu System
Before installing Coolify, update your Ubuntu system to ensure it has the latest security patches, bug fixes, and package updates. This helps improve system stability and reduces the risk of installation issues.
Run the following command to update the package index and upgrade all installed packages:
sudo apt update && sudo apt upgrade -yIf the upgrade installs a new Linux kernel, reboot the server before continuing so all updates take effect:
sudo rebootStep 2 – Install Coolify
Coolify provides an official installation script that automates the setup process. If Docker Engine is not already installed, the installer installs and configures it automatically before deploying the latest version of Coolify.
Run the following command to begin the installation:
curl -fsSL https://cdn.coollabs.io/coolify/install.sh | sudo bashThe installation may take several minutes to complete. During the process, the installer displays its progress in the terminal.
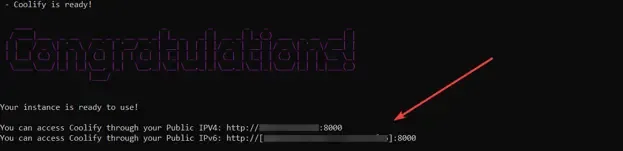
Once the installation finishes successfully, it displays the URL you can use to access the Coolify dashboard, similar to the output below:
Step 3 – Verify the Installation
After installation, verify that Docker and the Coolify services are running correctly.
First, check the status of the Docker service:
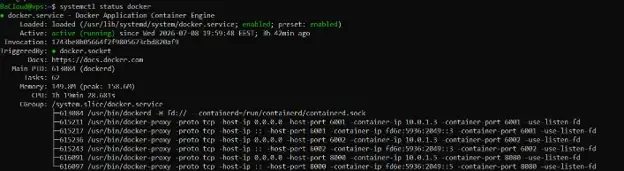
systemctl status dockerYou should see the Docker service listed as active (running), similar to the output below:
Next, view the running Docker containers:
docker psIf the installation is completed successfully, this command should list several running Coolify containers, including the core application and its supporting services. The exact container names and components may vary slightly between releases.

Finally, verify that Docker Compose is available:
docker compose versionIf Docker Compose is installed correctly, the command returns the installed version, similar to the following:

Step 4 – Access the Coolify Dashboard
Open the following address in your web browser, replacing YOUR_SERVER_IP with the public IP address of your VPS:
http://YOUR_SERVER_IP:8000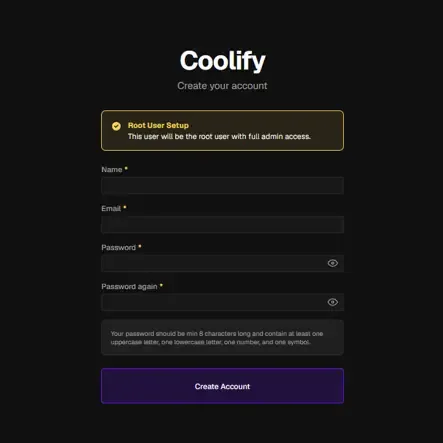
When the dashboard loads, create your first administrator account. This account has full administrative privileges and is used to manage your Coolify instance.
Step 5 – Complete the Initial Setup
After creating your administrator account, Coolify launches the initial setup wizard to connect your first server.
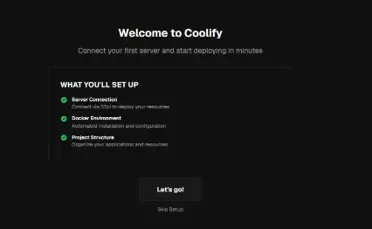
The welcome screen provides an overview of the setup process, including server connection, Docker configuration, and project organization.
Click Let’s go! to continue.
-
Choose a Server Type
On the Choose Server Type page, you can select where your applications and databases will be deployed.
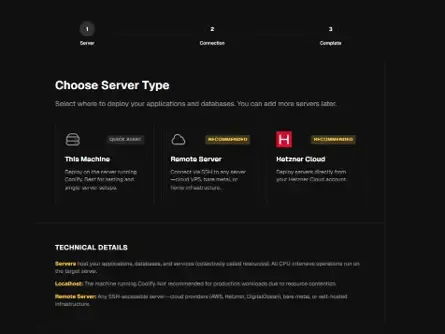
You will see the following options:
-
This machine – Use the same server running Coolify to host your applications and services.
-
Remote Server – Connect to another server via SSH to deploy applications and services.
-
Hetzner Cloud – Deploy servers directly from your Hetzner Cloud account.
For this guide, select Remote Server and continue.
-
Configure SSH Authentication
The next step is SSH Authentication, which allows Coolify to securely connect to your server.
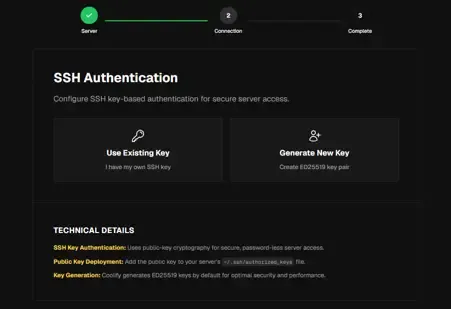
You will have two options:
-
Use Existing Key – Use an SSH key pair that you already have configured.
-
Generate New Key – Create a new ED25519 SSH key pair through Coolify.
For this guide, select Generate New Key and continue.
After selecting Generate New Key, Coolify displays the SSH Key Configuration page.
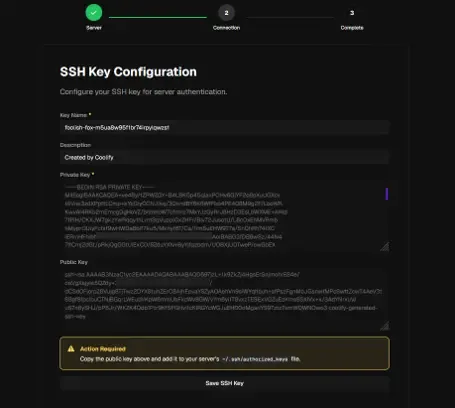
You will see the following fields:
-
Key Name – A name used to identify the SSH key.
-
Private Key – Generated automatically by Coolify.
-
Public Key – The key that needs to be added to your VPS.
Coolify instructs you to copy the public key and add it to your server's SSH authorized keys file.
To add the public key:
-
Open the SSH authorized keys file:
nano ~/.ssh/authorized_keys-
Paste the public key provided by Coolify into the file.
-
Save and exit the file.
Return to Coolify and click Save SSH Key to continue.
Once the SSH key is configured, Coolify can securely connect to your VPS and complete the server setup.
-
Configure the Server Connection
After saving the SSH key, Coolify moves to the Server Configuration step. Here, you provide the details Coolify needs to connect to your remote server.
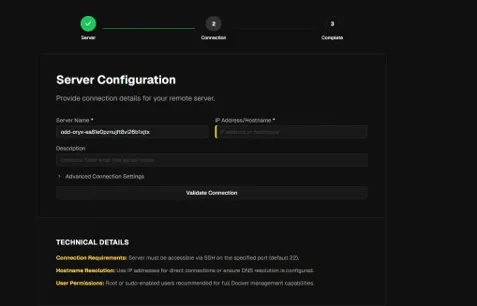
Fill in the following fields:
-
Server Name – Enter a name to identify your server in Coolify.
-
IP Address/Hostname – Enter your BaCloud VPS's public IP address.
-
Description – (Optional) Add a description to help identify the server.
Before continuing, ensure that:
-
The server is reachable through SSH.
-
SSH is available on the configured port (the default is 22).
-
The user account has sufficient permissions to manage Docker (a root user or sudo-enabled user is recommended).
After entering the required details, click Validate Connection to verify that Coolify can connect to your VPS.
-
Create Your First Project
After the server connection is successfully validated, Coolify displays the Project Setup screen.
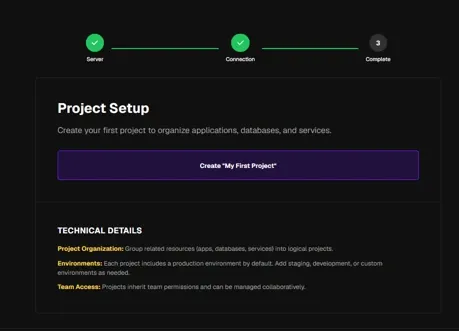
This step allows you to create your first project, which is used to organize your applications, databases, and services.
Click Create My First Project to continue.
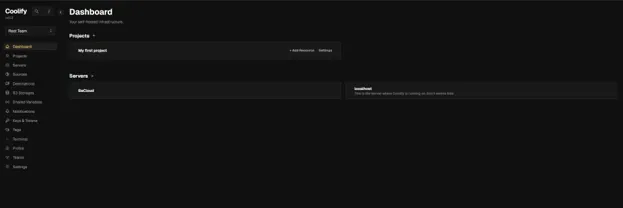
Once the project is created, Coolify will complete the initial setup and take you to the dashboard (as shown below).
Step 6 – Configure a Domain and HTTPS (Recommended)
Although you can access the Coolify dashboard using your server's IP address, configuring a domain name is recommended for production deployments. A domain allows you to securely access Coolify over HTTPS and provides a more convenient way to manage your instance.
To configure a domain:
-
Create an A record pointing your domain or subdomain to your VPS's public IP address.
-
Wait for the DNS changes to propagate.
-
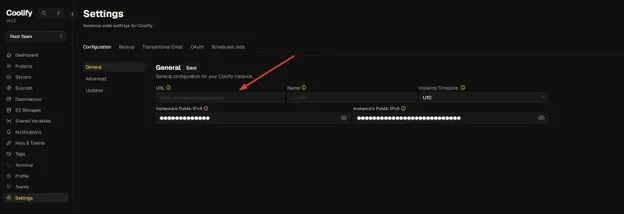
In the Coolify dashboard, on the left sidebar go to:
Settings → Configuration → General
-
Enter your domain in the URL field.
For example:
https://coolify.yourdomain.com-
Save the changes.
Once the domain resolves correctly, Coolify automatically configures HTTPS and manages TLS certificate renewal using its built-in reverse proxy.
You can then access your Coolify dashboard securely at:
https://coolify.yourdomain.comNote: For a standard Coolify installation, you do not need to manually configure Nginx, Apache, or Certbot. Coolify manages the reverse proxy configuration and TLS certificates automatically.
Conclusion
You have successfully installed Coolify on your Ubuntu 26.04 VPS and completed the initial setup. Your instance is now ready to deploy and manage applications, databases, and services from a centralized dashboard. As your infrastructure grows, you can also add additional servers and projects to manage all your deployments from a single interface.
For more in-depth tutorials, visit the BaCloud blog, where you’ll find helpful guides.