


Every millisecond matters in e-commerce. According to Google research, around 40% of shoppers leave if a page takes more than three seconds to load, making slow category browsing or checkout delays costly. Magento’s powerful features can also increase server load if the web server isn’t optimized. LiteSpeed and its native LSCache module improve Magento performance by accelerating dynamic pages, reducing PHP execution, and lowering resource usage, helping stores handle more traffic without adding hardware. In this guide, you will know how to set up a VPS with LiteSpeed for Magento.
Prerequisites
Before getting started, make sure you have the following in place:
- A system running Ubuntu 24.04 LTS (VPS or local server)
- Root or a user account with sudo privileges
- Basic familiarity with the Linux terminal
- Server resources meeting or exceeding: 4 vCPU, 8 GB RAM, 40 GB SSD storage, and 2–4 GB swap
Optional but recommended:
- A domain name pointing to your server’s IP, required if you plan to enable HTTPS or configure virtual hosts
Install a few helpful tools if missing, which make repository management, downloads, and firewall setup easier:
|
sudo apt install wget curl ufw unzip -y |
Ensuring these prerequisites are met will help avoid compatibility issues and make the LiteSpeed installation smoother.
Step 1 — Install OpenLiteSpeed
We’ll begin by installing OpenLiteSpeed, the web server that will serve your Magento store.
Update your server packages
Before installing, it’s best practice to refresh your package index so Ubuntu knows about the latest versions available:
|
sudo apt update |
Add the LiteSpeed repository
OpenLiteSpeed isn’t included in Ubuntu’s default repositories, so you need to add LiteSpeed’s official repo and key:
|
wget -O - https://repo.litespeed.sh | sudo bash |
This script automatically detects your Ubuntu version (22.04 / 24.04) and configures the correct source list.ssh
Install OpenLiteSpeed
Now you can go ahead and install the free, open-source version of LiteSpeed. This includes the core web server and the admin interface:
|
sudo apt install openlitespeed -y |
Once installed, enable the service and start it automatically at boot:
|
sudo systemctl enable --now lshttpd |
You can confirm it’s running with:
|
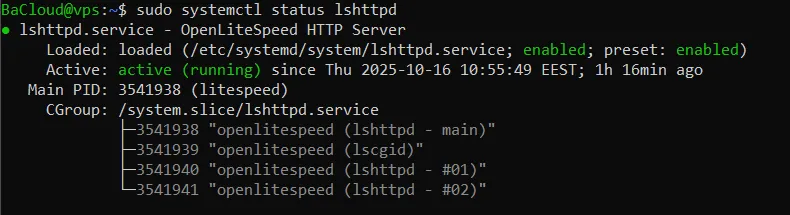
sudo systemctl status lshttpd |
You should see output similar to:
(Press Q to exit the status view.)
Access the WebAdmin Console
LiteSpeed comes with a built-in web admin interface for managing virtual hosts, PHP settings, and more.
Open your browser and visit:
|
http://<server-ip>:7080 |
(Replace <server-ip> with the public IP address of your server.)
You should see a login screen like the one below:
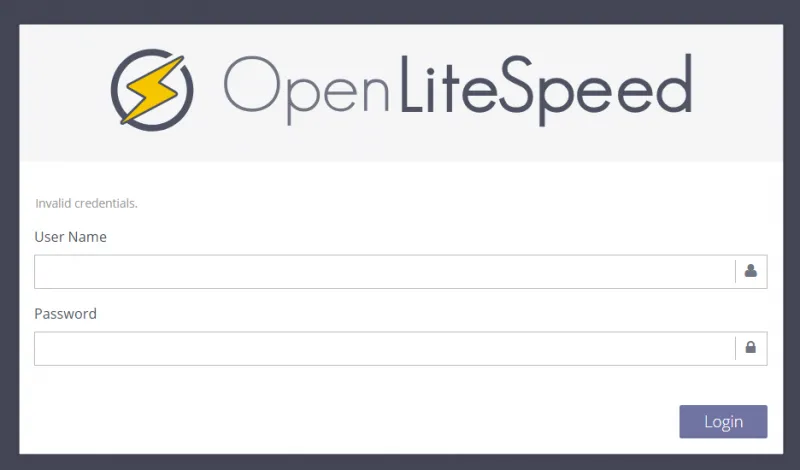
Create Admin Credentials
Before logging in, you must create your admin username and password.
Run this setup script and follow the prompts:
|
sudo /usr/local/lsws/admin/misc/admpass.sh |
After that, you can log in to the WebAdmin console using the credentials you just set.
Allow Access Through the Firewall (if needed)
If you can’t reach the WebAdmin panel, it might be blocked by your firewall.
Run the following to open the necessary ports for LiteSpeed (7080 for admin, 8088 for default web pages):
|
sudo ufw allow 7080,8088/tcp |
Then reload your firewall rules:
|
sudo ufw reload |
At this point, LiteSpeed should be fully installed and accessible from your browser.
Step 2 — Install PHP and required extensions
OpenLiteSpeed uses LSAPI for performance and compatibility. This step will install PHP, verify it, and configure OpenLiteSpeed to use it.
Enable the LiteSpeed repository
LiteSpeed provides its own repository to install LSAPI PHP packages compatible with OpenLiteSpeed.
|
sudo wget -O - https://rpms.litespeedtech.com/debian/enable_lst_debian_repo.sh | sudo bash |
Refresh package lists
After adding the LiteSpeed repository, update the package list so the system can find LSAPI PHP packages:
|
sudo apt update |
Install PHP 8.2 and core extensions
Install PHP 8.2 with essential extensions required by Magento (MySQL, Curl, Intl, OpCache). Optional extensions such as zip, Mbstring, Soap, gd, and Bcmath are included in lsphp82-common.
|
sudo apt install lsphp82 lsphp82-common lsphp82-mysql lsphp82-opcache lsphp82-curl lsphp82-intl -y |
Verify PHP installation
Check that PHP 8.2 is installed and accessible by OpenLiteSpeed, and confirm the version.
|
/usr/local/lsws/lsphp82/bin/lsphp -v |
Expected output:

Configure OpenLiteSpeed to use PHP 8.2
Edit the OpenLiteSpeed configuration file to replace any old PHP binary with the new PHP 8.2 LSAPI binary.
|
sudo nano /usr/local/lsws/conf/httpd_config.conf |
Search for old PHP lines like lsphp73/bin/lsphp or lsphp80/bin/lsphp.
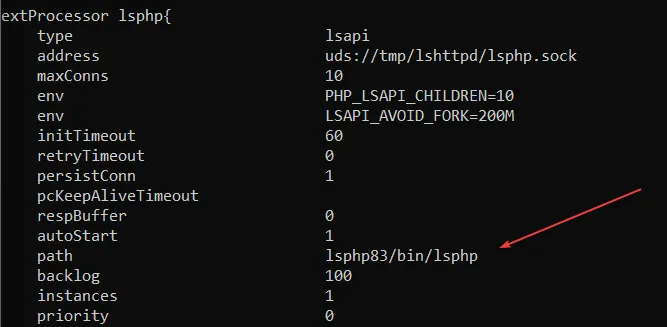
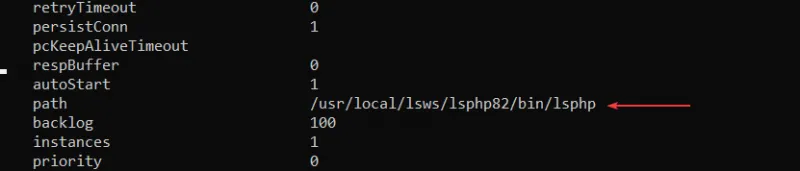
Replace with:
|
/usr/local/lsws/lsphp82/bin/lsphp |
Save and exit
Restart OpenLiteSpeed
Apply the configuration changes so OpenLiteSpeed starts using PHP 8.2.
|
sudo systemctl restart lsws |
Verify PHP is working via browser
Create a temporary PHP info file to confirm that OpenLiteSpeed is running PHP 8.2 correctly.
|
echo "<?php phpinfo(); ?>" | sudo tee /usr/local/lsws/Example/html/phpinfo.php |
Open a web browser and go to:
|
http://YOUR_SERVER_IP:8088/phpinfo.php |
Replace YOUR_SERVER_IP with your server’s actual IP.- You should see a page displaying PHP information. At the top, it should show:
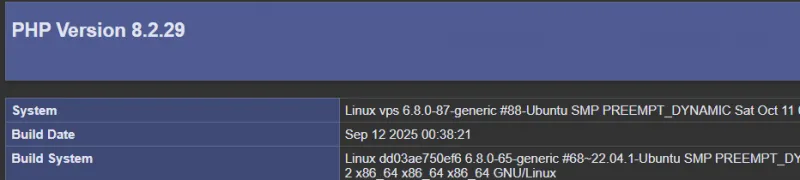
- This confirms that OpenLiteSpeed is using PHP 8.2 with all required extensions.
After verification, remove the test file for security:
|
sudo rm /usr/local/lsws/Example/html/phpinfo.php |
The system is ready to proceed to database setup.
Step 3 — Install MariaDB and create the Magento database
Magento requires a supported database version. For Magento 2.4.x, the safe MariaDB versions are 10.2–10.6 and 11.4. Using a newer version (like 11.8) will break the installer. This step will install MariaDB 11.4, secure it, and create a dedicated database and user for Magento.
Add the Official MariaDB Repository
To install the correct MariaDB version, you can use the official MariaDB setup script.
|
sudo curl -LsS https://downloads.mariadb.com/MariaDB/mariadb_repo_setup | sudo bash -s -- --mariadb-server-version=11.4 |
This command adds the MariaDB repository for version 11.4 and automatically configures your system.
Update Package Lists
After adding the repository, refresh your package index so Ubuntu can find MariaDB 11.4:
|
sudo apt update |
Install MariaDB
Run the following command to install MariaDB:
|
sudo apt install mariadb-server -y |
This installs MariaDB 11.4 and automatically starts the database service.
Secure the Installation
Run the built-in security script:
|
sudo mysql_secure_installation |
This tool helps you remove unsafe defaults. When prompted, you can safely use the following recommended responses for a new installation:
When asked for the current root password, press Enter. By default, MariaDB doesn’t set one on a new system.
- Switch to unix_socket authentication: n
- Change the root password: n (skip if fresh install)
- Remove anonymous users: y
- Disallow remote root login: y
- Remove test database: y
- Reload privilege tables: y
Create the Magento Database and User
Now, log in to MariaDB as the root user:
|
sudo mysql -u root -p |
When prompted for a password, press Enter (unless you set one in the previous step).
Once inside the MariaDB prompt (MariaDB [(none)]>), execute this commands:
|
CREATE DATABASE magento; |
Replace 'strongpassword' with your chosen password.
Confirm Database Creation
You can verify that the database exists with:
|
sudo mysql -e "SHOW DATABASES;" |
You should see Magento listed in the output.

MariaDB is now installed, secured, and ready for Magento.
Step 4 — Install Composer
Composer is required to manage Magento dependencies.
|
sudo apt install composer -y |
Verify installation:
|
composer --version |
You should see an output similar to this:
![]()
Step 5 — Install Elasticsearch (Magento 2.4+ requirement)
Magento 2.4+ requires Elasticsearch to handle product search and catalog indexing. This step ensures it is installed cleanly without repository errors.
Add the official Elastic 8.x repository
Add the GPG key:
|
curl -fsSL https://artifacts.elastic.co/GPG-KEY-elasticsearch | sudo gpg --dearmor -o /usr/share/keyrings/elasticsearch-keyring.gpg |
Add the repository:
|
echo "deb [signed-by=/usr/share/keyrings/elasticsearch-keyring.gpg] https://artifacts.elastic.co/packages/8.x/apt stable main" | sudo tee /etc/apt/sources.list.d/elasticsearch-8.x.list |
Refresh the package index:
This ensures you install Elasticsearch 8.x from the official source, avoiding outdated or broken 7.x repositories.
|
sudo apt update |
Install Elasticsearch
|
sudo apt install elasticsearch -y |
This downloads and installs Elasticsearch cleanly.
Enable and start the Elasticsearch service
|
sudo systemctl enable --now elasticsearch |
This ensures Elasticsearch starts automatically on server boot.
- Verify Elasticsearch is running
Verify by running:
|
sudo systemctl status elasticsearch |
You should see an output similar to this:

Step 6 — Create and Configure a Virtual Host for Magento
OpenLiteSpeed uses Virtual Hosts to define how each site is served, including document roots, rewrite rules, and PHP behavior. In this step, you will create a dedicated Virtual Host for Magento, configure it correctly, and make sure no default mappings interfere.
Create the Magento Web Root Directory
Create a directory where Magento will be installed:
|
sudo mkdir -p /var/www/magento |
Set the correct ownership and permissions:
|
sudo chown -R www-data:www-data /var/www/magento |
Using the www-data user ensures compatibility with PHP and prevents permission issues during deployment.
Access the OpenLiteSpeed WebAdmin Console
Open your browser and visit:
|
http://<server-ip>:7080 |
You can just log in using the credentials you previously created.
- Add a New Virtual Host
In the WebAdmin panel, navigate to:
Virtual Hosts → Add
Fill in the following:
- Virtual Host Name: magento
- Virtual Host Root: /usr/local/lsws/conf/vhosts/magento
- Config File: /usr/local/lsws/conf/vhosts/magento/vhconf.conf
- Enable Scripts/ExtApps: Yes
- Restrained: Yes
Click Save.
If prompted that the directory does not exist, create it:
Click Save again.
- Create the Virtual Host Configuration File
Create and edit the Virtual Host config:
|
sudo nano /usr/local/lsws/conf/vhosts/magento/vhconf.conf |
Paste the following:
|
docRoot /var/www/magento/pub |
These settings enable Magento rewrite rules, increase execution limits, and prevent admin form errors.
Save and exit the editor.
- Remove the Default “Example” Virtual Host Mapping
OpenLiteSpeed includes a default virtual host named Example for testing. Leaving it enabled can cause routing conflicts.
To remove it:
- Navigate in WebAdmin:
Listeners → Default → Virtual Host Mappings
- Locate the Example entry and click the delete icon.
- Click Save.
- Map the Magento Virtual Host to the Default Listener
In the same Virtual Host Mappings section, click Add and enter:
- Virtual Host: magento
- Domains: *
Click Save. Then, click Graceful Restart at the top-right of WebAdmin to reload OpenLiteSpeed with the new Virtual Host.
- Verify That OpenLiteSpeed Is Serving Files
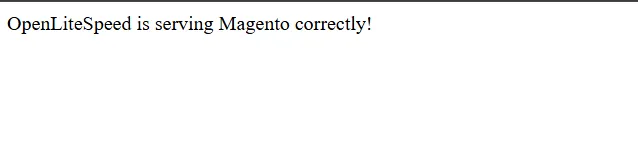
Create a temporary test file:
|
echo "OpenLiteSpeed is serving Magento correctly!" | sudo tee /var/www/magento/index.html |
Restart the server:
|
sudo systemctl restart lshttpd |
Open your browser and visit:
|
http://<server-ip>:8088 |
You should see the test message. Similar to this:
Once confirmed, remove the test file:
|
sudo rm /var/www/magento/index.html |
Right now, your OpenLiteSpeed server is fully prepared to serve Magento.
How to install Magento in a VPS server? Please read the following tutorial.