


Google Chrome is the world's most popular web browser, holding around 65-70% of the market share. In other words, roughly two out of every three internet users browse the web with Chrome. If you're switching to Ubuntu 24.04 and want the same browsing experience you had on Windows or macOS, installing Chrome is quick and easy.
In this guide, we’ll show you two easy ways to install Google Chrome on Ubuntu 24.04, using the graphical installer and the terminal. By the end, you’ll have Chrome installed, updated, and ready to use.
Prerequisites
Before installing Chrome, make sure you have the following:
-
An Ubuntu 24.04 system with internet access.
-
A user account with sudo privileges to install software.
-
Basic terminal familiarity if you want to use the command line method.
Method 1: Install Google Chrome Using the GUI
Note: This method requires Ubuntu Desktop (a graphical interface). If you’re on Ubuntu Server or another setup without a GUI, skip ahead to the Command Line method. If you’d like to add a GUI to your system, see our guide on how to install a GUI on Ubuntu 24.04.
Step 1: Download the Chrome .deb Installer
-
Open Firefox (the default browser on Ubuntu).
-
Go to the official Chrome website: https://www.google.com/chrome/.
-
Click Download Chrome and select the 64-bit .deb (for Debian/Ubuntu) option.
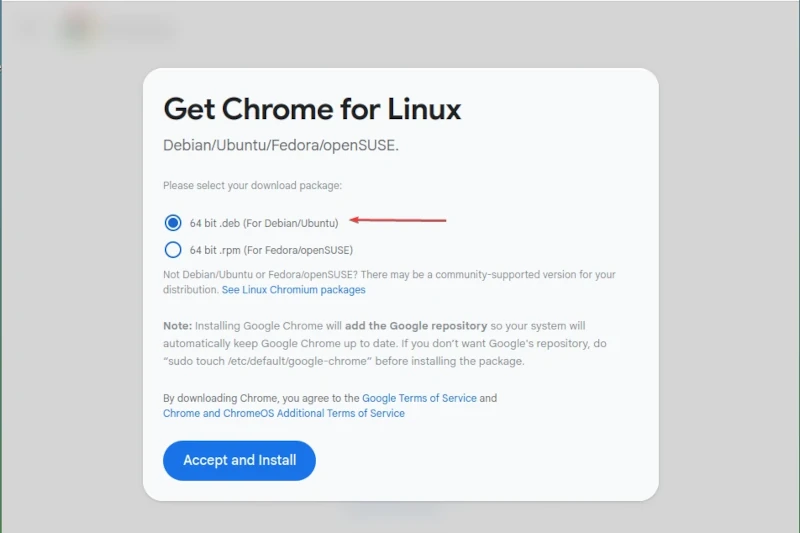
-
Save the file to your Downloads folder.
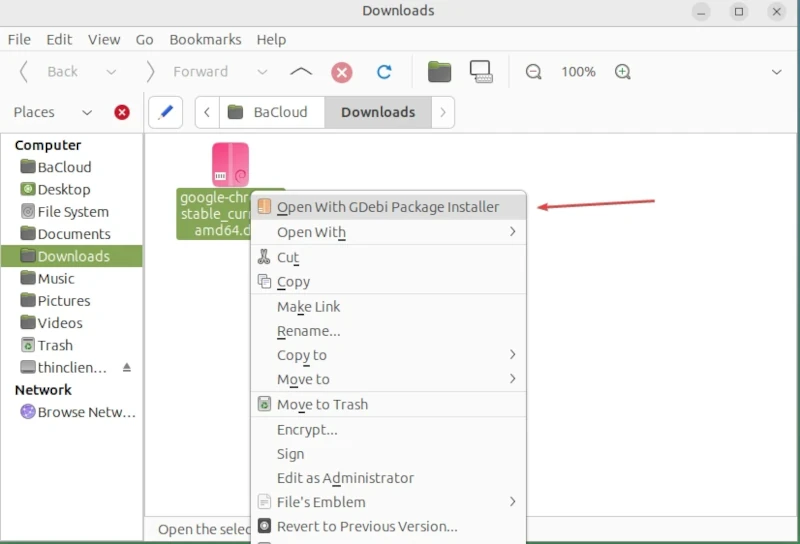
Step 2: Open the Installer
-
Navigate to your Downloads folder.
-
Right-click the file google-chrome-stable_current_amd64.deb.
-
Select Open With → Software Install (or GDebi Package Installer if it’s installed).
Step 3: Install Chrome
-
The Ubuntu Software Center (or GDebi) will open.
-
Click Install Package.
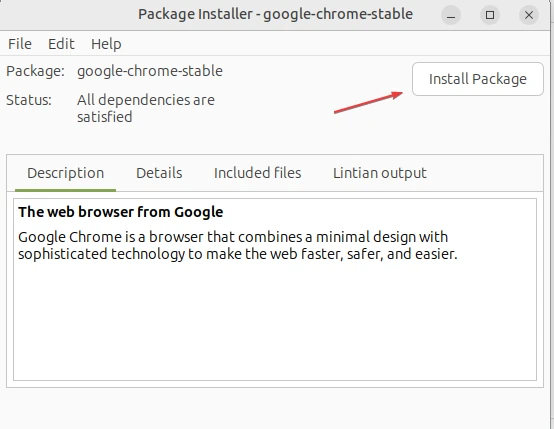
-
Enter your password when prompted.
-
Wait for the installation to complete.
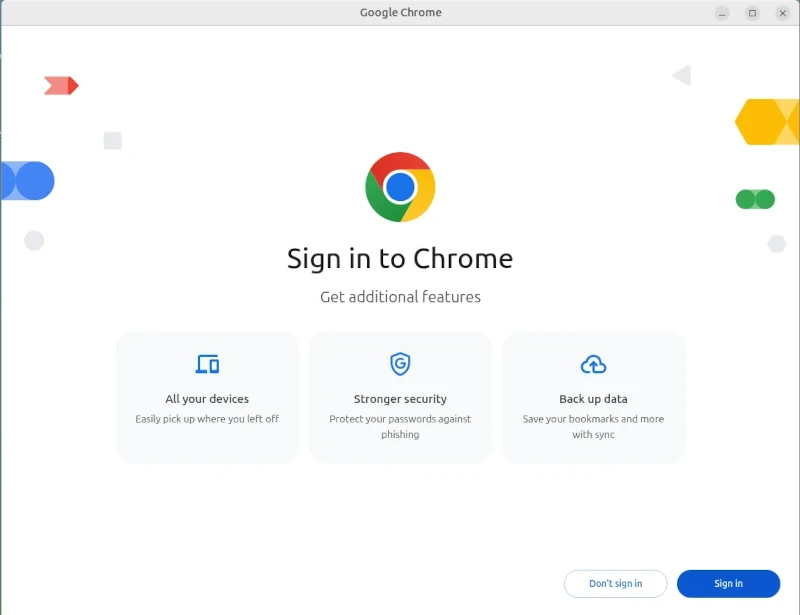
Step 4: Launch Chrome
-
Press the Super (Windows) key.
-
Search for Google Chrome in the Applications menu.
-
Click the Chrome icon to open it.
-
On first launch, you’ll see the welcome screen, where you sign in with your Google account to sync bookmarks, history, and extensions.
With this, you’ve successfully installed Google Chrome on Ubuntu 24.04 using the GUI method. Next, we’ll install Chrome using the Command Line method.
Method 2: Install Google Chrome Using the Command Line (CLI)
This method is faster and preferred by users who are comfortable working in the terminal.
Step 1: Download the Chrome .deb Installer
Run the following command to download the latest stable Chrome package directly from Google:
|
wget https://dl.google.com/linux/direct/google-chrome-stable_current_amd64.deb |
Step 2: Install Chrome
You can install the downloaded package in two ways:
Option A: Using dpkg (traditional method)
First, install the downloaded package:
|
sudo dpkg -i google-chrome-stable_current_amd64.deb |
If you see errors about missing dependencies, fix them by running:
|
sudo apt install -f |
If no errors appear, Chrome has been installed successfully.
Option B: Using apt (simpler, modern method)
This method is recommended because apt automatically takes care of any missing dependencies during installation. Just run:
|
sudo apt install ./google-chrome-stable_current_amd64.deb |
After this completes, Chrome is installed and ready to launch.
Step 3: Verify Installation
After the installation completes, you can launch Chrome in either of these ways:
-
From the Applications menu → search for Google Chrome and click the icon.
-
From the terminal, by running:
|
google-chrome-stable |
This will open the Chrome graphical window (requires Ubuntu Desktop with a GUI).
-
To confirm that Chrome installed successfully and check the version, run:
|
google-chrome --version |
If you get an output similar to the one below, Chrome has been successfully installed:
![]()
Keeping Chrome Updated
When you install Chrome using the .deb package, it automatically adds Google’s official repository to your system. This means Chrome will receive updates along with your regular system updates.
To update Chrome (and other packages) via the terminal, run:
|
sudo apt update && sudo apt upgrade |
This updates your package list and installs the latest updates for all software, including Google Chrome.
To confirm that Google’s repository is correctly added and check the installed version, run:
|
apt policy google-chrome-stable |
You should see output similar to the example below:
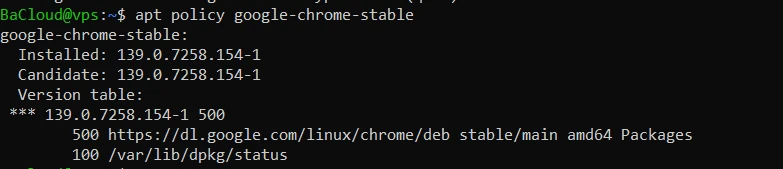
With this, Chrome will stay up to date automatically whenever you update your system.
Uninstalling Google Chrome
If you ever need to remove Google Chrome from your system, there are two options:
-
Remove Chrome but keep your configuration files
This command will uninstall Chrome while keeping your settings, bookmarks, and preferences intact:
|
sudo apt remove google-chrome-stable |
To clean up any leftover dependencies that are no longer needed, run:
|
sudo apt autoremove |
-
Remove Chrome completely, including configuration files
If you want to fully remove Chrome along with all associated configuration files, run:
|
sudo apt purge google-chrome-stable |
To remove any leftover dependencies after purging, run:
|
sudo apt autoremove |
Note: These commands work whether you installed Chrome via the GUI or the terminal.
After running the appropriate commands, Chrome will be fully removed from your system.
Conclusion
You have successfully installed Google Chrome on Ubuntu 24.04, and it will now stay updated automatically through your system’s package manager. To get the most out of your browser, you can set it as your default and sign in with your Google account to sync bookmarks, history, and extensions across devices. For users who prefer not to use the terminal, our GUI installation guide provides a complete step-by-step walkthrough.
For more in-depth tutorials, visit the BaCloud blog, where you’ll find helpful guides