


The GRUB bootloader enables you to select which operating system or kernel version to boot when your computer starts. By default, Ubuntu handles these settings for you, but sometimes you may want more control, especially if you dual-boot or want to customize the boot menu.
Grub Customizer is a simple graphical tool that simplifies this process. Instead of editing configuration files manually, you can use its interface to change the default OS, adjust the boot timeout, or tweak the appearance of the boot menu.
In this guide, you’ll learn how to install Grub Customizer on Ubuntu 24.04 and safely make fundamental changes.
Why Use Grub Customizer?
Editing GRUB manually means working with a text configuration file located at /etc/default/grub and then running update-grub in the terminal. While this method is powerful, it’s also easy to make a small mistake that could stop your system from booting.
Grub Customizer doesn’t replace GRUB — it simply gives you a safer, graphical way to adjust its settings without touching system files directly.
With Grub Customizer, you can:
- Change the default OS – for dual-boot systems, set Windows or another Linux distribution as the default without editing config files.
- Adjust the boot menu timeout – shorten the wait time (e.g., from 10 seconds to 3) or skip the menu entirely.
- Tweak the appearance – change the background image, fonts, or colors to match your preferences.
For most users, these are the only changes you’ll ever need and Grub Customizer makes them quick, safe, and beginner-friendly.
Prerequisites
Before starting, make sure you have the following:
- A system running Ubuntu 24.04
- A user account with sudo privileges to run administrative commands
- An active internet connection is required to download the necessary packages
Note: Grub Customizer requires a graphical interface. If you are using Ubuntu Server, you must
First, install a desktop environment. See our guide: How to Install and Set Up a Graphical Interface Desktop (GUI) on Ubuntu 24.04.
Update Your System
Before installing Grub Customizer, it’s important to update your system. Run the following command to update and upgrade your packages:
|
sudo apt update && sudo apt upgrade -y |
This updates your system, minimizing the risk of compatibility issues later on.
Install Grub Customizer
Grub Customizer isn’t included by default on Ubuntu, but you can install it using the official developer’s PPA.
Step 1: Add the Official Grub Customizer PPA
Grub Customizer is developed and maintained by Daniel Richter, and for Ubuntu 24.04, it’s only available through his official PPA.
Add it with:
|
sudo add-apt-repository ppa:danielrichter2007/grub-customizer |
When prompted, press Enter to confirm adding the PPA.
Then refresh your package lists:
|
sudo apt update |
Step 2: Install Grub Customizer
Install the package with:
|
sudo apt install grub-customizer -y |
Step 3: Verify Installation
Check that it’s installed correctly by running:
|
grub-customizer --version |

If you see a version number like the one in the image above, the installation was successful.
Launching Grub Customizer
Now that Grub Customizer is installed, let’s open it. You have two options:
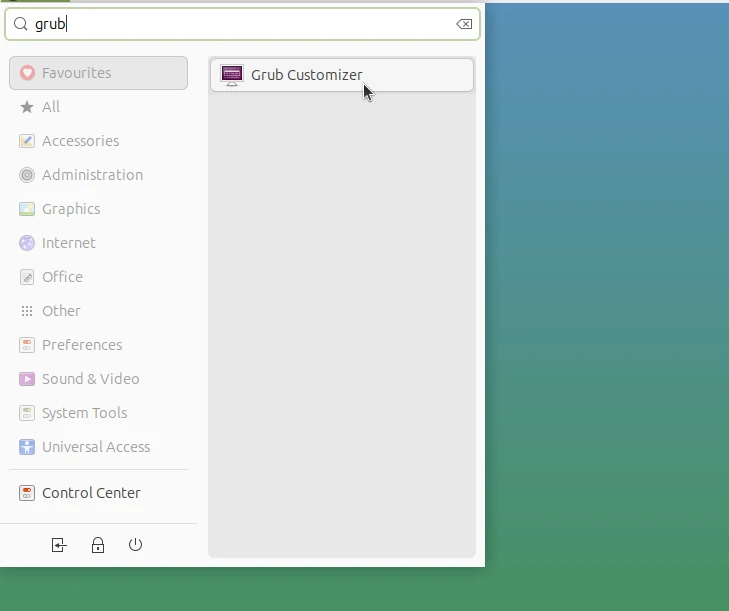
Option 1: From the application menu
- Open the Activities menu (top left).
- Search for Grub Customizer and click the icon.
Option 2: From the terminal
If you prefer using the terminal, run:
|
grub-customizer |
What You’ll See Inside
When you open Grub Customizer for the first time, Ubuntu will ask you to authenticate with your password. This is required because GRUB manages the bootloader, which is a core system component.
Once launched, you’ll see three primary tabs, like in the image below:
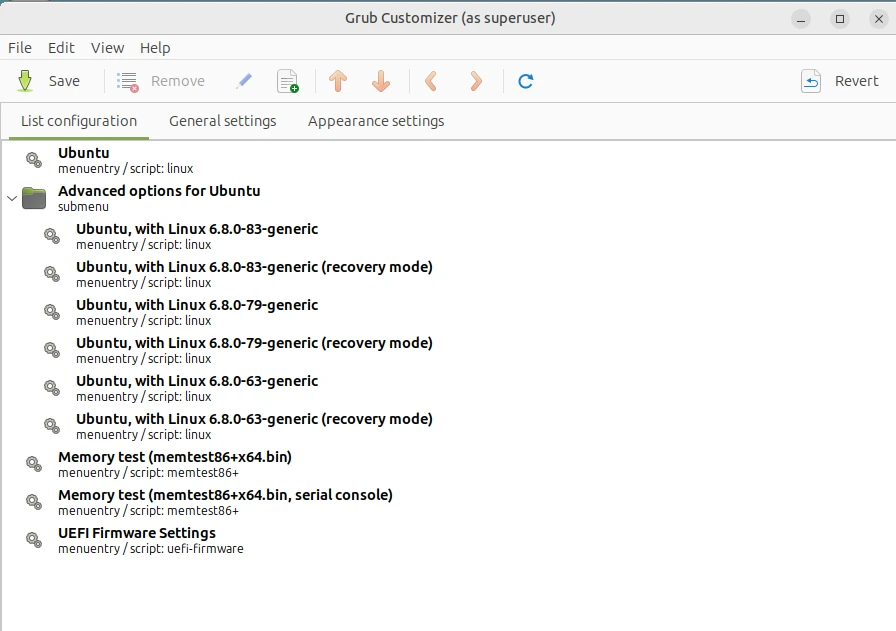
- List Configuration – Displays all boot entries (Ubuntu kernels, Windows if dual-booting, recovery mode, etc.). You can reorder or hide items here.
- General Settings – Lets you choose the default operating system and adjust the boot menu timeout (how long GRUB waits before auto-booting).
- Appearance Settings – Allows you to change the look of the boot menu, such as background image, text color, and fonts.
Some versions also show an Advanced Settings tab. This is where kernel parameters and other low-level options live. Beginners should avoid this unless they have a specific reason.
Making Changes Safely
Grub Customizer makes it easy to adjust standard bootloader settings without touching system files. Here are two safe examples for beginners:
Set the default OS
- Open the General Settings tab.
- Under Default Entry, you’ll see a dropdown list of boot options.
- If you only have Ubuntu, you’ll see entries like Ubuntu, Advanced options for Ubuntu (generic), and Recovery mode.
- If you dual-boot with Windows (or another OS), it will appear in this list as well.
- Select the system you want to boot automatically and click Save to apply the change. For example, choose Windows and click Save if you want it to start by default instead of Ubuntu.
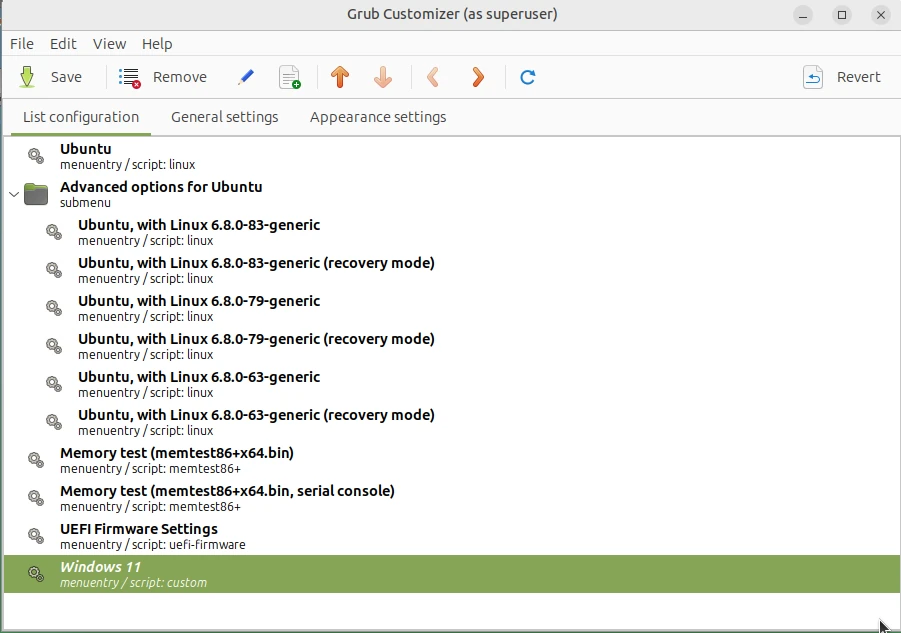
Alternatively, you can use the List Configuration tab to change boot order manually:
- Click the entry you want as the default (e.g., Windows).
- Use the ↑ Up arrow button to move it to the top of the list.
- Click Save to apply changes.
2. Change the boot timeout
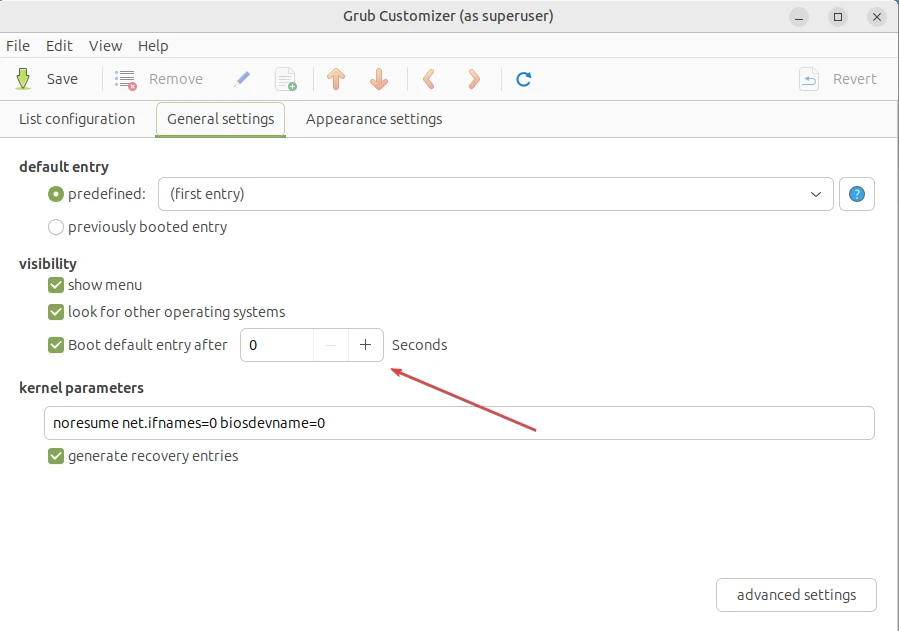
- Still in General Settings, adjust the Boot default entry after value.
- Example: change it from 10 seconds to 3 seconds so the menu doesn’t delay startup.
After making your changes, click Save, then reboot once to confirm everything works as expected.
Resetting or Removing Grub Customizer
If something goes wrong, you can either remove the app or thoroughly purge it (remove the app and its configuration). Follow the steps below.
Option 1: Remove only the application
Use this when you want to uninstall the Grub Customizer program while retaining the GRUB settings you created. Run:
|
sudo apt remove grub-customizer |
Then update GRUB to apply the changes
|
sudo update-grub |
Option 2 — Full removal (including config files)
This removes both the application and its configuration files, restoring GRUB to its default state: Simply run:
|
sudo apt purge grub-customizer |
Then update GRUB to apply the changes
|
sudo update-grub |
Conclusion
Grub Customizer is a handy tool for managing your boot menu without needing to dive into complex system files. With it, you can safely set your default operating system, shorten boot times, and adjust appearance settings to your liking. Remember to stick to the beginner-safe options and avoid advanced tweaks unless you’re confident about the changes.
By following this guide step by step, you should now have Grub Customizer installed, configured, and working — making your boot process smoother and more personalized.
For more in-depth tutorials, visit the BaCloud blog, where you’ll find helpful guides.