

Legacy Java applets are still common in vendor tools like IPMI consoles, iDRAC virtual media, and other management interfaces — but modern browsers no longer support them. Instead of keeping an old machine just to run outdated Java, you can use Docker to spin up a contained environment with everything preconfigured.
In this guide, we’ll show you how to run legacy Java applets (whether distributed as .jnlp or .jar files) inside a Docker container with Ubuntu, Java 8, and IcedTea-Web support. This way, you can get them working again without cluttering or compromising your main system.
Why Docker?
Running old Java applets directly on your machine can be messy and risky. Outdated Java versions often have unpatched security issues, and installing them alongside your modern setup can cause conflicts. Docker solves this neatly by:
- Isolating legacy Java — the container keeps insecure runtimes separate from your host.
- Avoiding system clutter — no need to downgrade your browser or install old Java globally.
- Ensuring reproducibility — once you have a working container, anyone on Linux, macOS, or Windows can run the same setup with the same results.
With Docker, you get a clean, disposable environment that runs only when needed.
Prerequisites
To follow this guide, you’ll need:
- Docker installed — works on Linux, macOS (via Docker Desktop), or Windows (via Docker Desktop/WSL2).
- Basic terminal knowledge — the commands in this guide are shown for Linux, but they also work on macOS and Windows with minor path differences.
- A sample applet to test with, such as a .jnlp (Java Web Start) file or a .jar file.
- If you don’t have one, don’t worry — in a later section we’ll show you how to create a simple sample applet for testing.
- Apple Silicon note: many legacy images are x86-only. On M1/M2 Macs, add the flag --platform linux/amd64 when building or running the container.
Building the Docker Image
Now that the prerequisites are in place, the first step is to build a Docker image with all the tools needed to run legacy Java applets.
Step 1 — Create a working directory
Choose a folder where you’ll store the Dockerfile, the startup script, and any applet files. For example:
|
mkdir ~/legacy-java |
(You can choose any folder name you like.)
Step 2 — Create the startup script
Inside your legacy-java directory, create a file named start.sh:
|
nano start.sh |
Paste the following content into the file:
|
#!/usr/bin/env bash |
Save and exit.
Then make it executable:
|
chmod +x start.sh |
Step 3 — Create the Dockerfile
Inside this directory, create a file named Dockerfile. You can do this with:
|
nano Dockerfile |
Paste the following content into the file and save it:
|
FROM ubuntu:24.04 |
This image installs:
- Java 8 JDK (to compile and run Java code, including applets)
- IcedTea-Web (javaws) (to run .jnlp Java Web Start apps)
- A lightweight LXDE desktop environment
- Xvfb (virtual X server)
- x11vnc + noVNC + websockify (remote GUI access from browser or VNC client)
- Fonts and X11 libraries (ensuring proper rendering of Java text and GUIs)
- Basic tools (wget, curl, nano, ca-certificates)
Step 4 — Build the image
From the same directory as the Dockerfile, run:
|
docker build -t legacy-java . |
On Apple Silicon (M1/M2), add --platform linux/amd64 to force an x86 build:
|
docker build --platform linux/amd64 -t legacy-java . |
Step 5 — Verify the image
Check that the image was built successfully:
|
docker images |
You should see legacy-java listed in the output.
Running the Container
With the image built, the next step is to start a container and connect to it. This will give you access to the LXDE desktop environment running inside Docker.
Step 1 — Run the container
Make sure you are still in your terminal on the same system where you built the Docker image. Then run:
|
docker run -it \ |
- -it keeps the container attached to your terminal so you can see logs.
- -p 5900:5900 exposes the VNC server.
- -p 8080:8080 exposes the noVNC web interface.
- -v ~/applets:/root/applets mounts your host’s ~/applets directory into the container so that .jnlp or .jar files persist across runs.
- --name legacy-java gives the container an easy-to-use name.
Step 2 — Connect to the desktop
You can connect in two ways:
-
Using a browser (recommended):
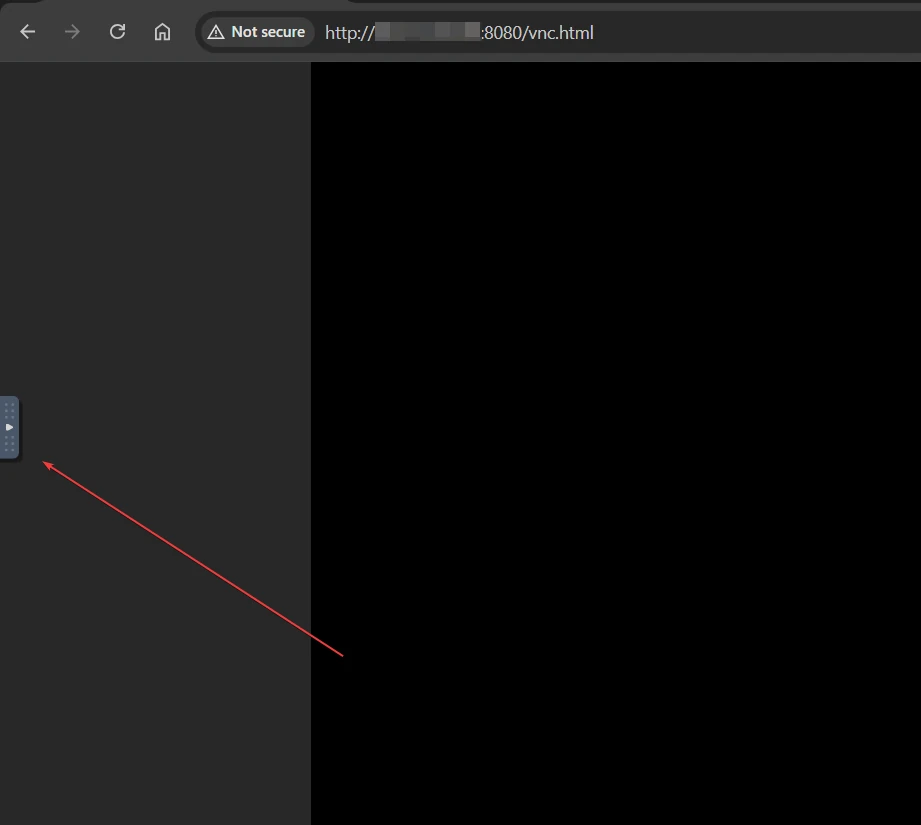
If you are running the container on your own computer, open:
|
http://localhost:8080/vnc.html |
If you are running the container on a remote VPS, replace localhost with the server’s IP. For example:
|
http://203.0.113.10:8080/vnc.html |
-
Using a VNC client:
- On your local machine, connect to localhost:5900 if the container is running locally.
- On a VPS, connect to <server-ip>:5900 (e.g., 203.0.113.10:5900) using any VNC client (Remmina on Linux, RealVNC, TightVNC, etc.).
Step 3 — Verify it works
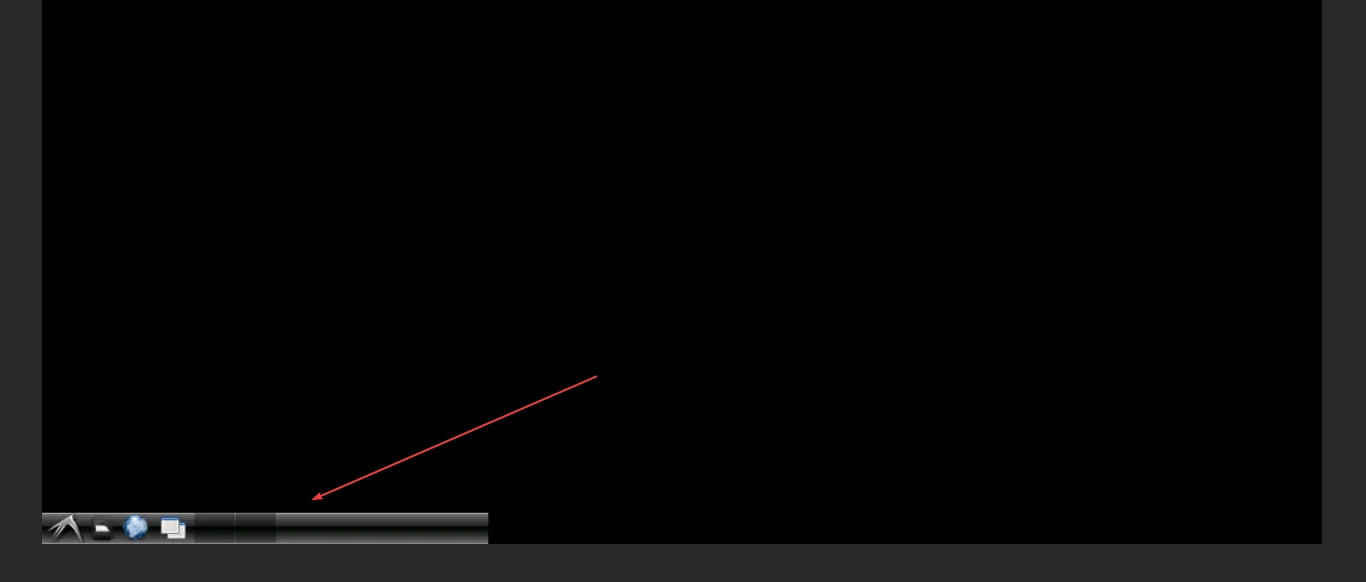
When you first connect, you might briefly see a black screen. This is normal while the LXDE desktop starts up.
In some cases, a small message such as “no session for PID …” may appear. This isn’t a fatal error — it’s a harmless startup warning related to how LXDE initializes and can be safely ignored. Just click ‘ok.’
You’ll also see a side panel appear:
Click on the fullscreen icon to switch to full screen.
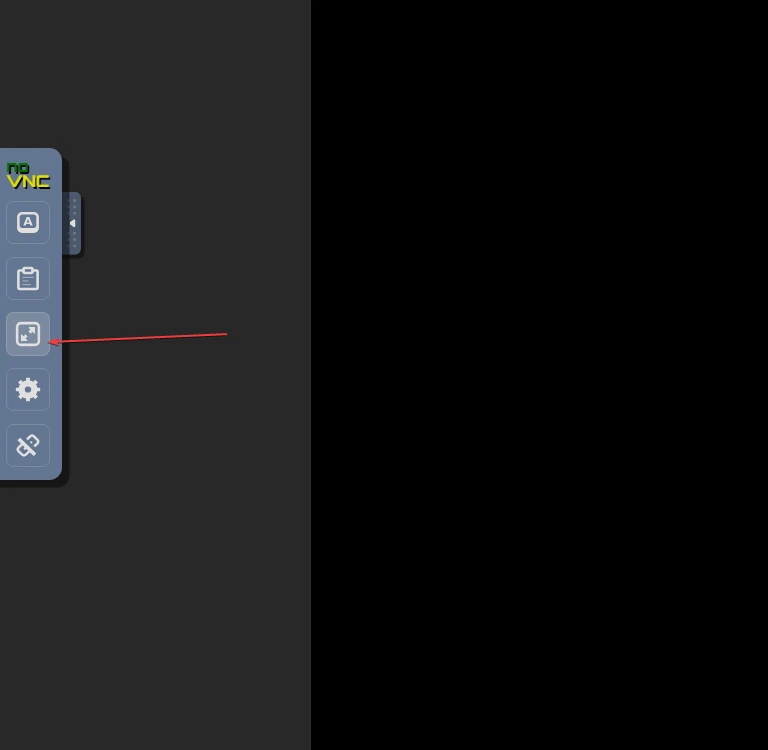
This will reveal the LXDE taskbar at the bottom along with default applications like the file manager and browser.
Once the desktop environment is visible, your setup is complete. You can open a terminal inside the container and use javaws to run your legacy .jnlpapplets.
Creating a Sample Applet (Optional)
If you already have your own .jar or .jnlp file, you can skip this section. Otherwise, let’s create a simple test applet so you can confirm that your setup is working.
Step 1 — Create a folder for applets
On your VPS host (not inside Docker yet), create the folder where your applets will live. This folder is mounted into the container so files persist.
|
mkdir -p ~/applets |
Step 2 — Write a simple applet
We’ll create a small Java applet that displays the message “Hello BaCloud from Java Applet!” inside a window.
|
nano HelloApplet.java |
Paste in the following code:
|
import java.applet.Applet; |
Save and exit.
Step 3 — Install Java compiler on the VPS host
To compile the .java file, you need the Java Development Kit (JDK). Install it:
First, update the package list:
|
sudo apt update |
Next, install the Java Development Kit (JDK):
|
sudo apt install openjdk-8-jdk -y |
Step 4 — Compile the applet and create an HTML loader
Compile your .java file:
|
javac HelloApplet.java |
Then create a simple HTML file that loads the applet:
|
nano HelloApplet.html |
Paste in:
|
<html> |
Save and exit.
Step 5 — Verify the compiled files
After compiling and creating the HTML file, list the contents of your ~/appletsdirectory:
|
ls ~/applets |
You should now see at least these files:
- HelloApplet.java – the source code
- HelloApplet.class – the compiled bytecode
- HelloApplet.html – the test HTML wrapper
Loading a Java Applet
Now let’s actually run the applet inside the container.
Step 1 — Stop any old containers using the same ports
If you have a container already running on ports 5900 or 8080, you’ll need to stop it first.
- If your terminal is still “stuck” showing container logs from a previous run, simply press Ctrl + C to stop it.
- Or, from a new terminal session, list active containers:
|
docker ps |
This will display a list of active containers, including their IDs and names.
Then, stop the container by running:
|
docker stop <container_id> |
Replace <container_id> with the ID shown in the list.
Next, remove any old container named legacy-java to avoid conflicts:
|
docker rm legacy-java 2>/dev/null || true |
(The 2>/dev/null || true part just hides the error if the container doesn’t exist yet.)
Step 2 — Start the container fresh
Now run the container again, mounting your ~/applets folder:
|
docker run -it \ |
Step 3 — Open a terminal in the VNC desktop
Once connected to the desktop (via VNC or http://<server-ip>:8080/vnc.html), open the LXDE terminal.

Step 4 — Use appletviewer to load the applet
Inside the LXDE terminal, run:
|
export DISPLAY=:0 |
If you followed our example, run the command exactly as shown with HelloApplet.html.
If you’re using your own applet, replace HelloApplet.html with the name of your own HTML wrapper file.
- For .class files, the HTML should point to the .class.
- For .jar files, the HTML should reference the .jar.
A popup window will appear titled “Applet Viewer: …”.
- If you used your own files, you should see whatever your applet is programmed to display.
- If you used the sample applet, it will say: Hello BaCloud from Java Applet! Just like in the image below:
|
Hello BaCloud from Java Applet! |
If you see a screen with this text like in the image above, your Java Web Start/Applet environment is working correctly!
Security Considerations
Java Applets are legacy technology and should be treated as insecure by default. To minimize risk:
- Never run applets directly on your host machine. Always use Docker or a VM to isolate execution.
- Restrict network access.
- Use --network none to block all outbound connections.
- If intranet access is required, explicitly set --network host.
- Drop unnecessary privileges. Run the container with:
|
--cap-drop=ALL |
This reduces the attack surface by removing Linux capabilities.
- Limit file system access. Mount only the folders you need (e.g., ~/applets) and make them read-only where possible:
|
-v ~/applets:/root/applets:ro |
- By combining these options, you ensure the applet runs in a tightly controlled, sandboxed environment, protecting both your VPS and your local machine.
Troubleshooting
If you run into issues, here are some common fixes:
- “Can’t open display” → Verify that the VNC or noVNC service is running and accessible on the correct ports.
- JNLP file won’t launch → Some legacy apps require older Java versions (Java 6/7). Try adjusting your Java installation.
- Permission denied errors → Check your volume mounts and ensure the container user has read/write access.
- Applet requires intranet access → Run the container with --network host or configure a proxy.
Conclusion
By containerizing a lightweight Linux desktop with Java 8, LXDE, and remote access tools, we’ve created an isolated environment where legacy Java applets and Web Start applications can still run safely. Instead of struggling with outdated browsers or insecure plugins on your host system, everything is now encapsulated inside Docker.
We verified this setup by compiling and running a simple “Hello BaCloud” applet, but the same approach applies to your own .class, .jar, or .jnlp files. Whether you connect via VNC or directly in your browser through noVNC, you now have a repeatable way to launch and test applets on modern infrastructure.
If you’re also planning to use Docker, take a look at our guide on how to install Docker on Ubuntu 24.04 for a step-by-step walkthrough.