

What Is Docker Compose and How to Install It on a VPS
Docker makes it easy to package your app along with all its dependencies, code, libraries, and services, into one portable container. However, most real-world apps require multiple containers working together. That’s where Docker Compose comes in: it allows you to define and run multi-container setups using a single YAML file and a simple command.
On a VPS, Docker Compose is especially valuable for quickly deploying and scaling apps in a clean, isolated environment. This guide shows you how to install Docker Compose on a BaCloud VPS running Ubuntu 24.04. It is also valid for recent versions.
What is Docker Compose?
Docker Compose is a tool for defining and managing multi-container Docker applications using a simple YAML file. Instead of launching containers individually, you can describe each service, like your app, database, and cache, in a single configuration, then bring everything up at once using the docker-compose up command. This is especially useful in development environments where multiple containers need to work together.
With the release of Docker Compose v2, it’s now integrated directly into the Docker CLI as a plugin, so you’ll use docker compose instead of the older docker-compose command.
Prerequisites
Before getting started, make sure you have the following in place:
- A system running Ubuntu (either a VPS or a local machine)
- Docker installed and running — here’s how to install Docker on Ubuntu if you haven’t already.
- A user account with sudo privileges
- An active internet connection
With these in place, you’re ready to install Docker Compose.
Step 1: Update Your System and Install Required Packages
Before installing Docker Compose, it’s a good idea to ensure your system is current. This ensures compatibility with the latest repositories and helps avoid potential issues.
First, update your package list:
|
sudo apt update |
Then, install the essential packages needed for secure downloads:
|
sudo apt install ca-certificates curl |
- ca-certificates: Ensures your system can verify SSL certificates, which is important for secure connections.
- curl: A command-line tool used to download data from external sources. We’ll use it to fetch Docker’s GPG key in the next step.
Once these are installed, you’re ready to add Docker’s repository.
Step 2: Add Docker’s GPG key
Docker uses GPG keys to verify package authenticity. In this step, we’ll create a directory for the key, download it from Docker, and set the correct permissions.
-
Create a directory for Docker’s GPG key:
Docker’s GPG key will be stored in a dedicated directory. The following command ensures that the directory exists and sets the correct permissions.
|
sudo install -m 0755 -d /etc/apt/keyrings |
-
Download Docker’s GPG key:
Use the curl command to fetch Docker’s GPG key from the official Docker repository. This key ensures the packages you're downloading are secure and verified.
|
sudo curl -fsSL https://download.docker.com/linux/ubuntu/gpg -o /etc/apt/keyrings/docker.asc |
-
Change the permissions of the GPG key:
Finally, we ensure the key has the appropriate permissions so that the system can read it correctly.
|
sudo chmod a+r /etc/apt/keyrings/docker.asc |
Step 3: Add Docker’s Official Repository
Next, we’ll add Docker’s official repository to your system’s sources list. This allows you to install Docker Compose and other Docker-related tools directly from Docker’s official source.
|
echo \ |
This command adds the Docker repository for Ubuntu to your system, allowing you to install Docker packages in the following steps.
Step 4: Install Docker Compose
Now that the repository is added, it’s time to install Docker Compose. First, update your package list to include the Docker repository, and then install the Docker Compose plugin.
-
Update your package list:
This ensures that your system knows about the newly added Docker repository.
|
sudo apt update |
-
Install Docker Compose:
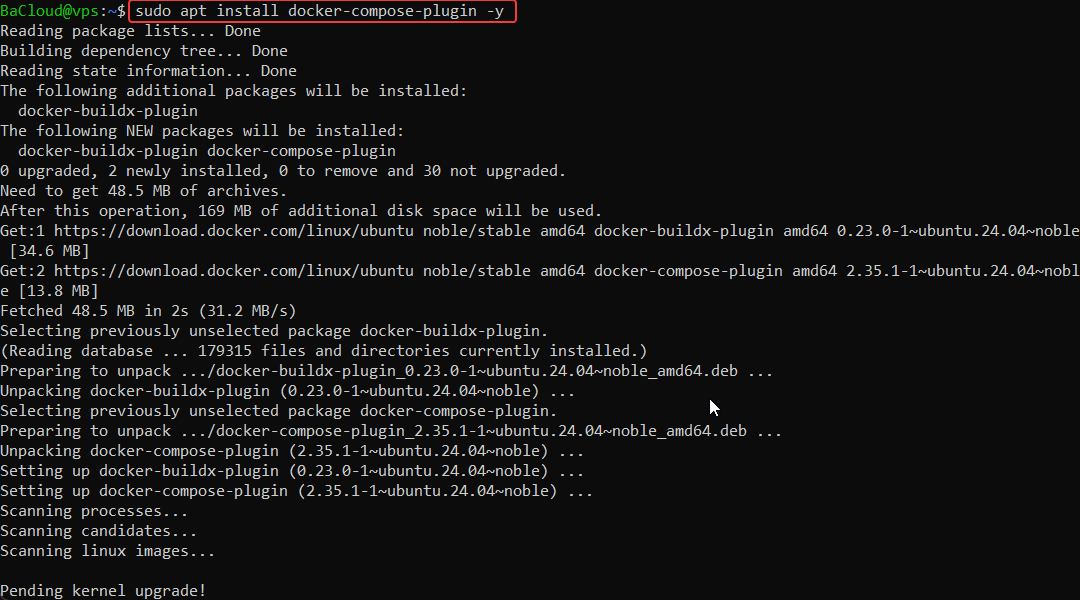
Finally, use this command to install the Docker Compose plugin.
|
sudo apt install docker-compose-plugin -y |
Step 5: Verify Installation
To ensure everything has been installed properly, verify the installation of Docker Compose by checking its version.
|
docker compose version |

If you see the version information like the one in the image above, congratulations! Docker Compose has been successfully installed on your system.
Test Docker Compose with a Sample App
Now that Docker Compose is installed, let's test it with a simple example to ensure everything works properly. We'll use the hello-world image, a basic container that Docker provides to confirm if everything is set up correctly.
Step 1: Create a new directory for the test app
First, create a directory where we will place the docker-compose.yml file. This file will define our application setup.
|
mkdir hello-test && cd hello-test |
Step 2: Create the docker-compose.yml file
Inside the hello-test directory, create a new docker-compose.yml file using a text editor like nano. Run the following command:
|
nano compose.yml |
In the file, paste the following:
|
services: |
This YAML file tells Docker Compose to use the hello-world image. It’s a simple container that prints a welcome message when it starts up.
Step 3: Run the container
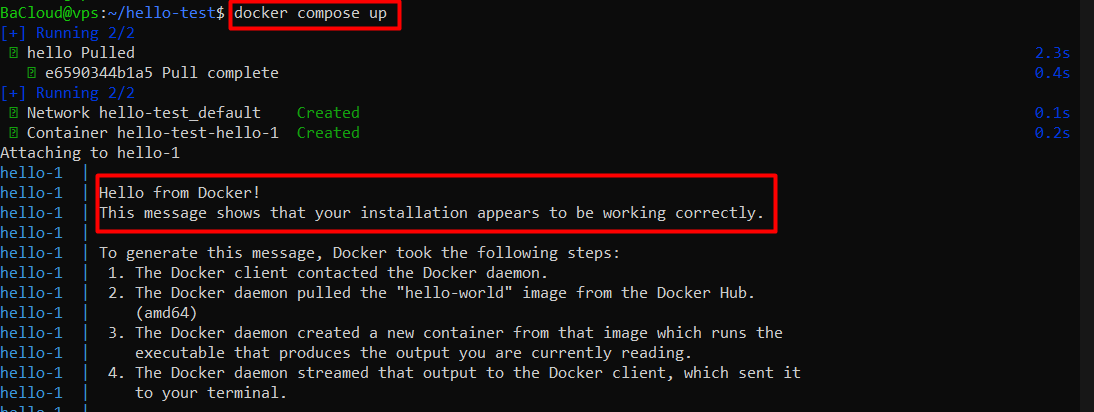
Now, let’s run the app using Docker Compose. The command below will start the container as defined in the docker-compose.yml file.
|
docker compose up |
Once you run this command, Docker Compose will automatically pull the hello-world image from Docker’s registry (if you don't already have it) and launch the container. You should see a welcome message in your terminal, confirming that Docker Compose is working correctly just like the one in the image below.
Basic Docker Compose Commands
Docker Compose gives you simple, memorable commands to manage multi-container setups from your terminal. Here are the essentials:
- docker compose up – Starts all the services defined in your compose.yml file.
- docker compose down – Stops everything and removes containers, networks, and volumes created by Compose.
- docker compose restart – Restarts your running services in one step.
- docker compose logs – Outputs the logs from all containers, so you can debug fast.
- docker compose ps – Lists all currently running containers managed by your Compose file.
These commands are more than just handy, they help keep your workflow clean, repeatable, and easy to share with your team. As you grow, commands like build, exec, or run will come into play for more advanced use.
Uninstall Docker Compose
You can do it with a single command if you ever need to remove Docker Compose. Since Compose v2 is installed as a plugin through the package manager, uninstalling it is straightforward:
|
sudo apt remove docker-compose-plugin |
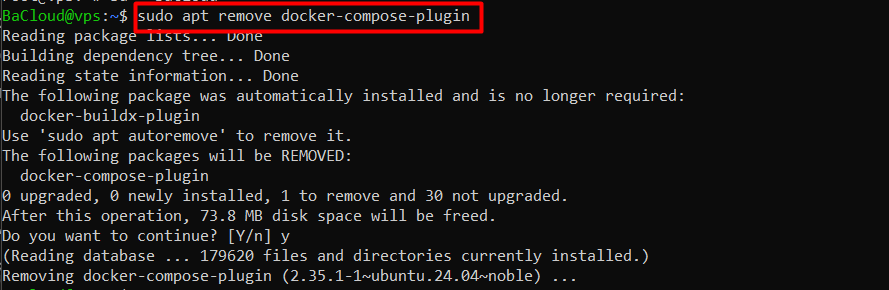
You’ll be prompted to confirm by typing Y when asked. Once removed, this only uninstalls the plugin; Docker itself and any existing Compose YAML files will remain untouched. If you reinstall it later, your previous project setups will still work as long as those YAML files are still on your system.
If you also want to clean up unused Docker resources (containers, networks, images, and volumes), you can run:
|
docker system prune |
You’ll be prompted to confirm. Be careful because this removes anything not actively used by running containers.
Conclusion
With Docker Compose now running on your VPS, you're set up to manage complex, multi-service apps in a clean, repeatable way. Whether it's spinning up a dev environment or deploying to production, Compose keeps things consistent and straightforward.
For more in-depth tutorials, visit the BaCloud blog, where you’ll find helpful guides.